Change the outfit. Change the pose. Keep the person.
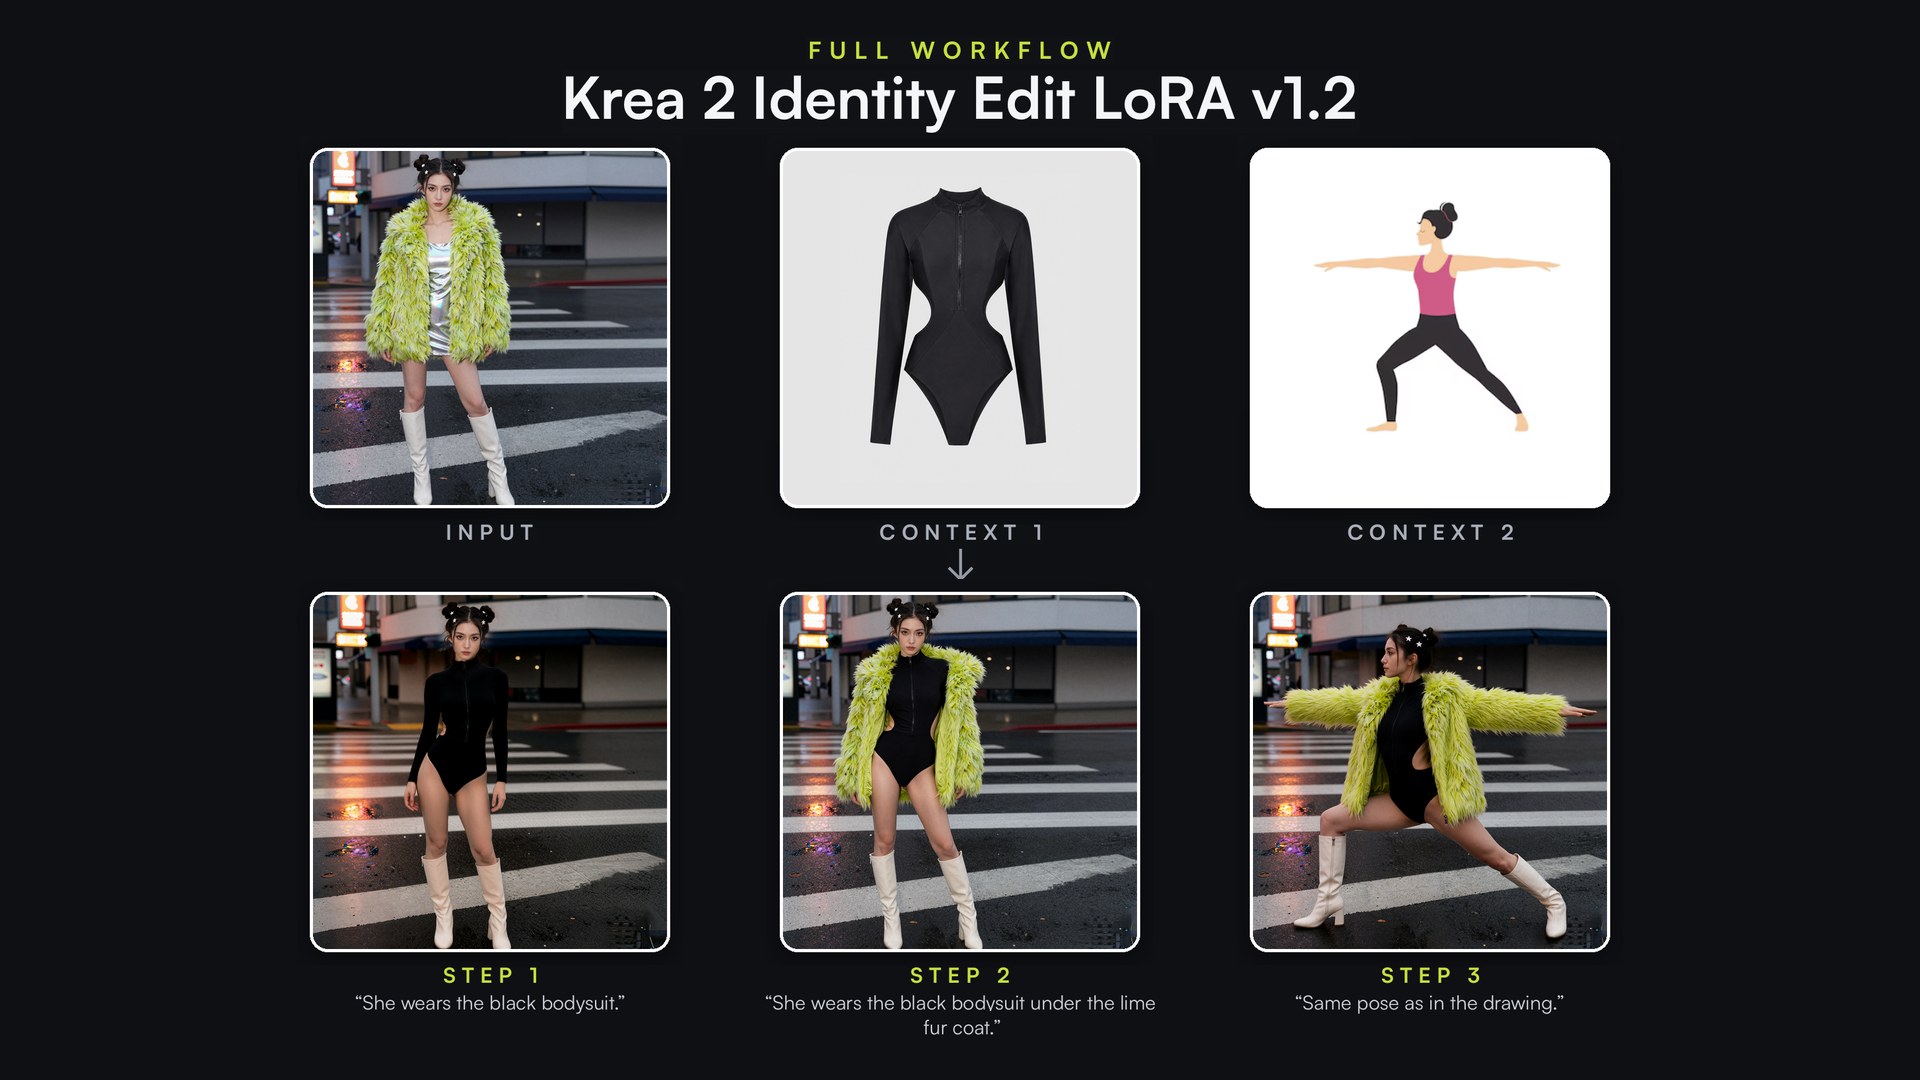
One photo in, one sentence of instruction, and only what you asked for changes. The face, the hair, the light, and the street all stay exactly where they were.
Edit the picture. Keep the identity.
Run Krea 2 Identity Edit LoRA v1.2 on the Supernet, per-edit from under 3 cents, or unlimited for $20/month with a 3-day trial.
Edit the photo, not the person.
Most AI image editors have a bad habit: ask for a new outfit and you get a new person. Krea 2 Identity Edit LoRA v1.2 is built around the opposite promise: it changes only what you asked for and leaves everything else untouched.
You give it three things: a photo to edit, one or two reference images, and one plain sentence. The face, the styling, the lighting and the scene all survive; the garment, the layer or the pose is the only thing that moves.
Because every output is a clean input for the next edit, you can chain changes: swap an outfit, layer a coat back over it, then move the model into a pose taken from a flat drawing, and the same person walks through all of it. It all runs on the Sogni Supernet ↗ with no local GPU and no ComfyUI graph to wire up.
Start from your photo
Open Sogni Studio or Sogni Web, or run it through the Sogni Creative Agent, then pick Krea 2 Identity Edit LoRA v1.2 from the model list. It wants three inputs:
- Input: the photo you want to edit.
- Context: one or two images the edit draws from, such as a garment product shot, a pose sketch, a face or a prop.
- Instruction: one plain sentence describing the change.
Three dials steer how literal the edit is. Grounding controls how strongly the original photo is preserved: raise it to protect the parts that should stay, lower it when the model is too timid to change anything. Reference Boost is the main likeness dial: raise it when the face or garment drifts. Reference B Boost weights the second image in multi-image edits: raise it when a pose sketch is being ignored. The starting values already work for almost everything below, so leave them alone until a render tells you otherwise.
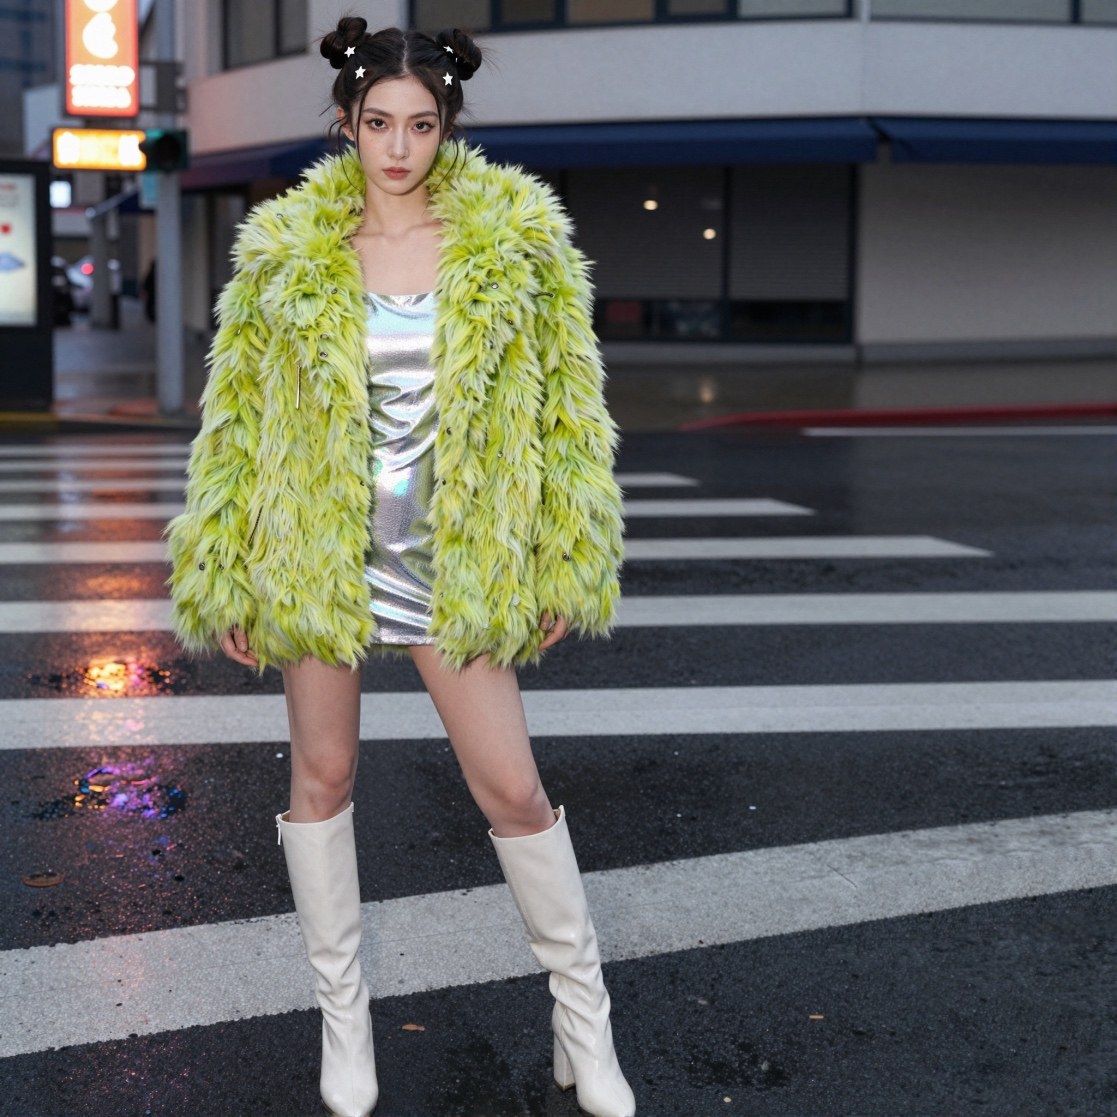
Swap the outfit from a product shot
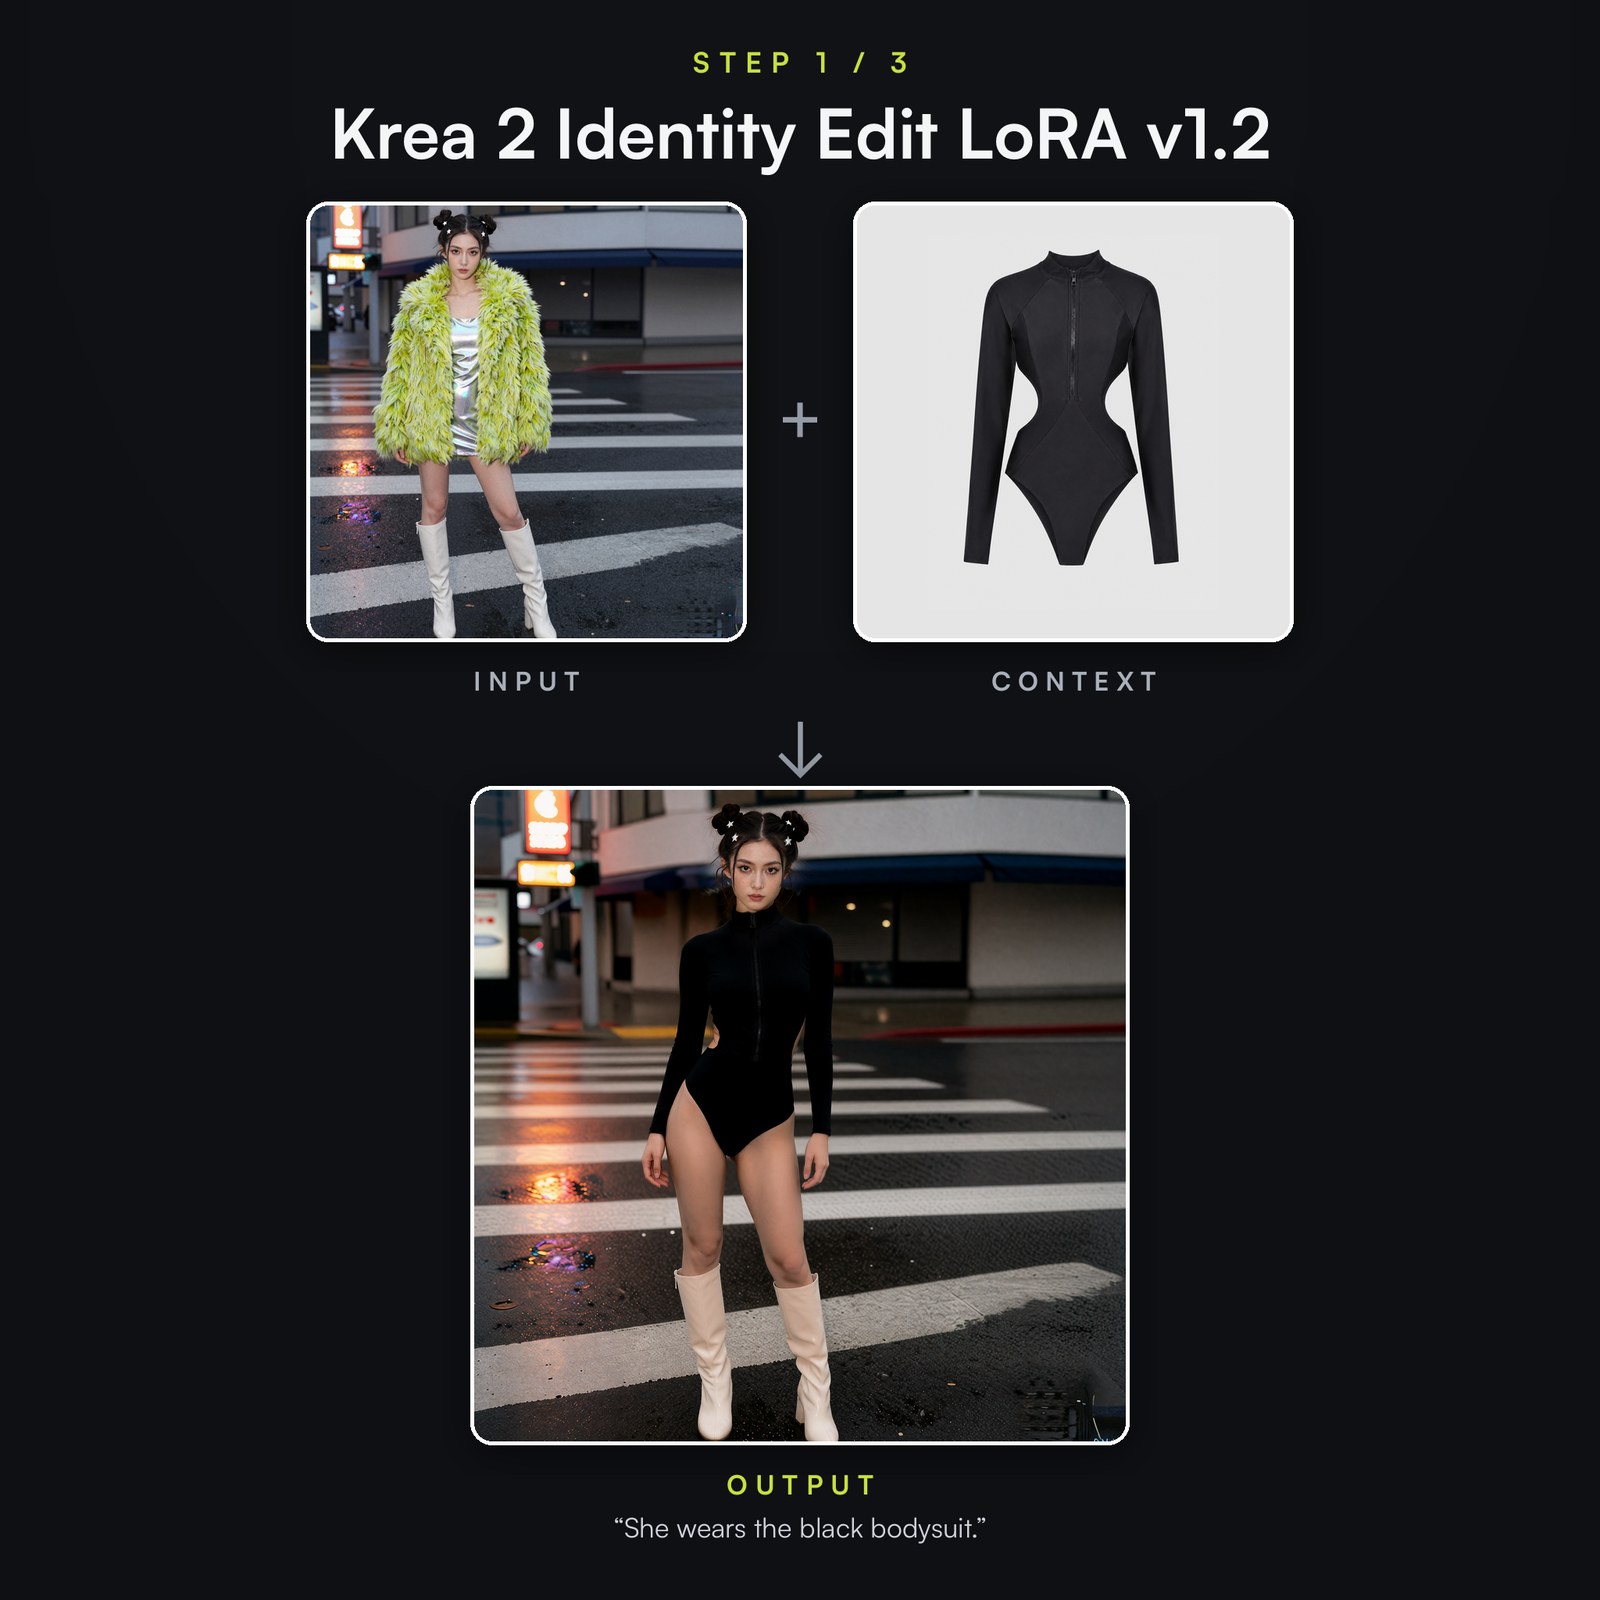
Drop a plain e-commerce product shot, here a black zip bodysuit on a gray background, into the first Context slot, leave the dials at their defaults, and describe the end state you want:
Notice what it kept without being told: her face and expression, the double buns with star clips, the white boots, the framing, the neon puddle reflections. And notice what it understood about the garment, raglan seams, mock collar, front zipper, all transferred from a flat catalog photo and re-lit for a wet street at dusk. That is the “identity” in Identity Edit: it holds for the person and the product, which is what makes it usable for real try-on work.
Layer clothing back on
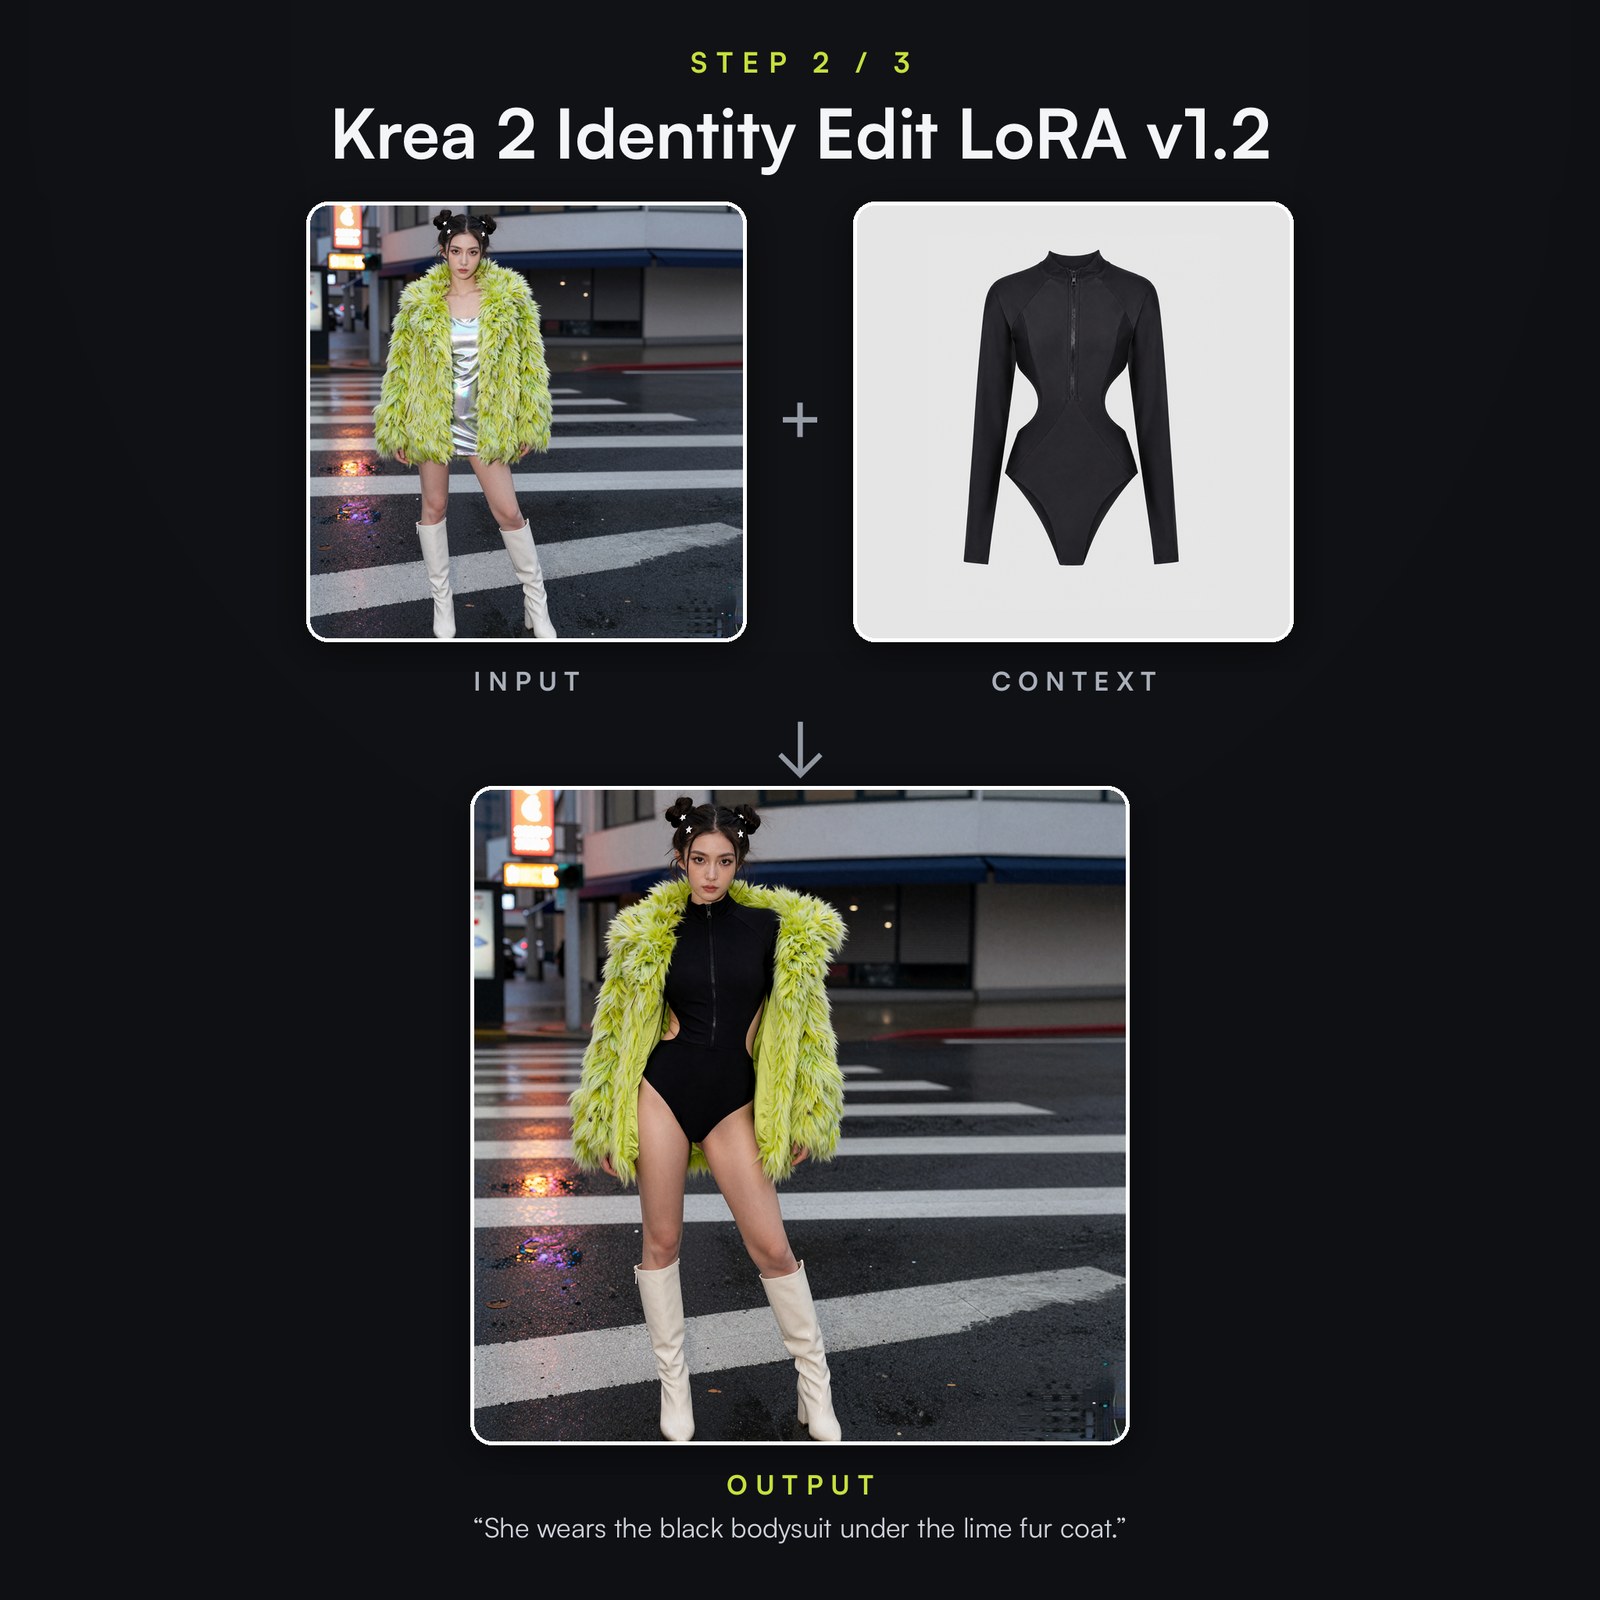
Identity editing chains: every output is a clean starting point for the next edit. Take Step 2’s output as the new input, keep the bodysuit image in the context slot, and describe the layered look you want:
Two things worth noticing. The coat was gone from the input, yet the instruction alone brought it back, because the sentence names it unambiguously. And the layering is physically plausible: the coat sits open on the shoulders, the fur overlaps the bodysuit’s edges, the lighting matches.
If you ever get a merged or repainted garment instead of true layering, name the order explicitly (“under”, “over”, “open”). The model follows spatial words closely.
Transfer a pose from a drawing
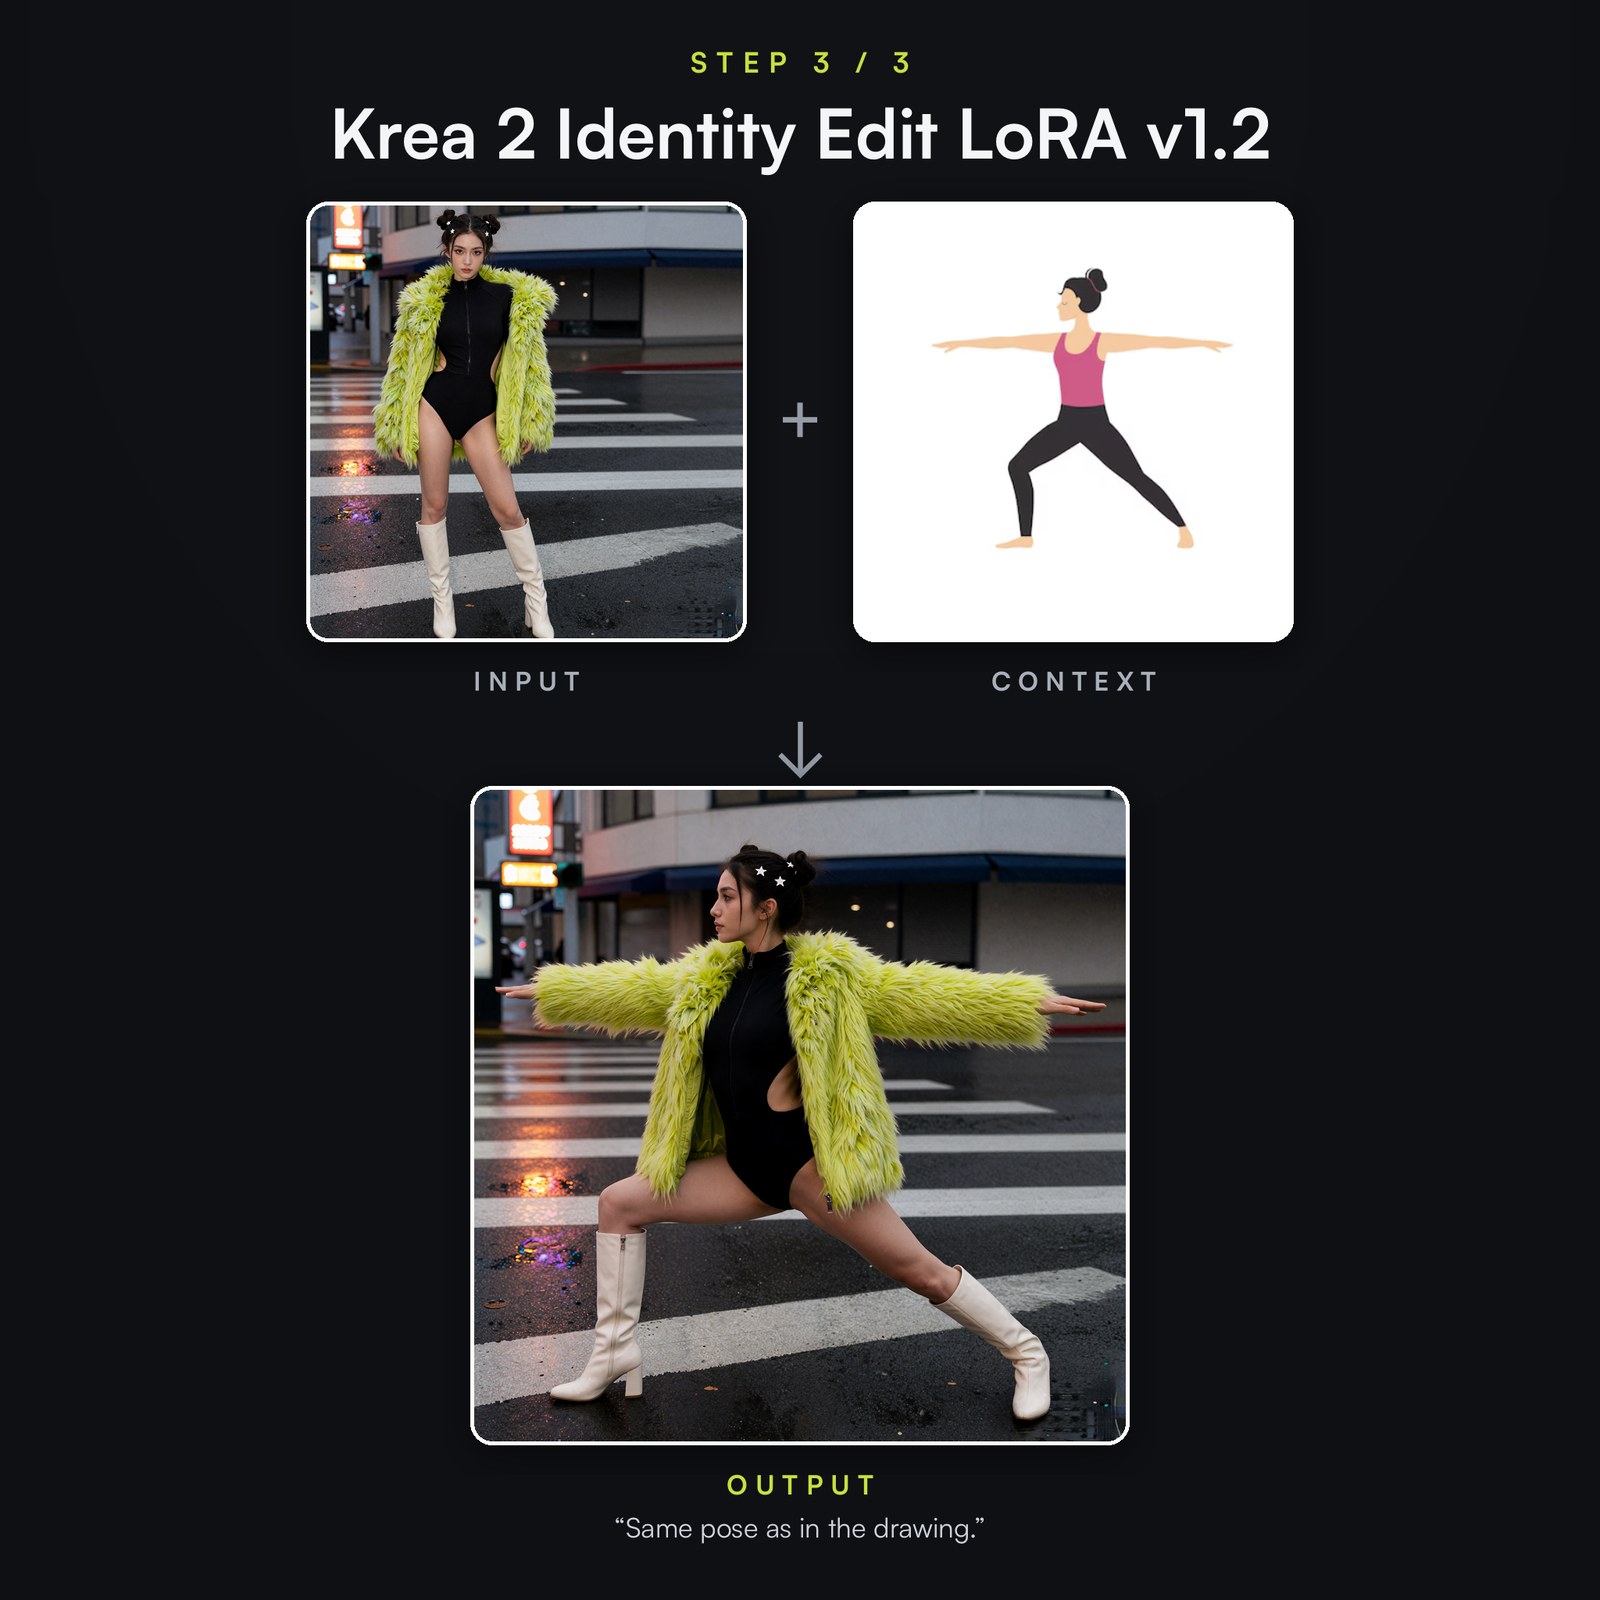
The context slots accept anything that reads as a pose: a stock illustration, a stick figure, an outline sketch, a quick doodle. It needn’t match your subject’s body, clothes or style, since the model extracts only the skeleton of the pose. Take Step 3’s output as the input and drop in a flat vector drawing of a Warrior II yoga pose:
The whole figure re-poses, arms extended, legs in a lunge, head turned to profile, and the outfit built in steps 2-3 comes along: the coat sleeves follow the arms, the fur shifts with the shoulders, the boots plant on the asphalt. The camera, the intersection and her face survive one more round-trip. Three edits deep, and she is still recognizably the same person.
Write better prompts
This model is instruction-tuned, so it wants a stage direction, not a classic image prompt. Forget quality tags, style soup and negative prompts, the winning format is one short, declarative sentence describing the end state. The rules that consistently pay off:
- Describe the result, not the operation. “She wears the black bodysuit” beats “replace her dress with a bodysuit”. State the world as you want it after the edit; the model works out what to change.
- Never write the word “reference.” You attach the extra image, but in the sentence you just name the thing plainly, “the black bodysuit”, “the green knit scarf”, “the drawing”. The model links your noun to the image you added; talking about “the reference” only confuses it.
- Name it the way you’d point at it. Describe the object as a person looking at both pictures would: color + item (“the lime fur coat”), or what the sketch is (“the outline drawing”, “the tree pose”).
- One change per prompt. Chain single edits instead of stacking three into one sentence, that’s exactly what steps 2-4 do.
- Use spatial words for layering and placement: “under the coat”, “over the shoulders”, “in her left hand”.
- Don’t re-describe what should stay. Preservation is the default, naming the hair or the street just invites the model to repaint them.
- Present tense, third person, “She wears…”, “The woman now holds…”, “The head is now…”, matches the training data and lifts the hit rate.
When a prompt is right but the render drifts, fix it with the dials rather than more words: raise Reference Boost when likeness slips, lower Grounding when the model is too timid to change anything, and raise Reference B Boost when the second image (usually the pose) is ignored.
Copy-ready prompts, every one is a real edit from this article
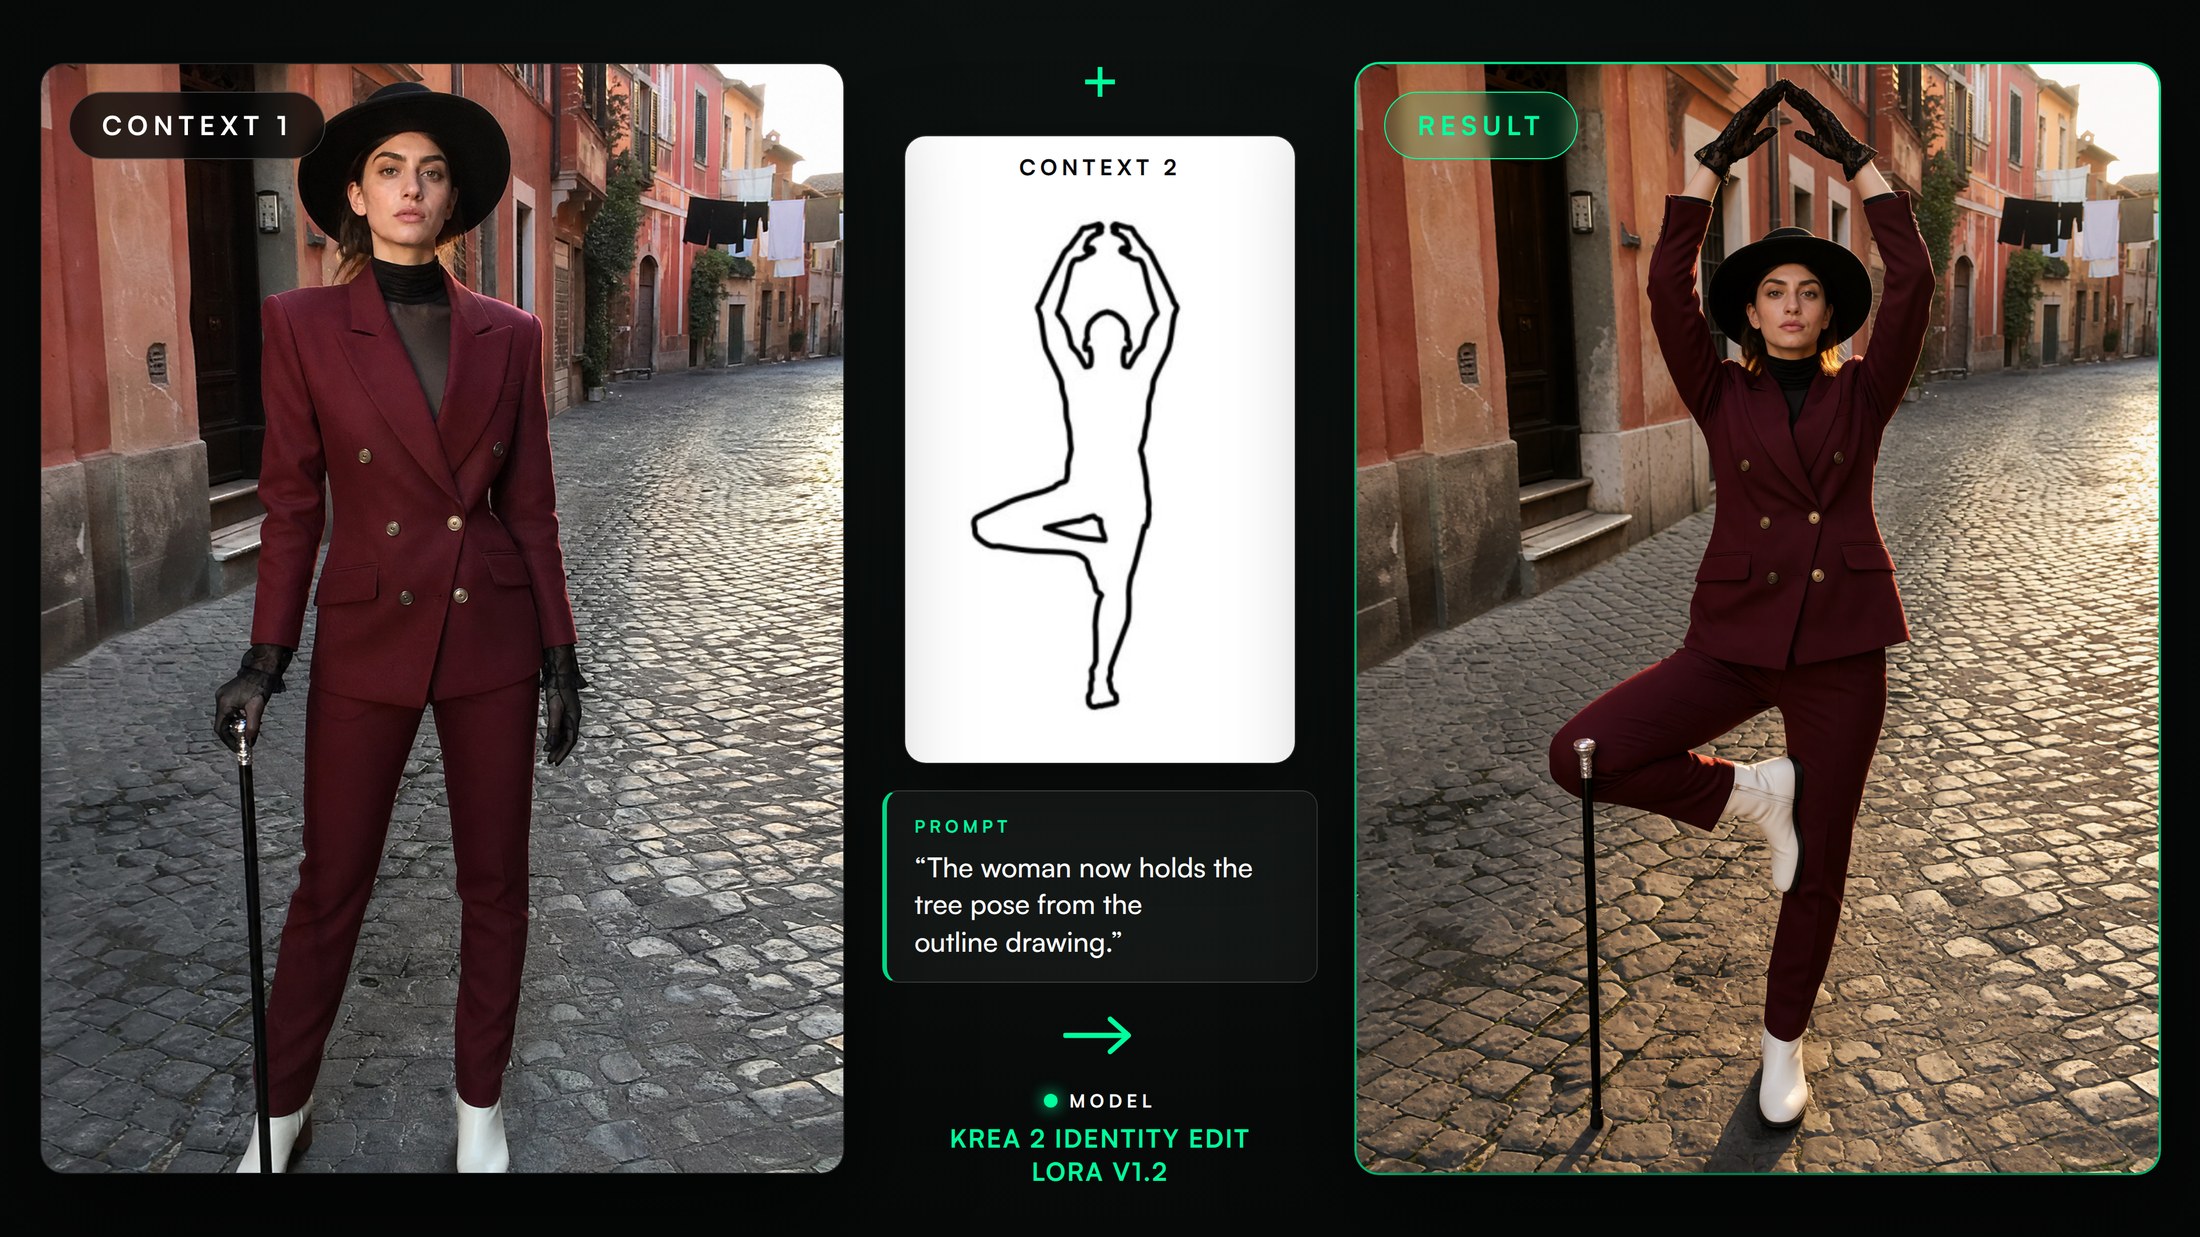
“The woman now holds the tree pose from the outline drawing.”
Try it on any photo
None of this is tied to one photo or one kind of subject. Bring any image, any person, any setting, and the same one-sentence edits apply. Here it is on a completely different shot.
Pose transfer from a sketch
The same trick works on anything
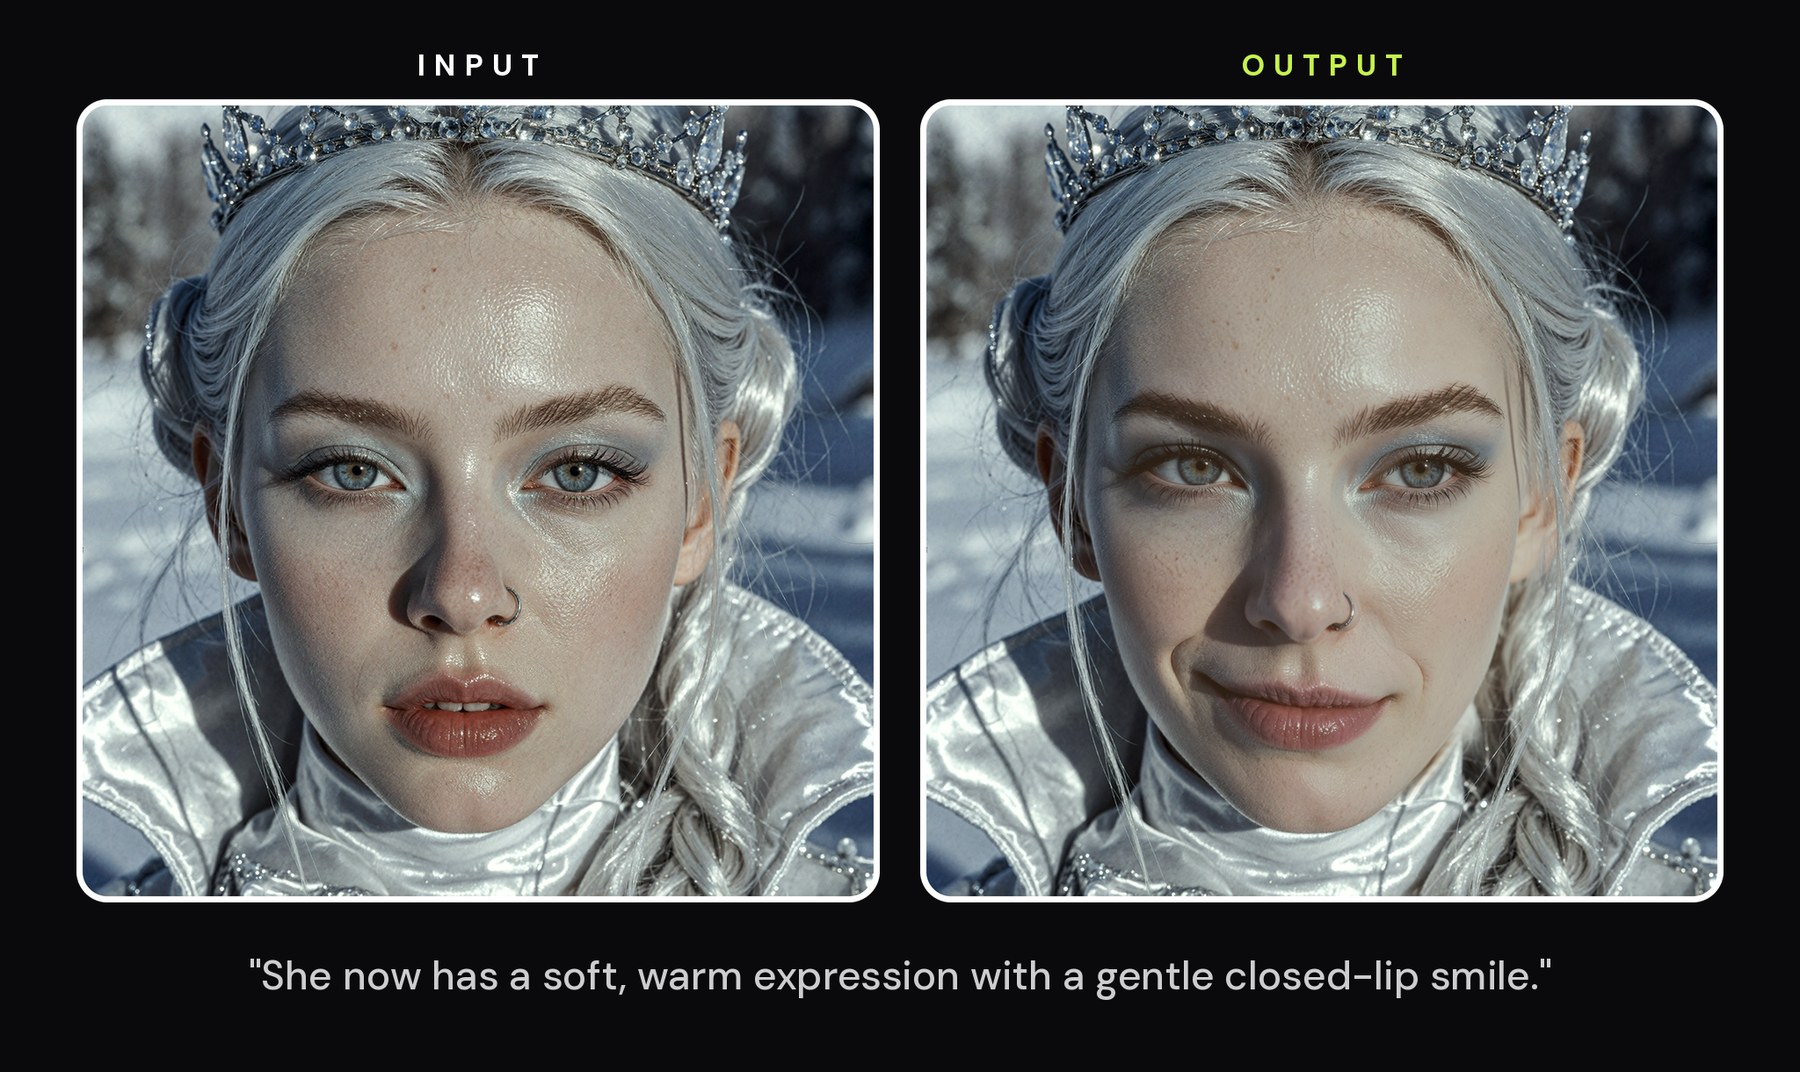
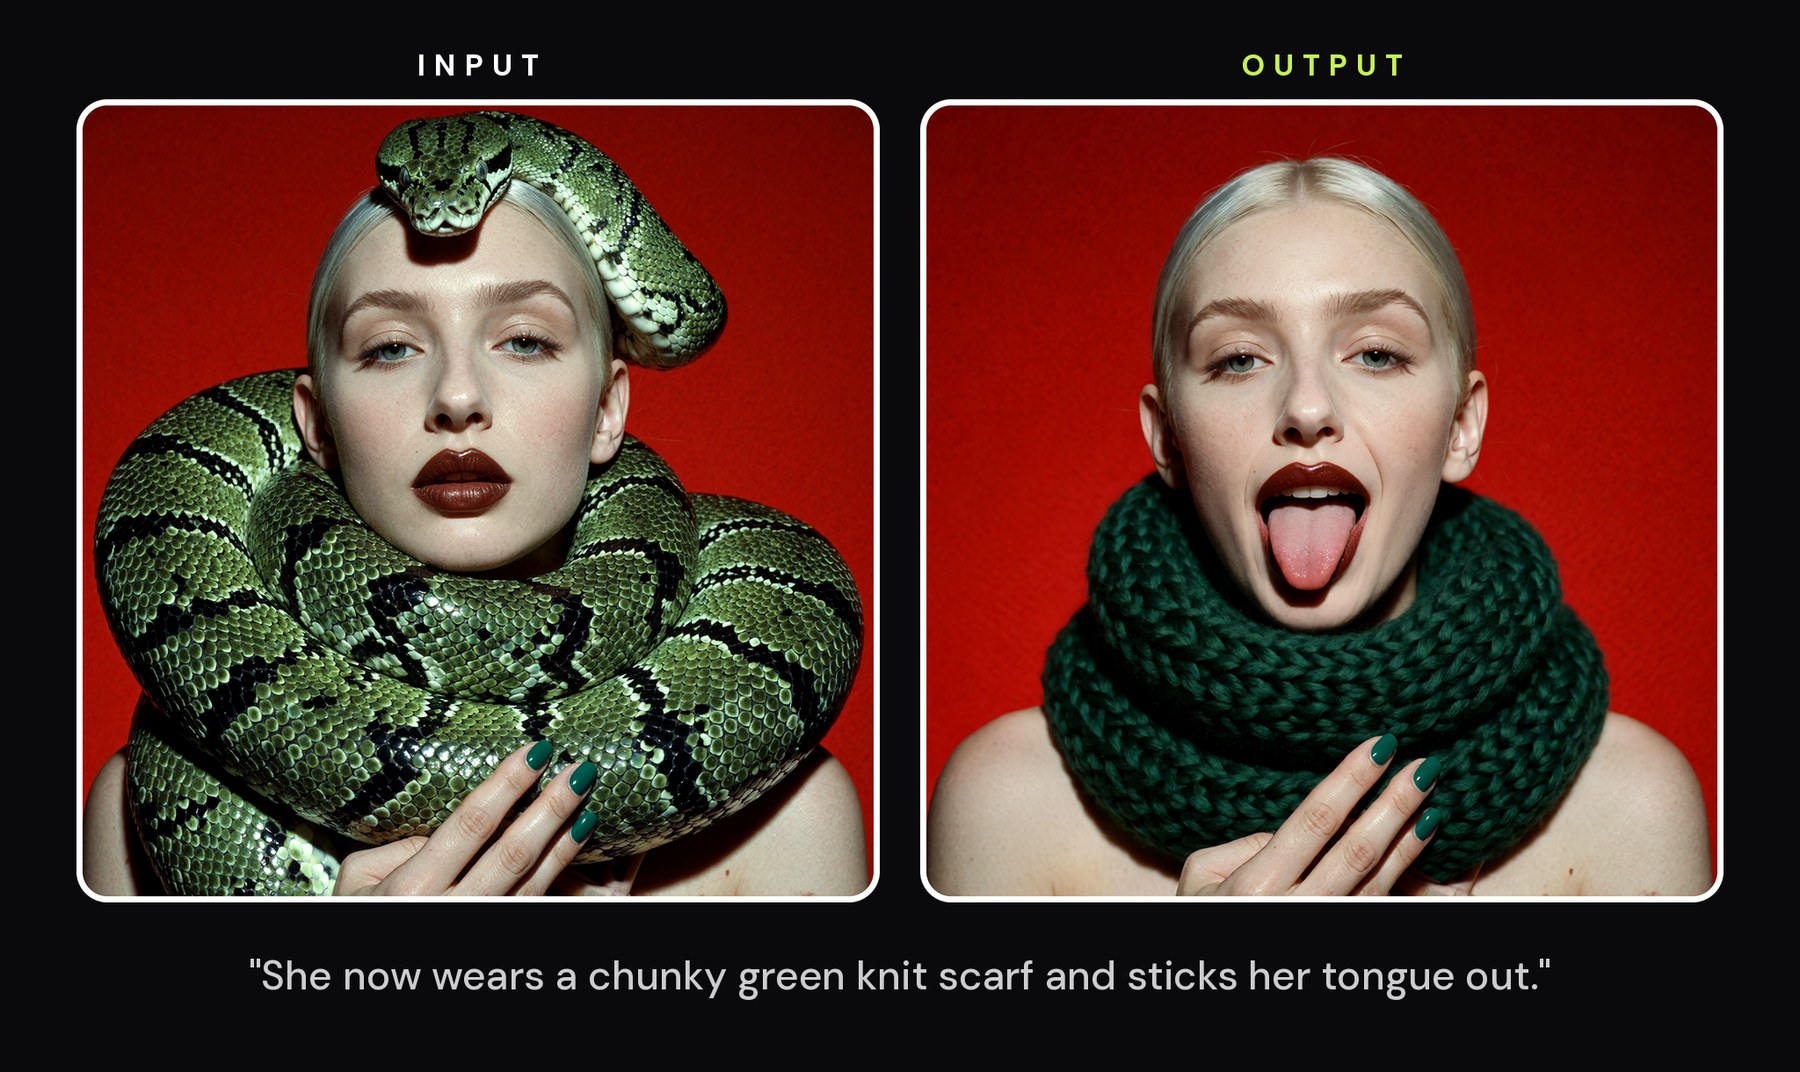
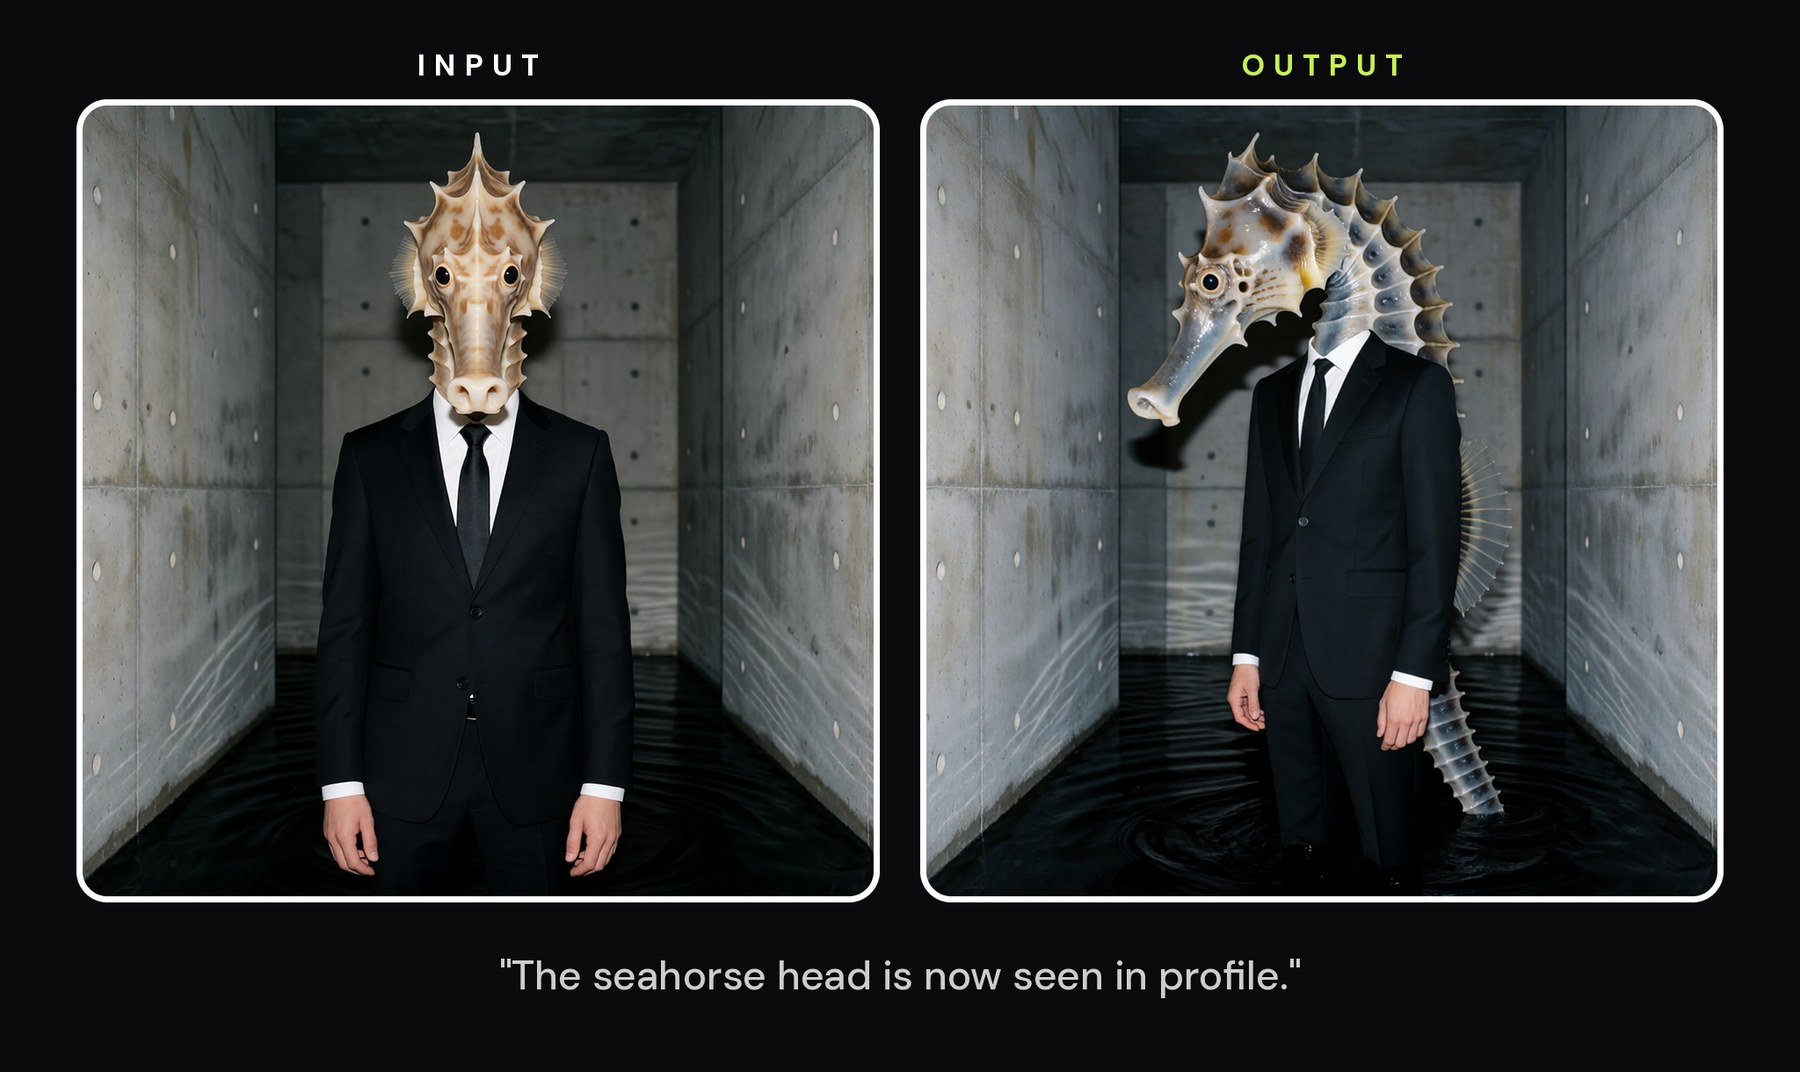
Identity editing isn't only for outfits and yoga poses. Because the model locks whatever it recognizes as the “subject,” you can rotate a head, change an expression, or add a prop to a surreal composite, and everything else holds. A few more edits, each one sentence:
Change an expression
Swap a prop for a garment
Turn a head to profile
Edit the picture. Keep the identity.
Edits like these are iteration machines. Pay-as-you-go, each edit runs 5.19–26 Spark (≈$0.03–$0.13). On Sogni Unlimited the meter disappears: $20/month (or $199/year) for fair-use unlimited rendering across every open-weight hosted model, Krea 2 Identity Edit included, with no credit counting and a 3-day trial for new subscribers.


