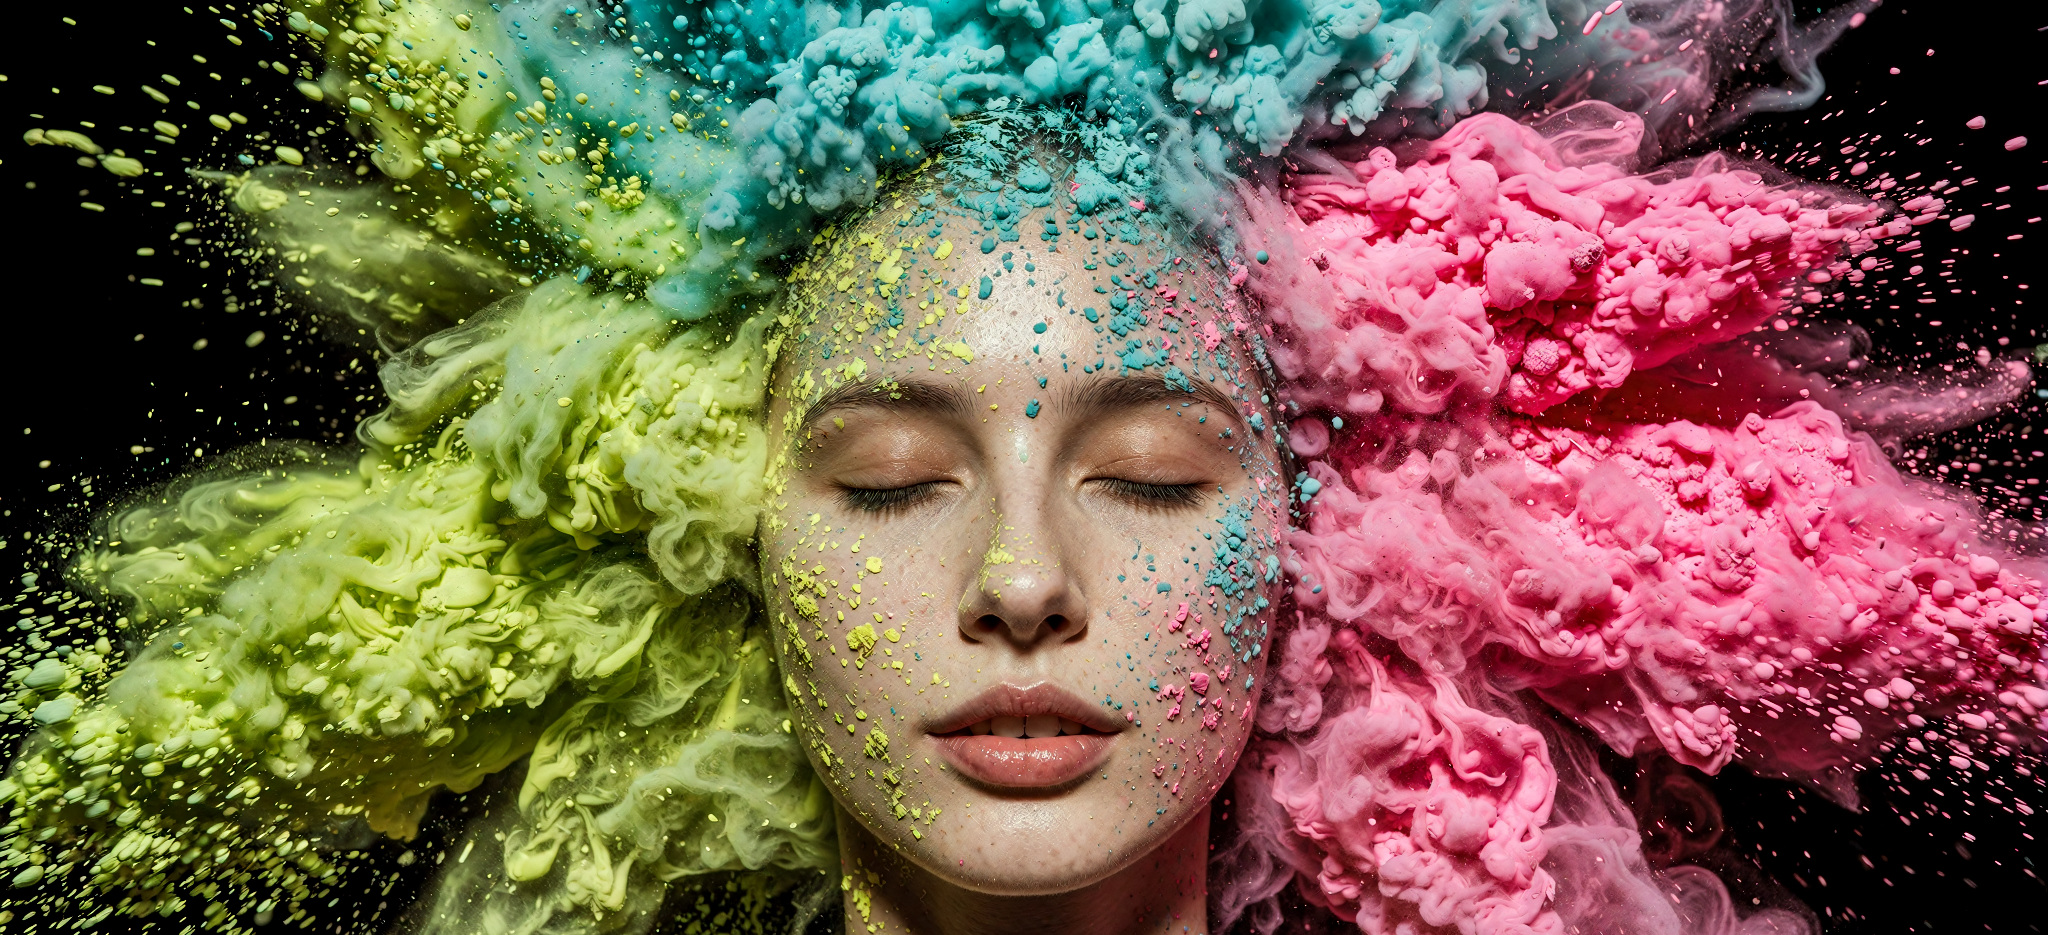
Your first steps with Sogni
Sogni Create, step by step: from your first prompt to images, video and music
The complete walkthrough of the app.sogni.ai web app. How the home screen works, how to generate your first images in seconds, how to pick models and styles, how to compare models side by side, how to create video and music, and how Spark points and the Supernet power all of it.
Contents
- Which Sogni to use
- Create your free account
- The home screen
- Every tool at a glance
- Models, apps and community
- The Create workspace
- Cost, speed and batch explained
- Styles
- Choosing a model
- Which models cost extra
- Compare models side by side
- Size, seed, steps, advanced
- Hit Imagine
- Working with a finished image
- Video: models and workflows
- Music: the full studio
- Recent Projects
- Spark, wallet and Unlimited
- Rewards and Share & Earn
- FAQ
Already use Claude, Codex or Hermes? Start here.
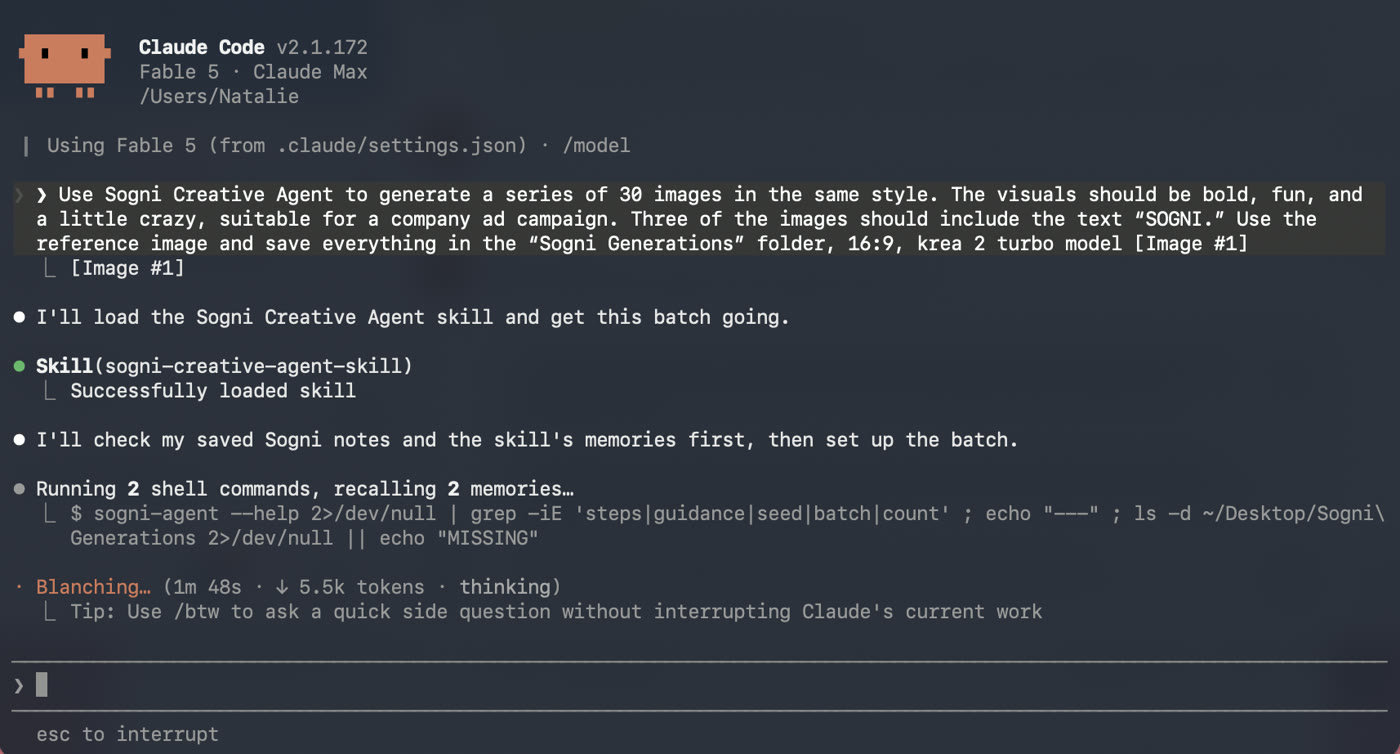
If you already have a powerful personal agent, the Sogni Creative Agent Skill is the easiest and most capable way into the platform. Ask in plain English and your agent plans the job, generates the assets, and delivers finished images, video, and music straight to your workspace.
npx setup-sogni-agent-skill


Never made an AI image before? Try Sogni Vibe.
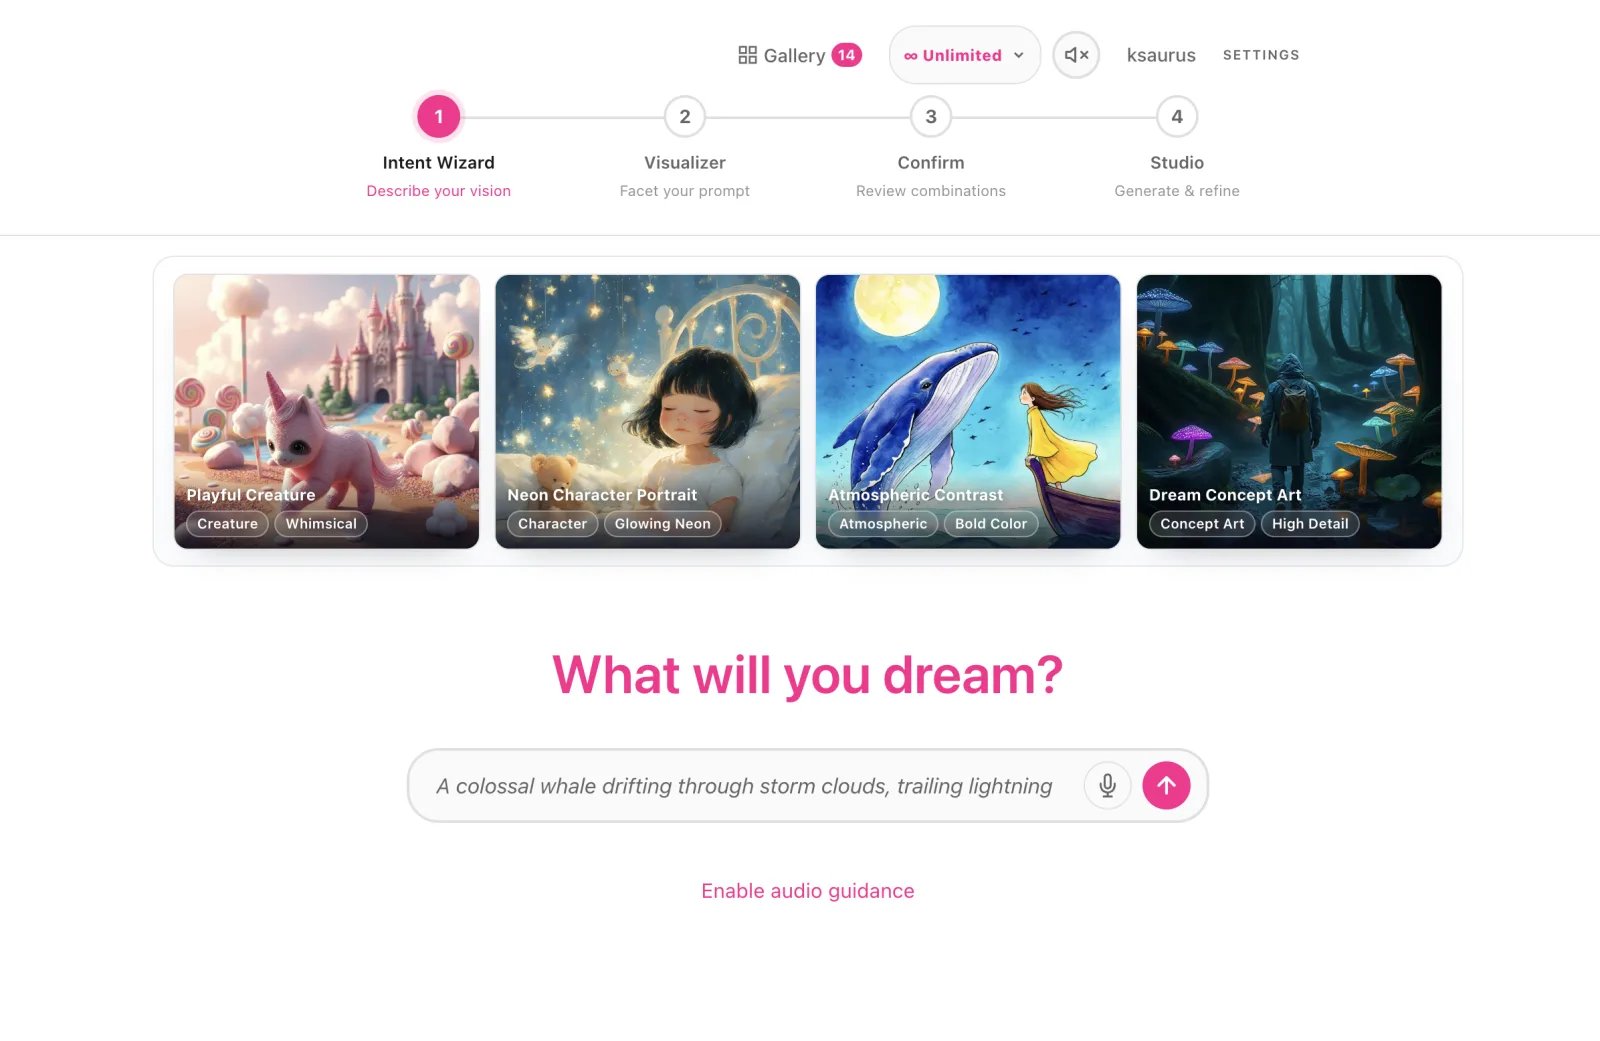
If AI tools are completely new to you, Sogni Vibe is the friendliest place to begin. There is nothing to install and no settings to learn: type one line describing what you want to see, or just say it out loud, and Vibe carries it through four guided steps:
- 1Intent Wizard · describe your vision
- 2Visualizer · facet your prompt
- 3Confirm · review combinations
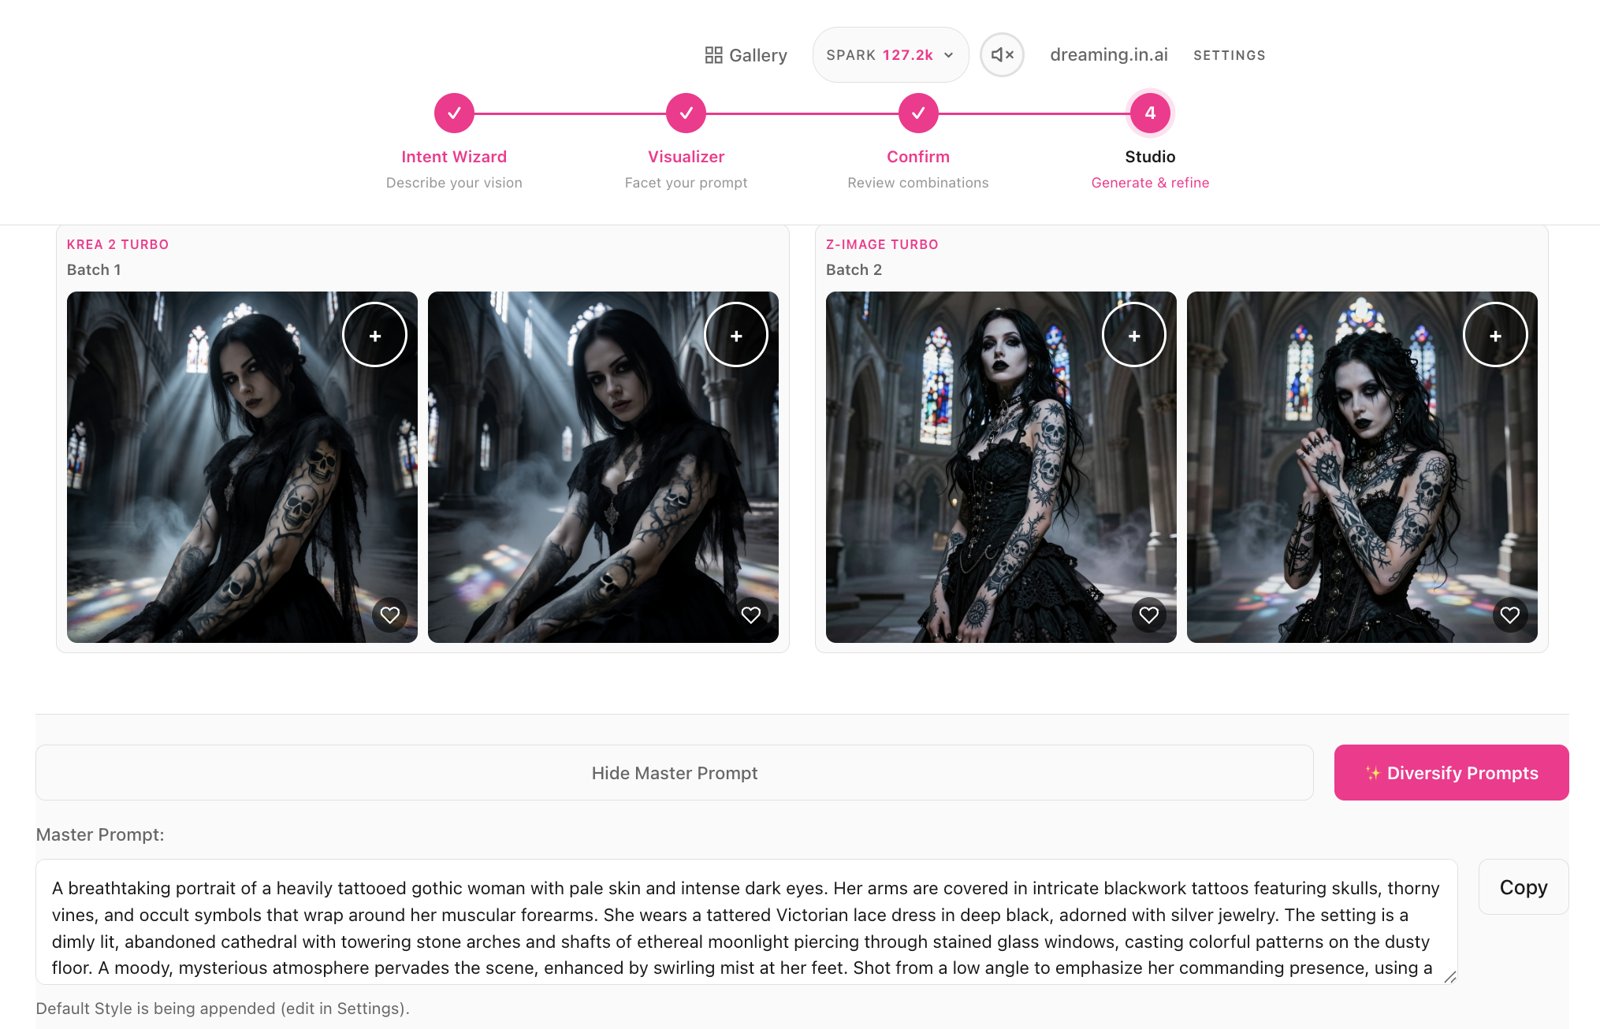
- 4Studio · generate & refine
The wizard does the prompt engineering for you, so your idea stays the focus. Images stream in live from several models at once; tap the ones you like and Vibe refines the idea for the next round, until the result matches the picture in your head.
You don't even need an account to try it, since guest mode is free. A free Sogni account unlocks every model, larger batches, higher resolutions, and turning your favorite stills into video.
First, which Sogni should you use?
Sogni is not a single app. It is a family of apps sharing one account, one gallery and one Spark balance, all rendering on the same Sogni Supernet, so whatever you make in one shows up in the others. Here is the lineup, and then the short answer on where to start.
| App | Platform | What it is |
|---|---|---|
| Sogni Create | Web, Android | Images, video and music in any modern browser, or as an Android app from Google Play. This is the one this guide covers. |
| Sogni Studio | macOS | The Mac-native creative workspace. Generate at full Supernet speed or entirely on-device, which means private and offline. Studio Pro adds Worker Mode, so your idle GPU earns from the network. Needs macOS Sonoma 14, Apple silicon and 16 GB RAM. |
| Sogni Pocket | iOS | The full thing on iPhone and iPad, again with Supernet or on-device generation. Needs iOS 17 and an iPhone 13 Pro or newer, or an iPad with Apple silicon. |
| Sogni Chat | Web | A chat workspace where you create through conversation and agent-driven workflows instead of a settings panel. |
| Focused apps | Web, iOS, Android | Photobooth (portraits from a selfie), Sogni Restore (repair old photos), Sogni 360 (seamless 360 degree scenes), Sogni Makeover (new looks on your own photos), Sogni Infinity (seamless tiling patterns), Sogni Vibe (a guided wizard from idea to video) and Ink (tattoo concepts). |
| Sogni Creative Agent | Web, terminal | Tell an agent what you want in plain English and it plans, generates and delivers finished images, video and music on the Supernet. It also installs as a skill inside Claude, Codex or Hermes, so it works straight from your terminal: npx setup-sogni-agent-skill |
| Sticker Bot | Telegram, Discord | Generate sticker art directly in your community chats, on Discord or Telegram. |
Windows and Linux builds are on the way and have a waitlist on the Super Apps page.
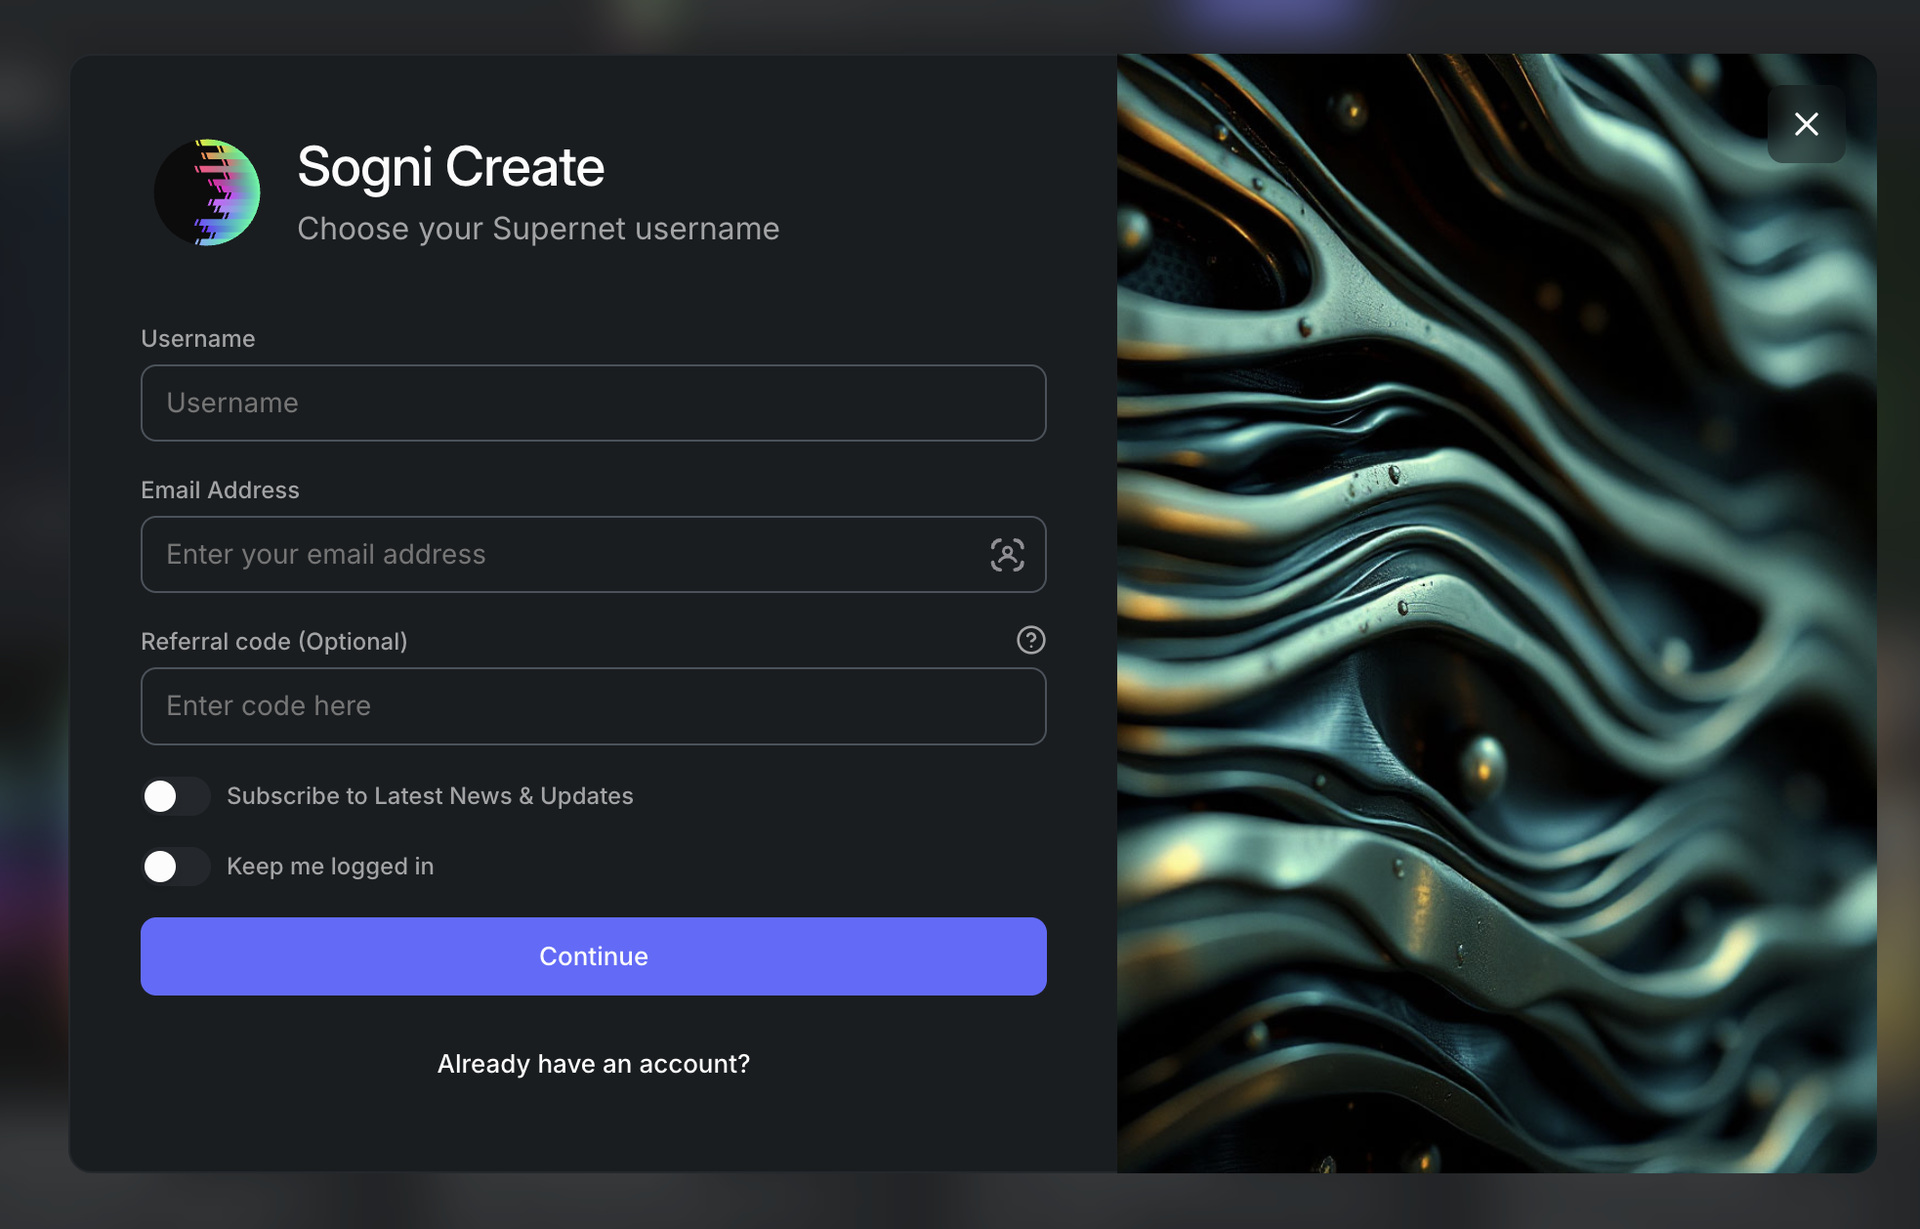
1Create your free account
Head to app.sogni.ai. You can browse freely, but the first time you hit a generate button you will be invited to sign up. It is free, takes under a minute, and comes with free Spark points so you can start creating right away, plus welcome rewards you can claim later (see step 18).
2The home screen
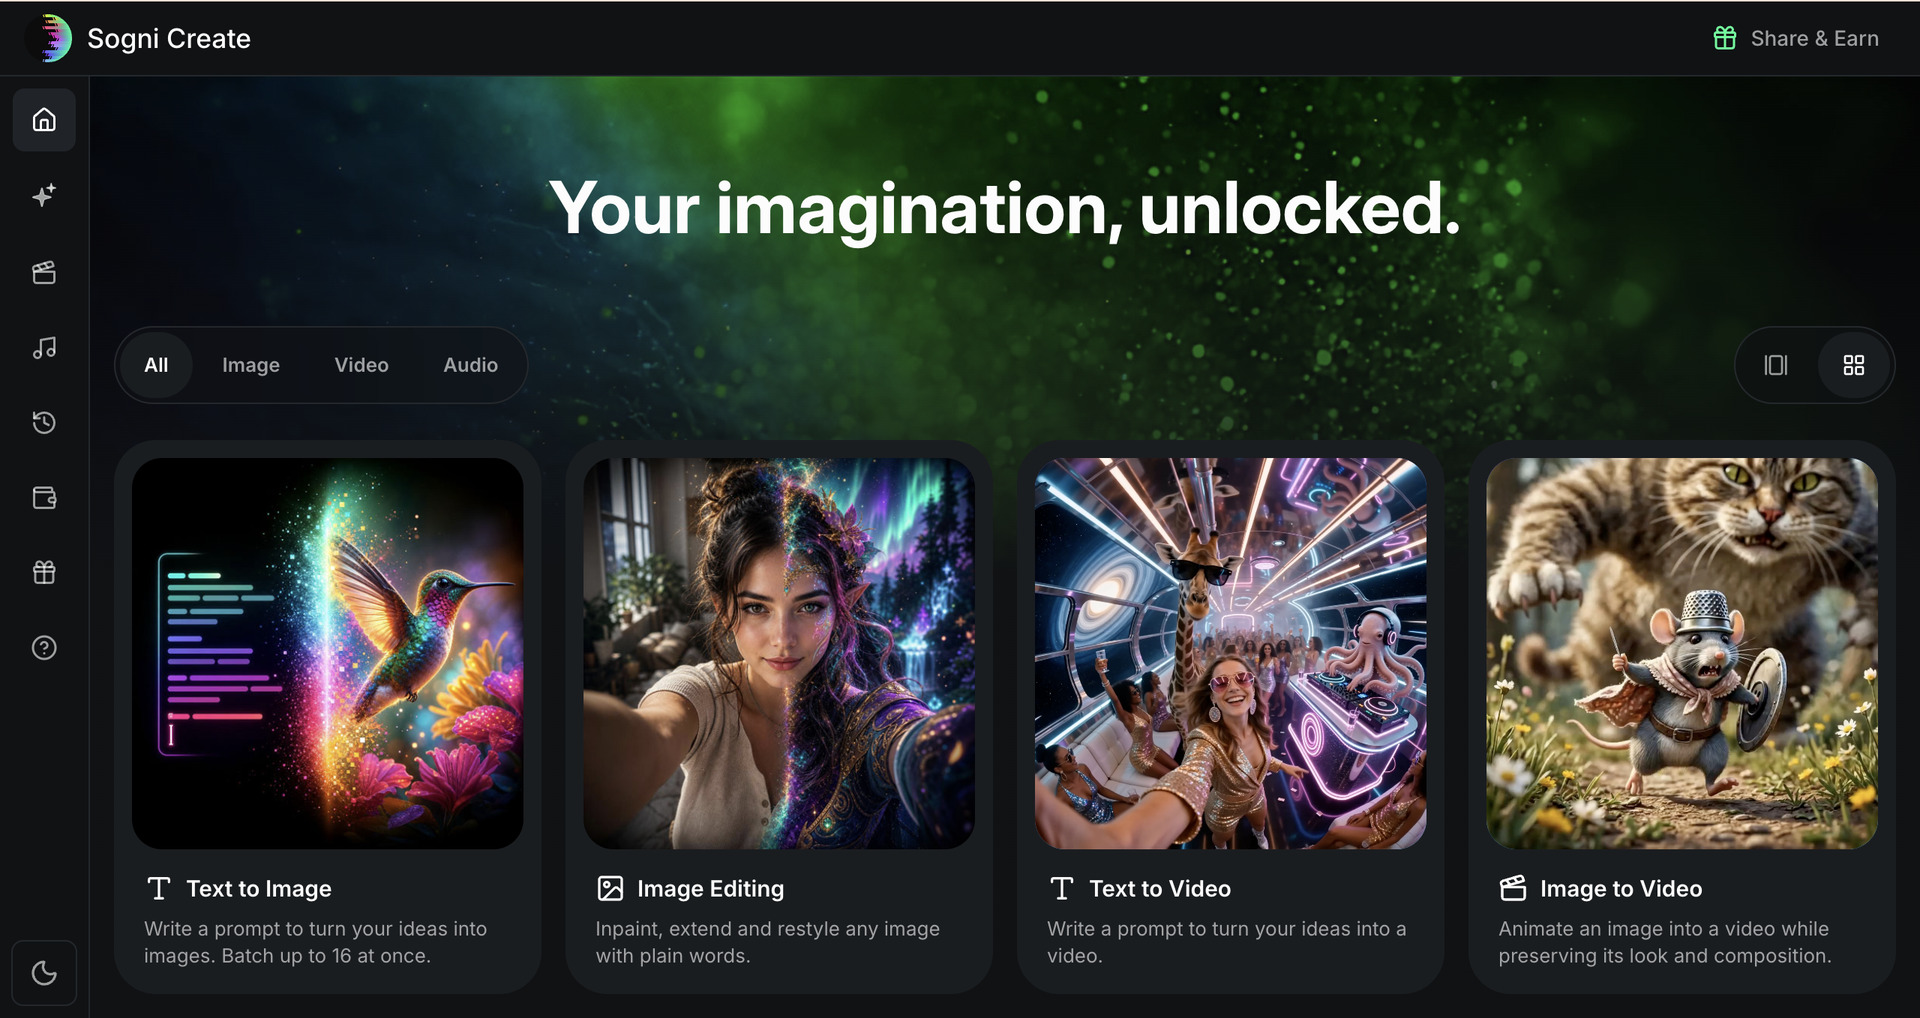
The home page greets you with "Your imagination, unlocked" and a row of tool cards. Every card is a creative mode: click one and you land directly in the right workspace, with no setup needed. The All / Image / Video / Audio filter narrows the cards to one category, and the two icons on the right switch between the carousel and the grid layout.
The left sidebar is your permanent navigation, top to bottom: Home, Create (images), Video, Music, Recent Projects, Wallet, Rewards and Help, which opens docs.sogni.ai. The moon icon at the bottom switches between light and dark theme.
3Every tool at a glance
Switch to the grid layout using the right-hand icon above the cards and the whole toolkit is visible at once. Sogni Create is far more than an image generator: nine creative modes live in one app.
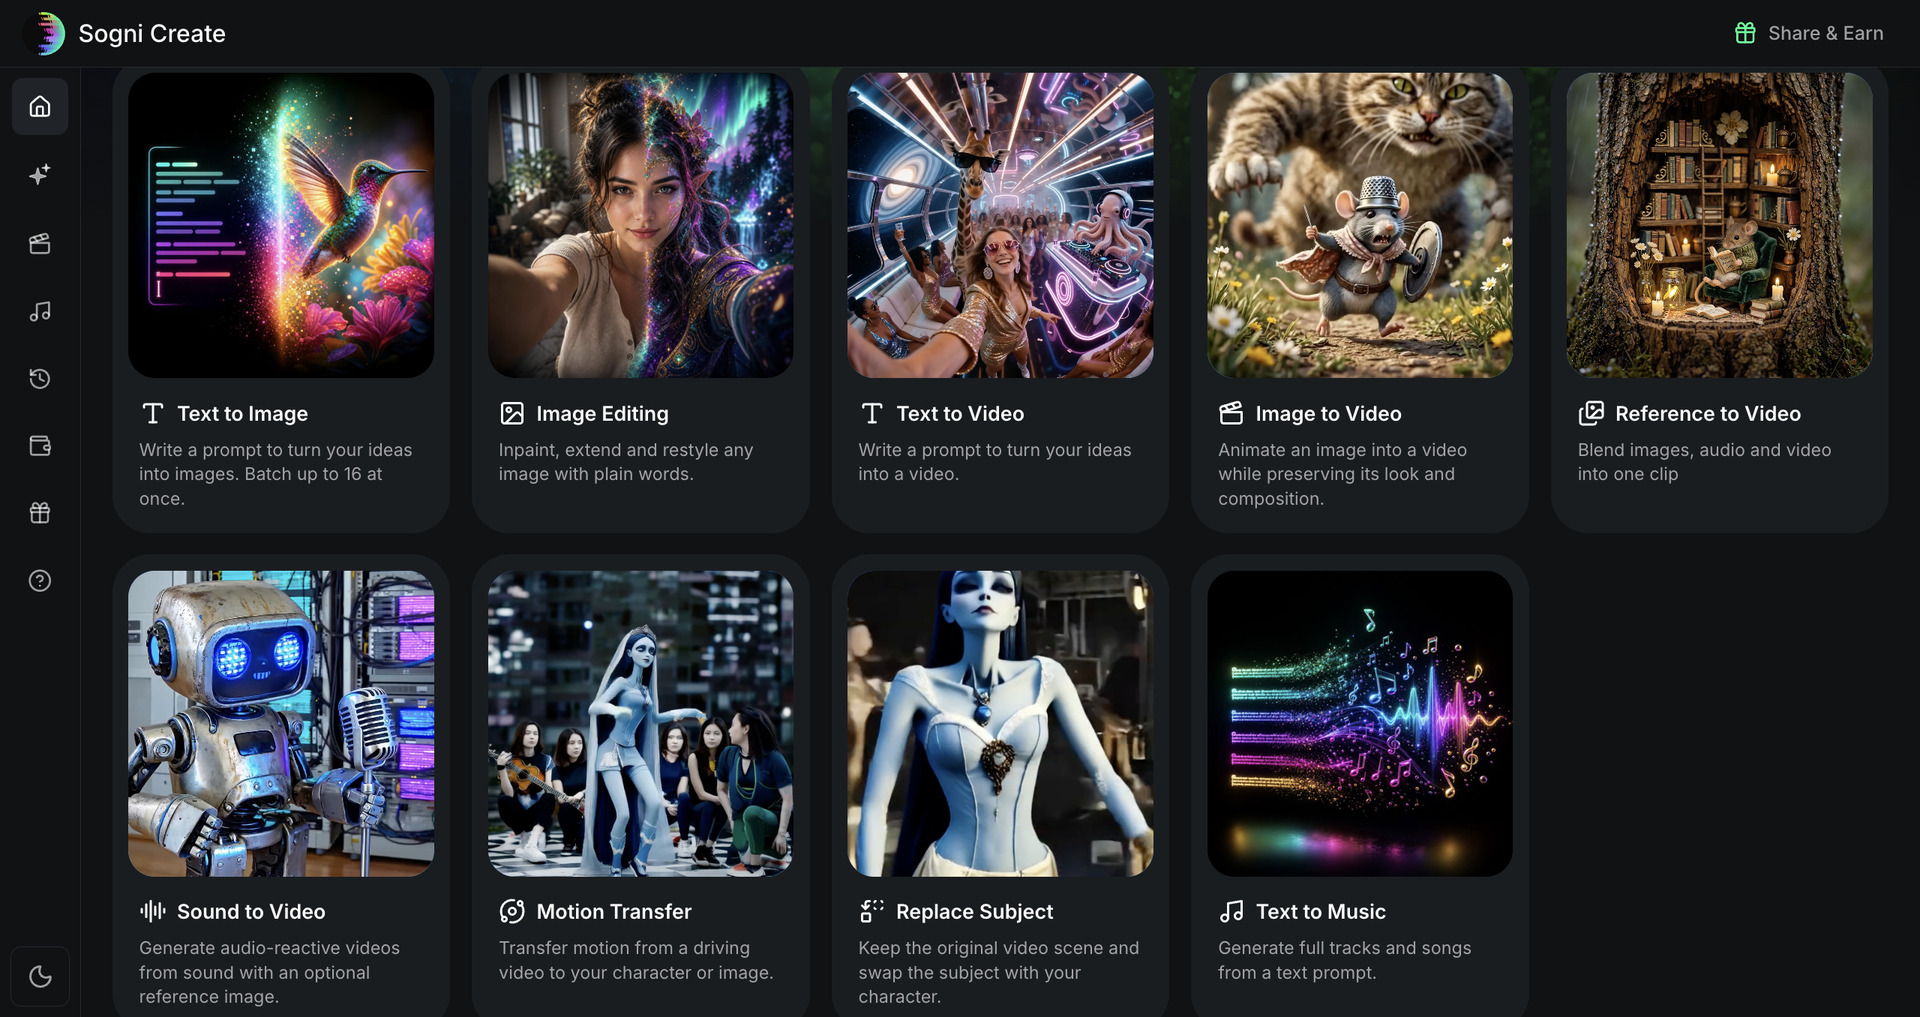
| Tool | What it does |
|---|---|
| Text to Image | Turns a written prompt into images, up to 16 in a single batch. |
| Image Editing | Inpaint, extend and restyle any photo using plain words. |
| Text to Video | A text prompt becomes a video, up to 4K with generated audio. |
| Image to Video | Animates a still image while preserving its look and composition. |
| Reference to Video | Blends multiple reference images into a single video. |
| Sound to Video | Audio-reactive video generated from a sound clip. |
| Motion Transfer | Transfers motion from a driving video onto your character or image. |
| Replace Subject | Keeps the original video scene and swaps the subject for your character. |
| Text to Music | Generates full tracks and songs from a text prompt. |
4Models, apps and community
Scroll down the home page and you will find three sections worth knowing before you start creating.
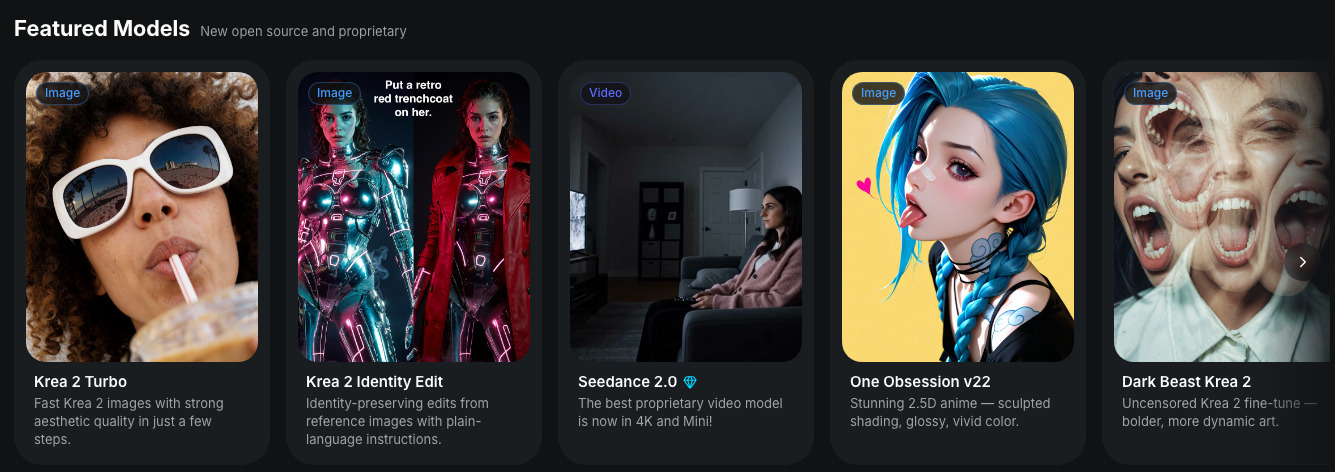
Featured Models is a curated shelf of new open-source and proprietary models: Krea 2 Turbo (fast images with strong aesthetics), Krea 2 Identity Edit (identity-preserving edits), Seedance 2.0 (the top proprietary video model, now in 4K), One Obsession (glossy 2.5D anime), Dark Beast (uncensored fine-tunes), Chroma, Flux Krea, Wan 2.2, LTX-2 and more. The full catalog lives at sogni.ai/models. A green "New" badge marks fresh arrivals, and a Premium badge marks the ones billed separately (see step 9).
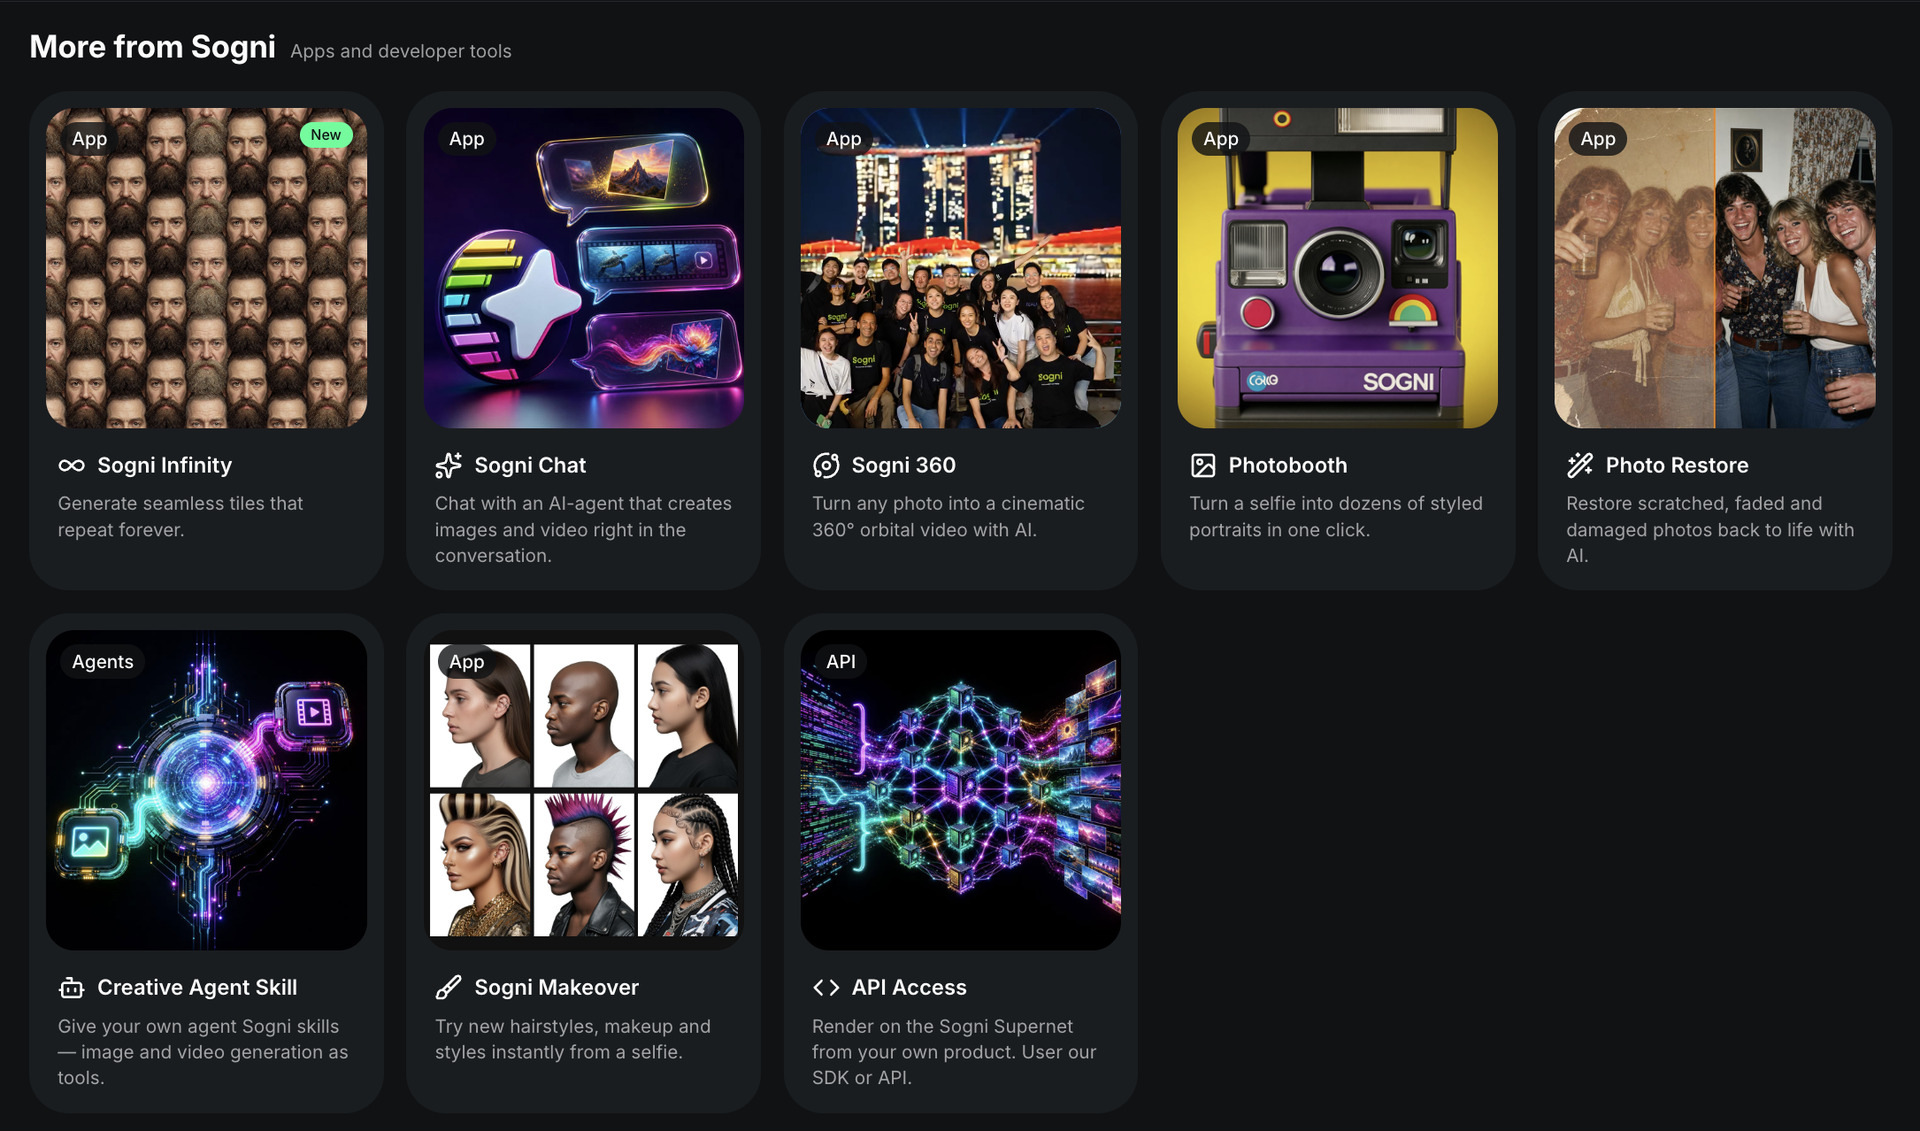
More from Sogni collects companion apps built on the same engine: Sogni Infinity (seamless tiles that repeat forever), Sogni Chat (an AI agent that creates images and video inside a conversation), Sogni 360 (cinematic 360 degree orbital video from one photo), Photobooth (dozens of styled portraits from a selfie), Photo Restore (bring scratched and faded photos back to life), Sogni Makeover (try hairstyles and makeup instantly), the Creative Agent Skill (give your own agent Sogni image and video generation as tools) and API Access (render on the Sogni Supernet from your own product via SDK or API).
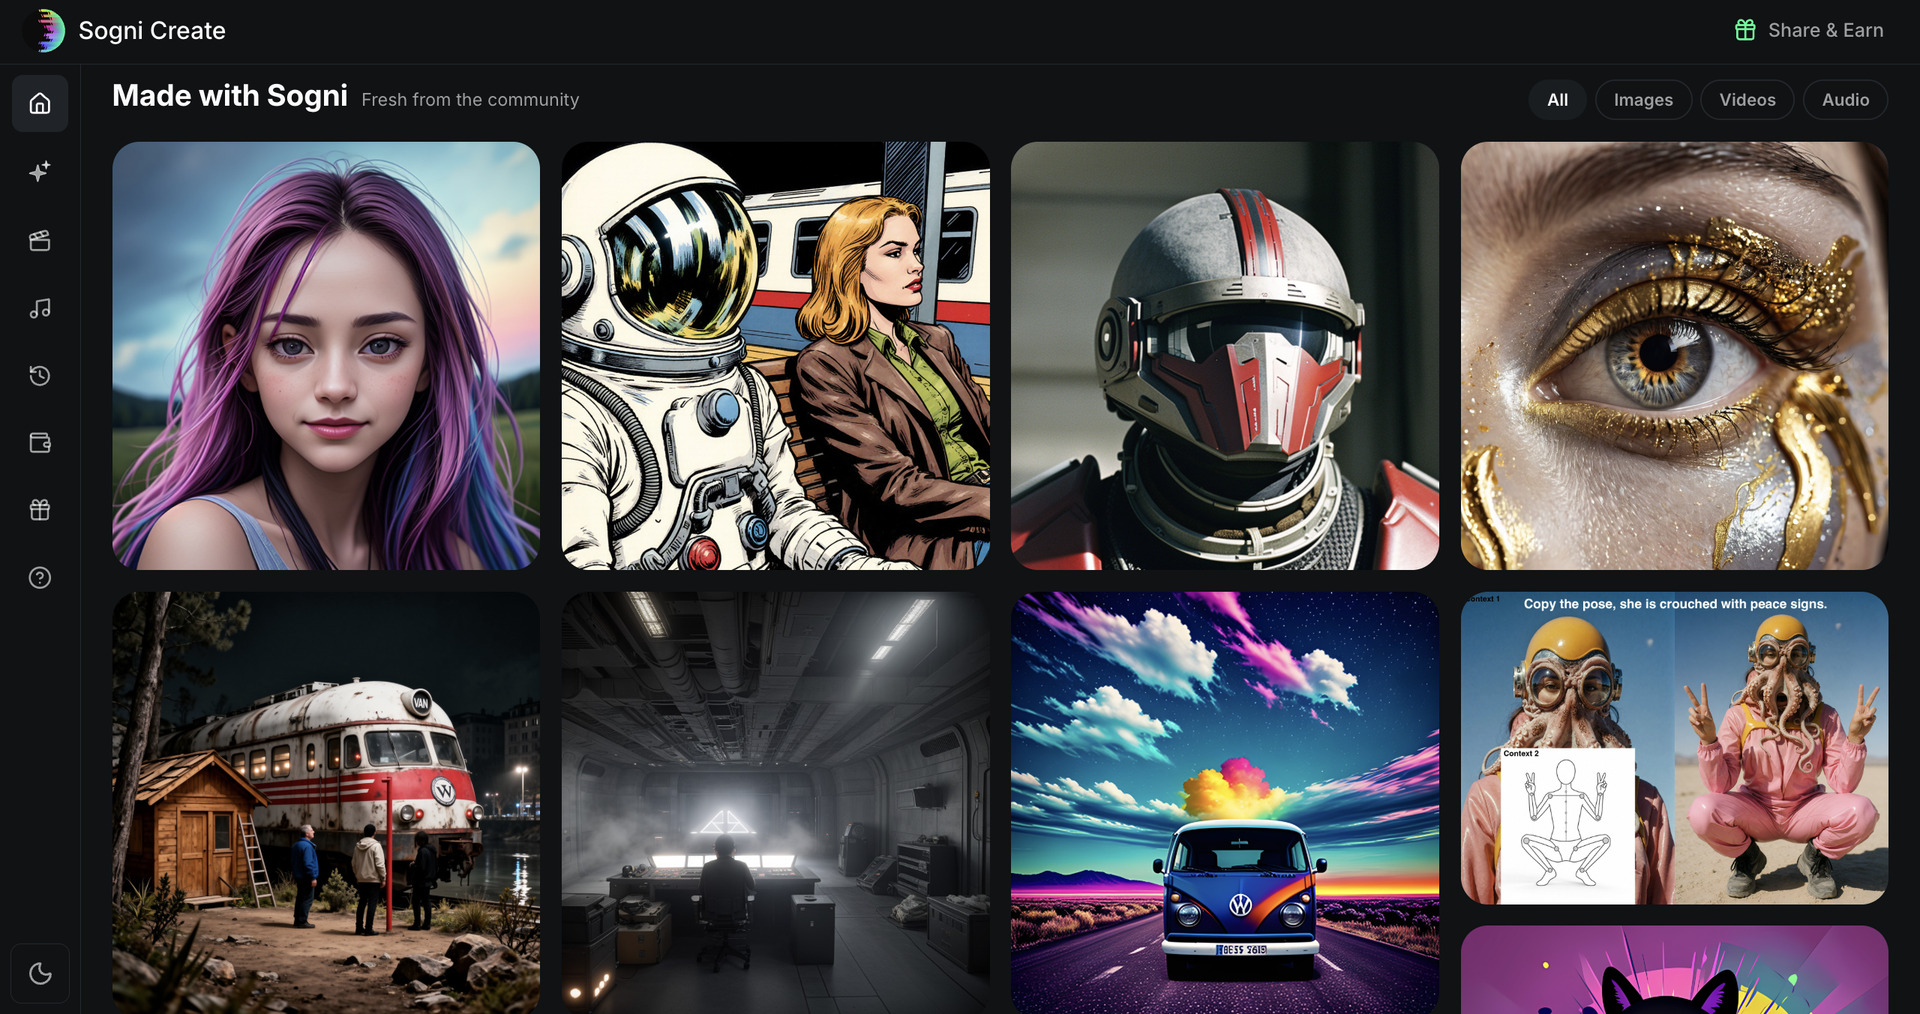
Made with Sogni is a live feed of community creations, filterable by Images, Videos and Audio. It is the best source of inspiration and ready-made prompts: click any piece to see how it was made.
5The Create workspace
Sidebar > Create, or the "Text to Image" card
This is the heart of the app. The settings panel sits on the left and your results fill the canvas on the right. Everything needed for one generation reads top to bottom, in the order you actually make decisions: prompt, cost and batch, style, model, then the finer settings.
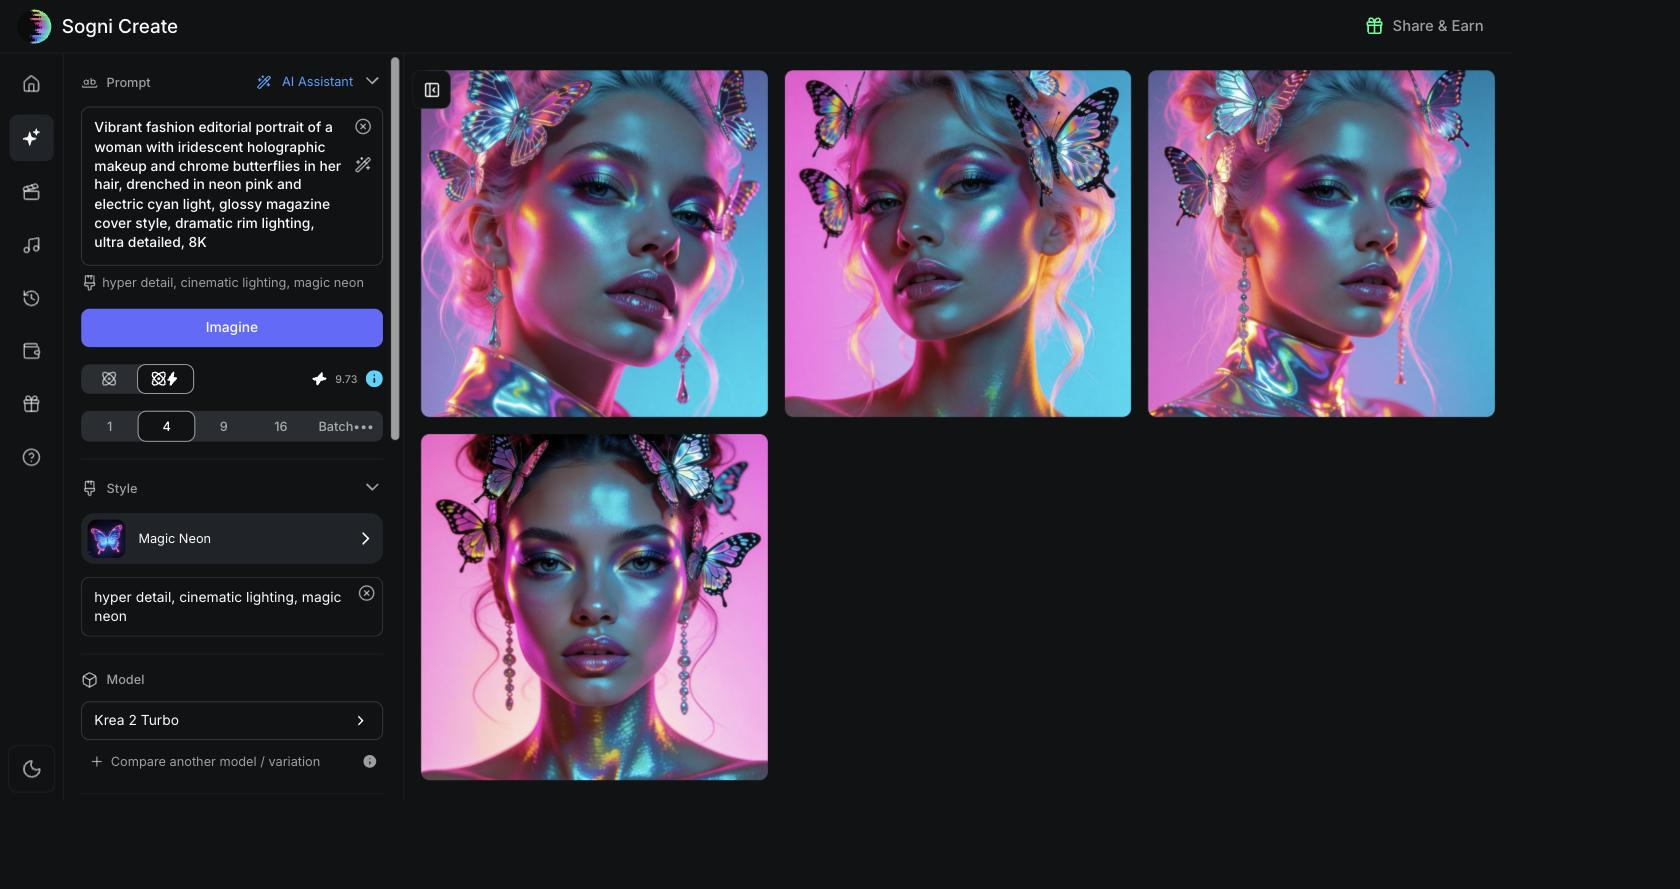
Three ways to write a prompt
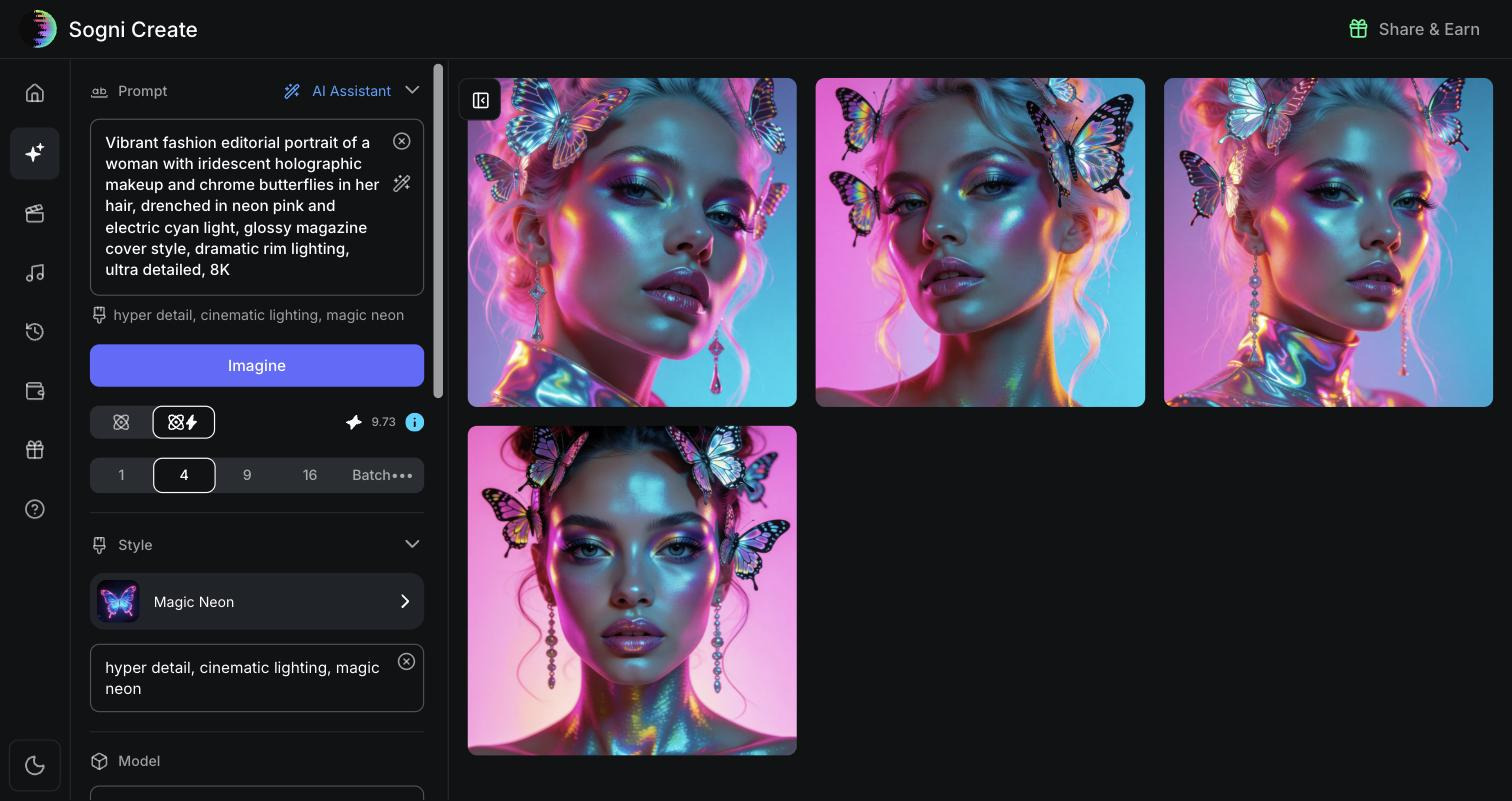
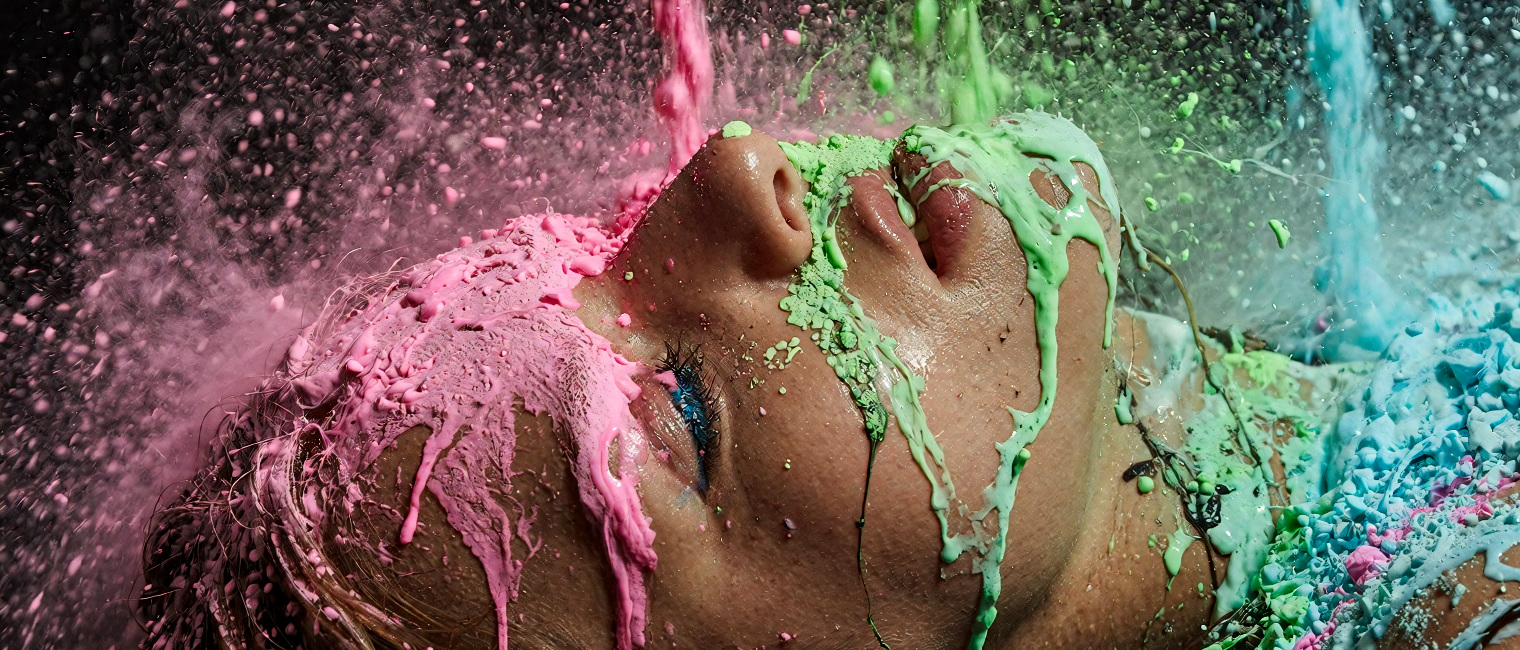
1. Type your own. Describe subject, mood, lighting and style. The prompt used throughout this guide shows what the generator can do with color:
2. Let the AI Assistant write it. With the toggle on, the app expands a short idea into a rich prompt automatically. The wand icon beside the box does the same on demand ("Enhance prompt with AI"), and the cross icon clears the prompt.
3. Borrow one. Click Use prompt on any inspiration card below the workspace and its full prompt lands in your box, ready to run or remix.
6Cost, speed and batch explained
The row right under the Imagine button holds the four controls that decide what your generation costs and how fast it arrives. Here is what each one means.
| Control | What it means |
|---|---|
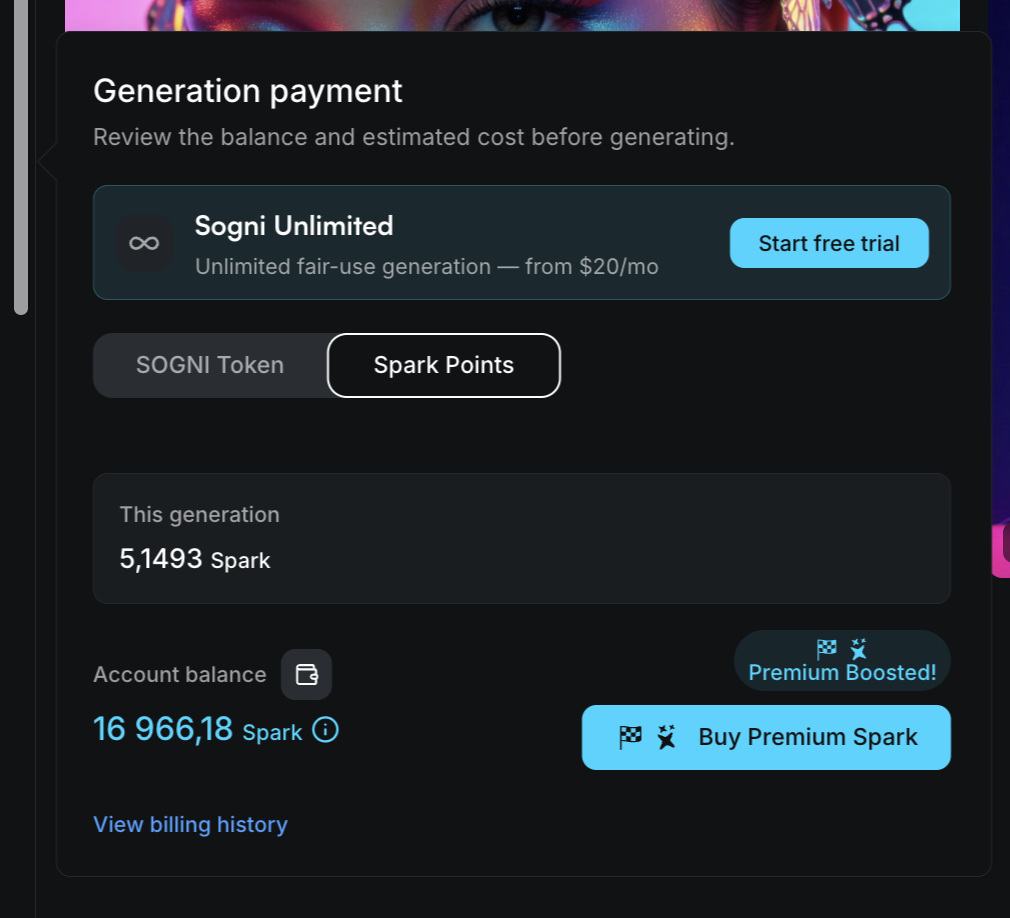
 | Estimated cost of this generation in Spark points, always shown before you click. It updates live as you change batch size, model, resolution or processing speed. The blue info button opens the Generation payment panel with the exact cost, your balance, the SOGNI Token and Spark Points switch, billing history and the Unlimited upgrade. |
 | Processing speed, in other words which Supernet renders your job. The plain icon is the Relaxed Supernet, which is cheapest. The lightning icon is the Fast Supernet, which is priority processing at a higher price. See the box below. |
 | Batch size, meaning how many images render from one prompt at once. Batch••• opens Mega Batch for even larger runs. If you have several models selected for comparison, the panel spells out the math for you, for example "1 image per selected model or variation x 2 selections = 2 images total." |
Sogni does not own a central render farm. Your job is sent to the Sogni Supernet, a decentralized network where independent GPU operators around the world contribute compute and earn rewards for every completed render. That is why you see worker names such as
@Nosana.network or @ceibo.ai printed on your tiles while they render, and it is the reason prices are a fraction of centralized services.The network has two lanes. The Relaxed Supernet is the cheap lane: your job waits for a free worker. The Fast Supernet is the priority lane: your job jumps the queue and finishes sooner, at roughly double the price. The output quality is identical, so you are paying purely for waiting time. One practical detail: the newest models are only published to the Fast Supernet, so if you pick one while Relaxed is selected the app tells you and offers a one-click "Switch to Fast Supernet" button.
The price difference on the same batch, with only the speed toggle changed:


7Styles
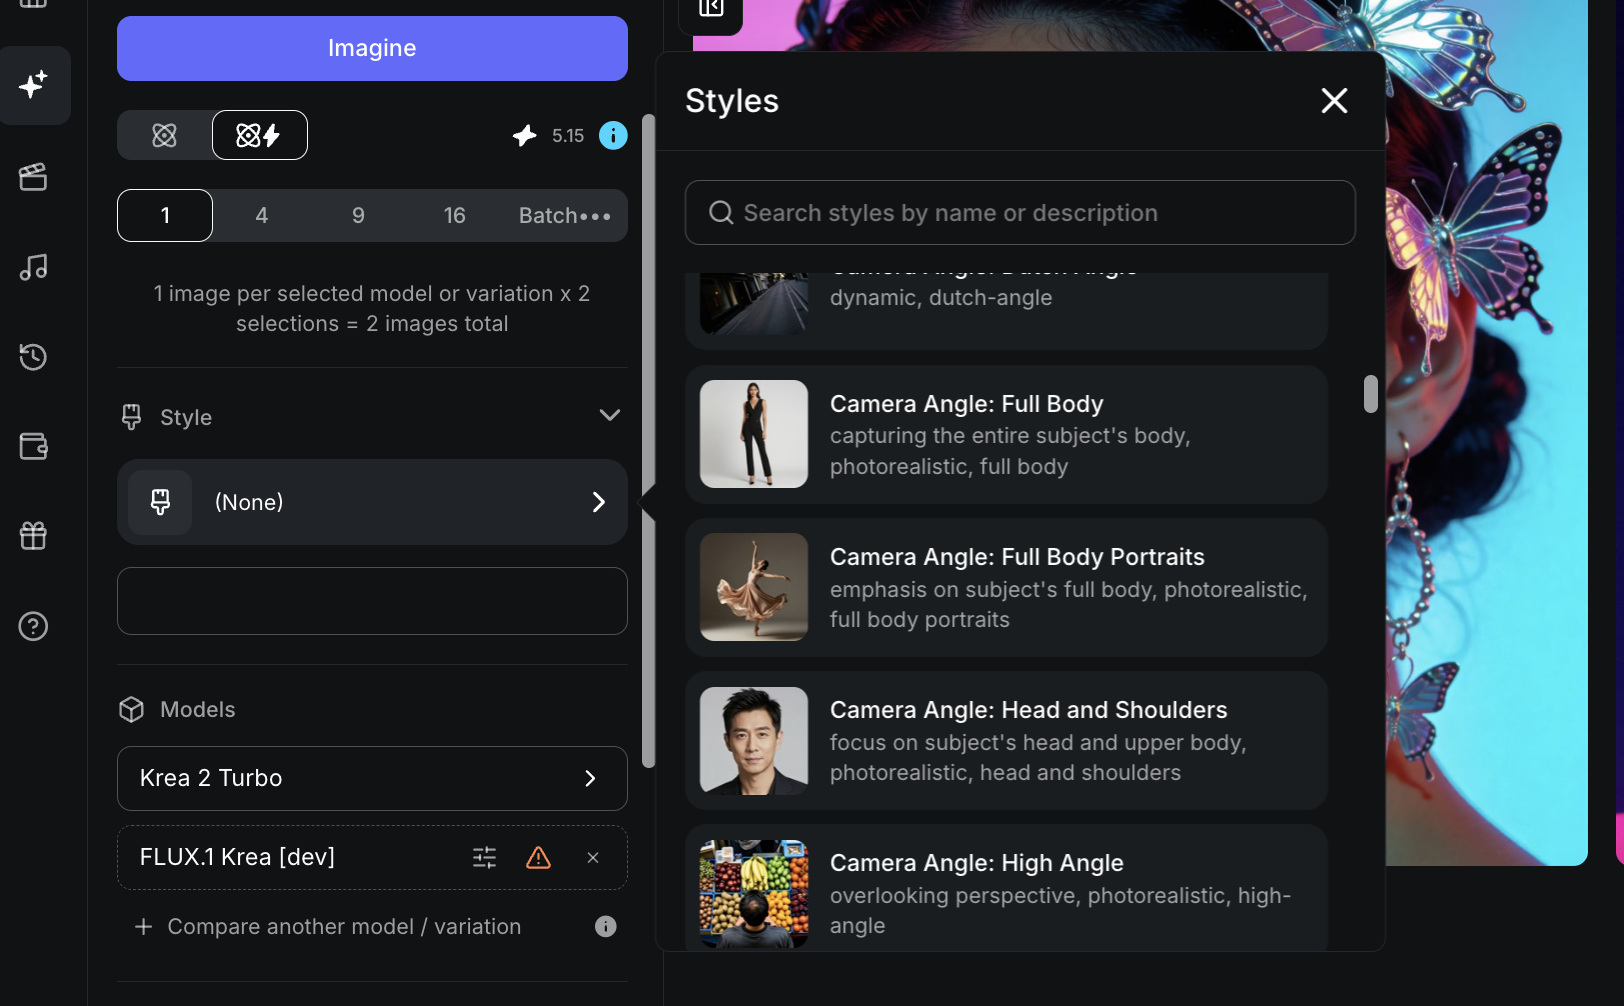
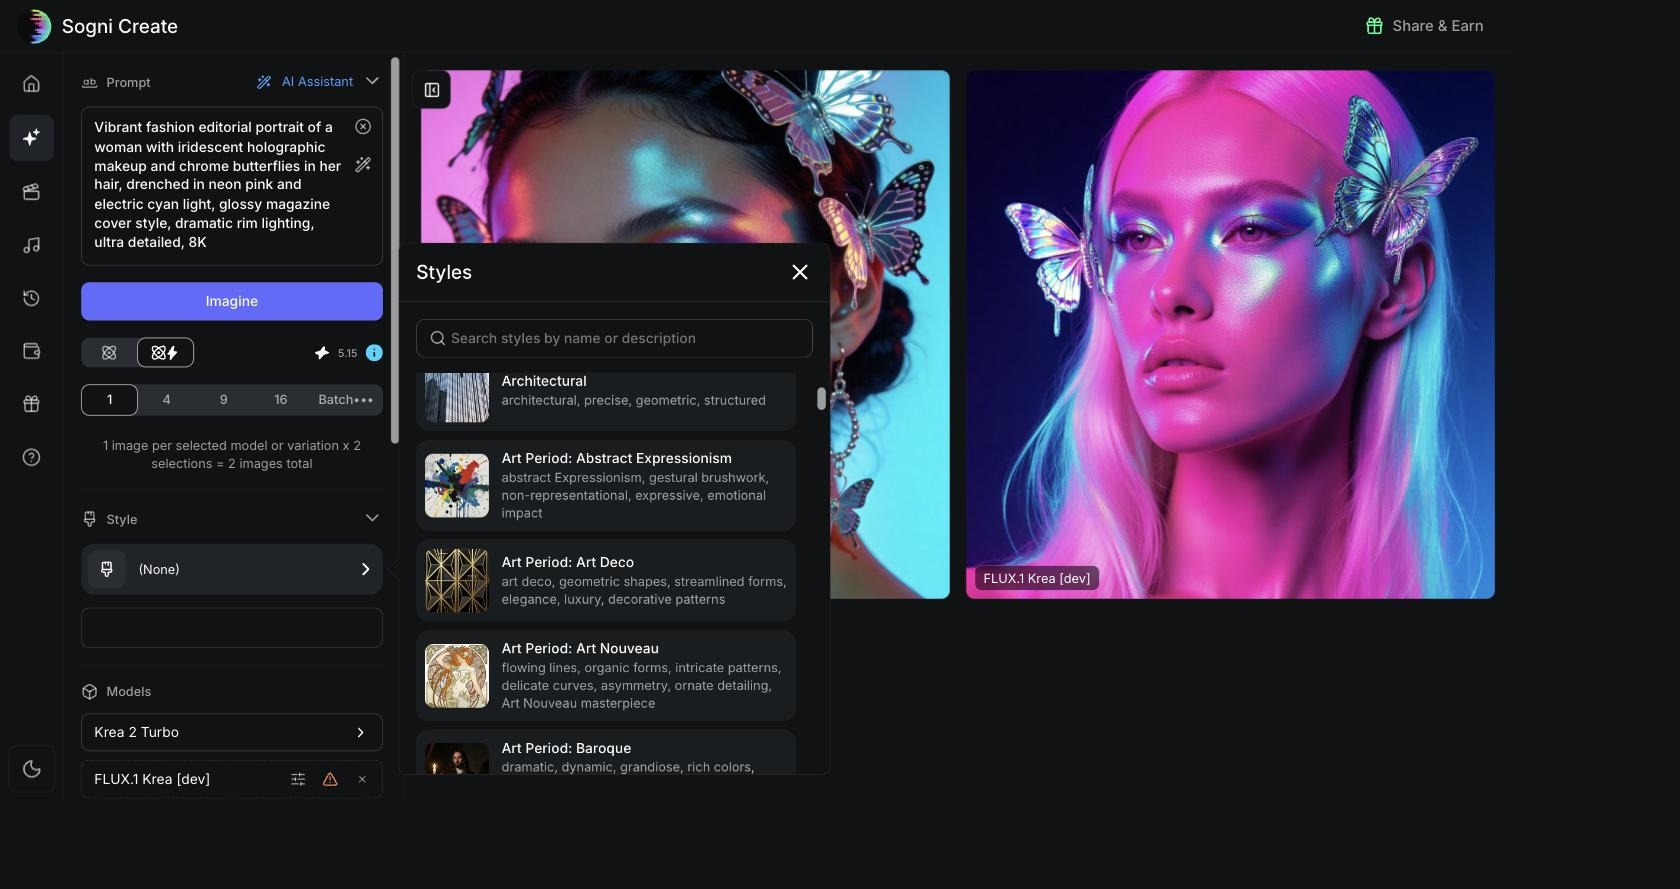
The Style section applies a curated aesthetic on top of your prompt. Click it to open a searchable library of more than 130 ready-made styles: Abstract, Anime, Architectural, a full run of art periods (Abstract Expressionism, Art Deco, Art Nouveau, Baroque and more), photographic looks, neon looks and beyond. Every style shows a thumbnail plus the exact keywords it will append, so you always know what it is doing, and styles you have used recently stay pinned at the top under "Recent history".
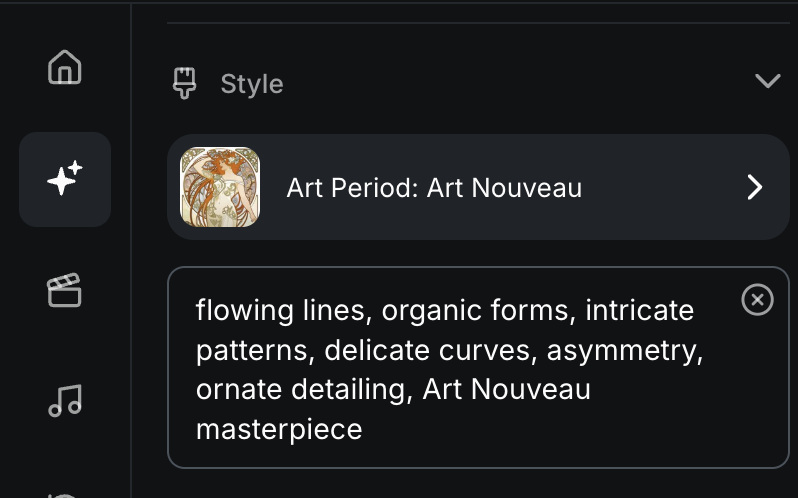
Once you pick a style, its keywords land in an editable box directly underneath, so you can tweak or delete any of them before generating. For the holographic butterfly prompt in this guide Magic Neon is a natural match; below is Art Period: Art Nouveau with its own recipe loaded.
8Choosing a model
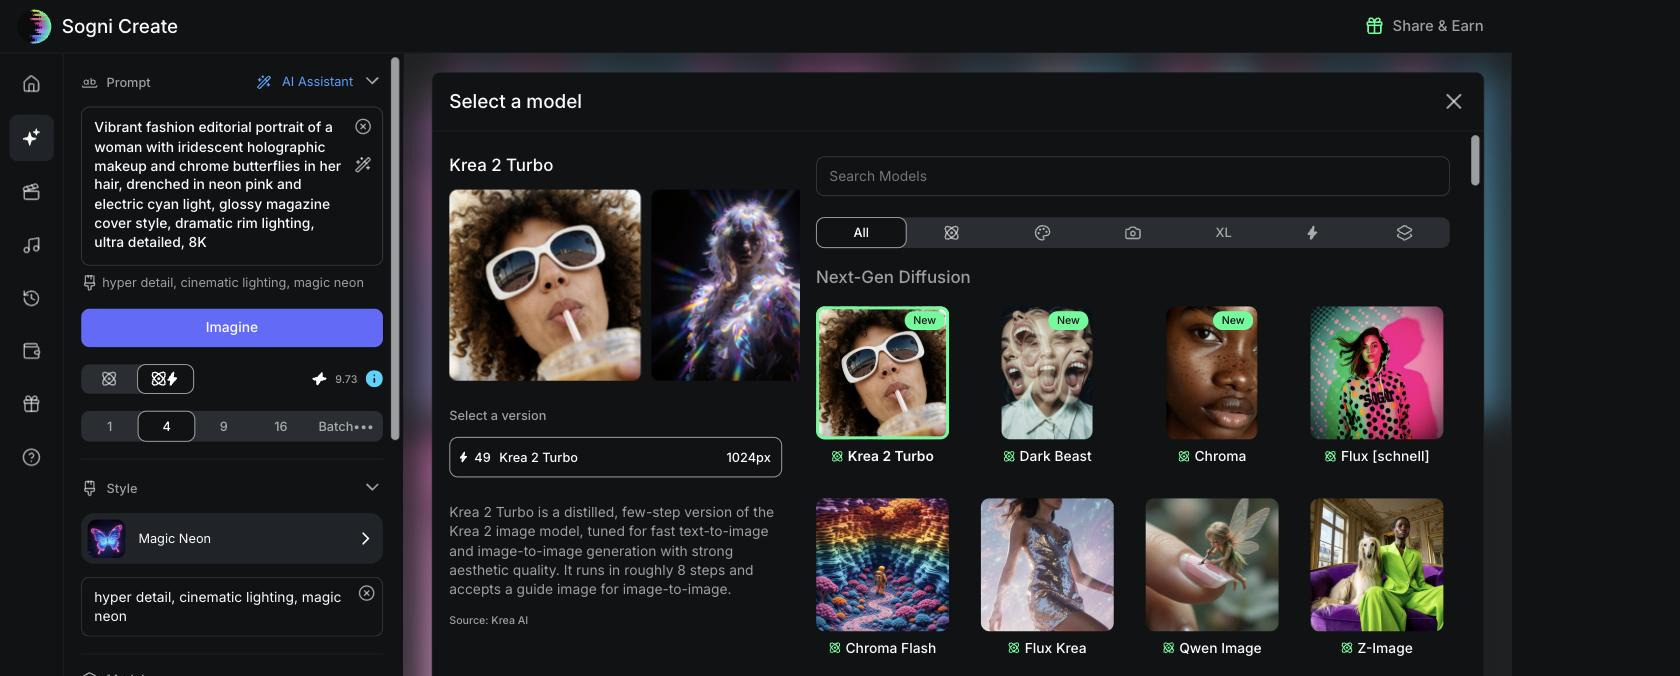
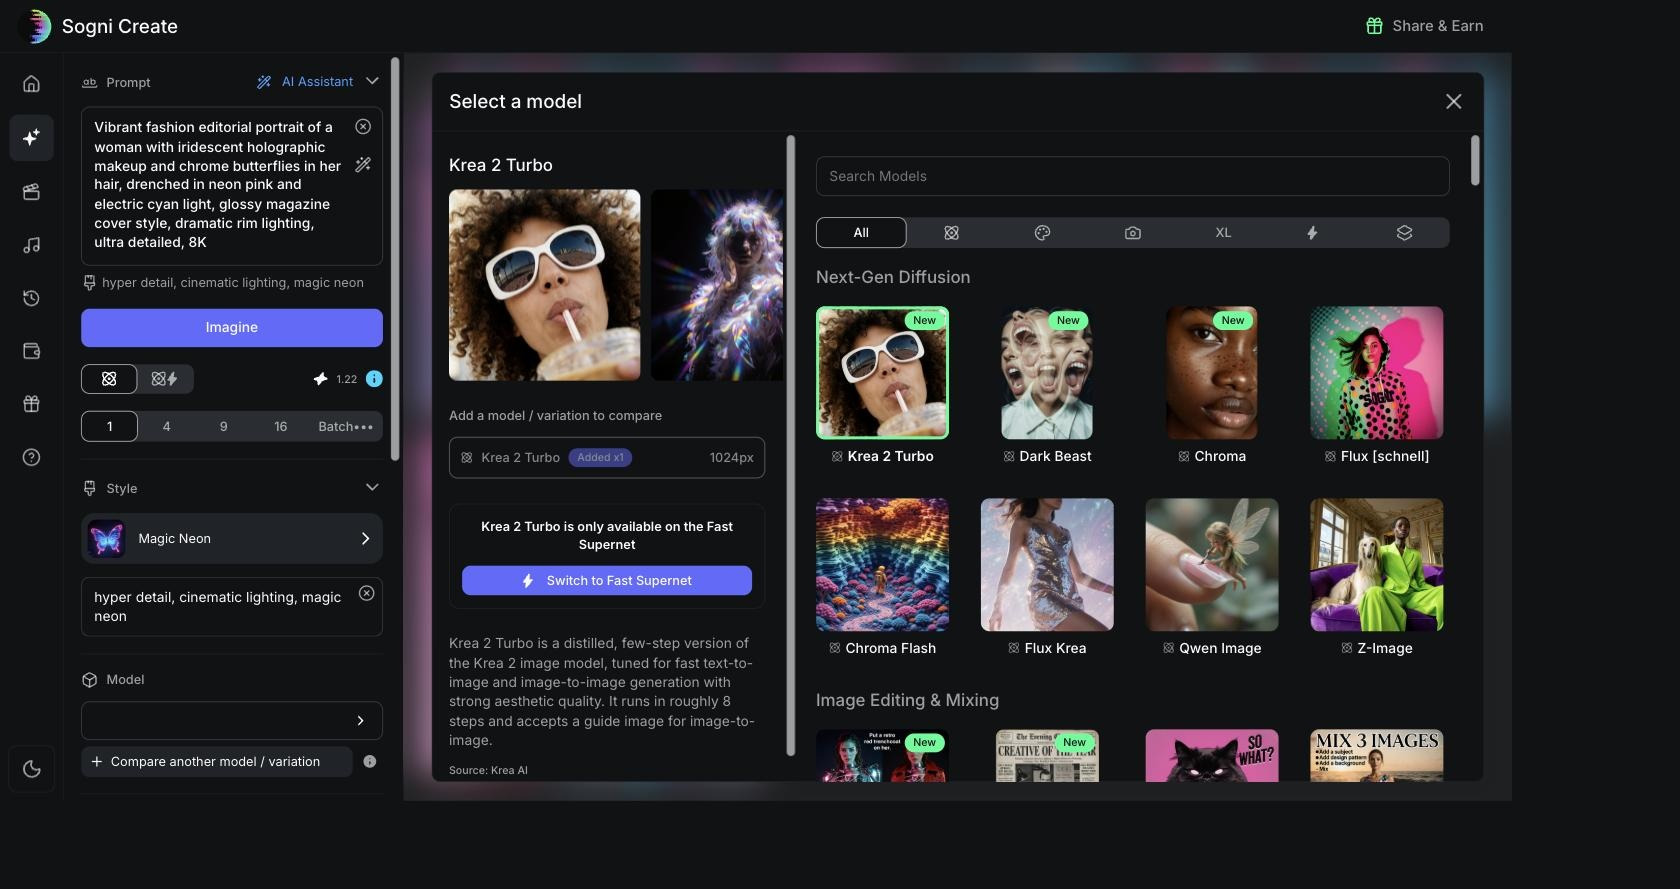
The Model section opens the full library, with search, category filters and a description of every model alongside sample images. Categories run from Next-Gen Diffusion (Krea 2 Turbo, Dark Beast, Chroma, Flux, Qwen Image, Z-Image) through Image Editing & Mixing (Krea 2 Identity Edit, GPT Image 2, Flux 2, Qwen Image Edit) to a deep SDXL shelf with dozens of community fine-tunes.
The default, Krea 2 Turbo, is a great starting point: a distilled, few-step version of the Krea 2 image model, tuned for fast text-to-image and image-to-image with strong aesthetic quality. It runs in roughly 8 steps and accepts a guide image.
9Which models are included and which cost extra
Not every model is billed the same way, and the badge next to the model name tells you which is which.
Open-source models running on the Supernet carry the small green Sogni mark. These are rendered by the decentralized GPU network, they are the cheapest option, and they are the ones covered by a Sogni Unlimited subscription under fair use. This group is large: on the image side it includes Krea 2 Turbo, Chroma, Chroma Flash, Flux [schnell], Flux Krea, Qwen Image, Z-Image, Dark Beast and the entire SDXL shelf, and on the video side it includes LTX 2.3 and Wan 2.2.
Premium commercial models carry a Premium badge. These are proprietary third-party models called through their vendor APIs rather than rendered on the Supernet, so they are billed separately and need Premium Spark, which you top up with a card. In the video picker these are Seedance 2.0 by ByteDance and HappyHorse 1.1 by Alibaba; on the image side the same rule applies to proprietary editors such as GPT Image 2. Every model has a page with prices and API IDs in the model catalog.
10Compare models side by side
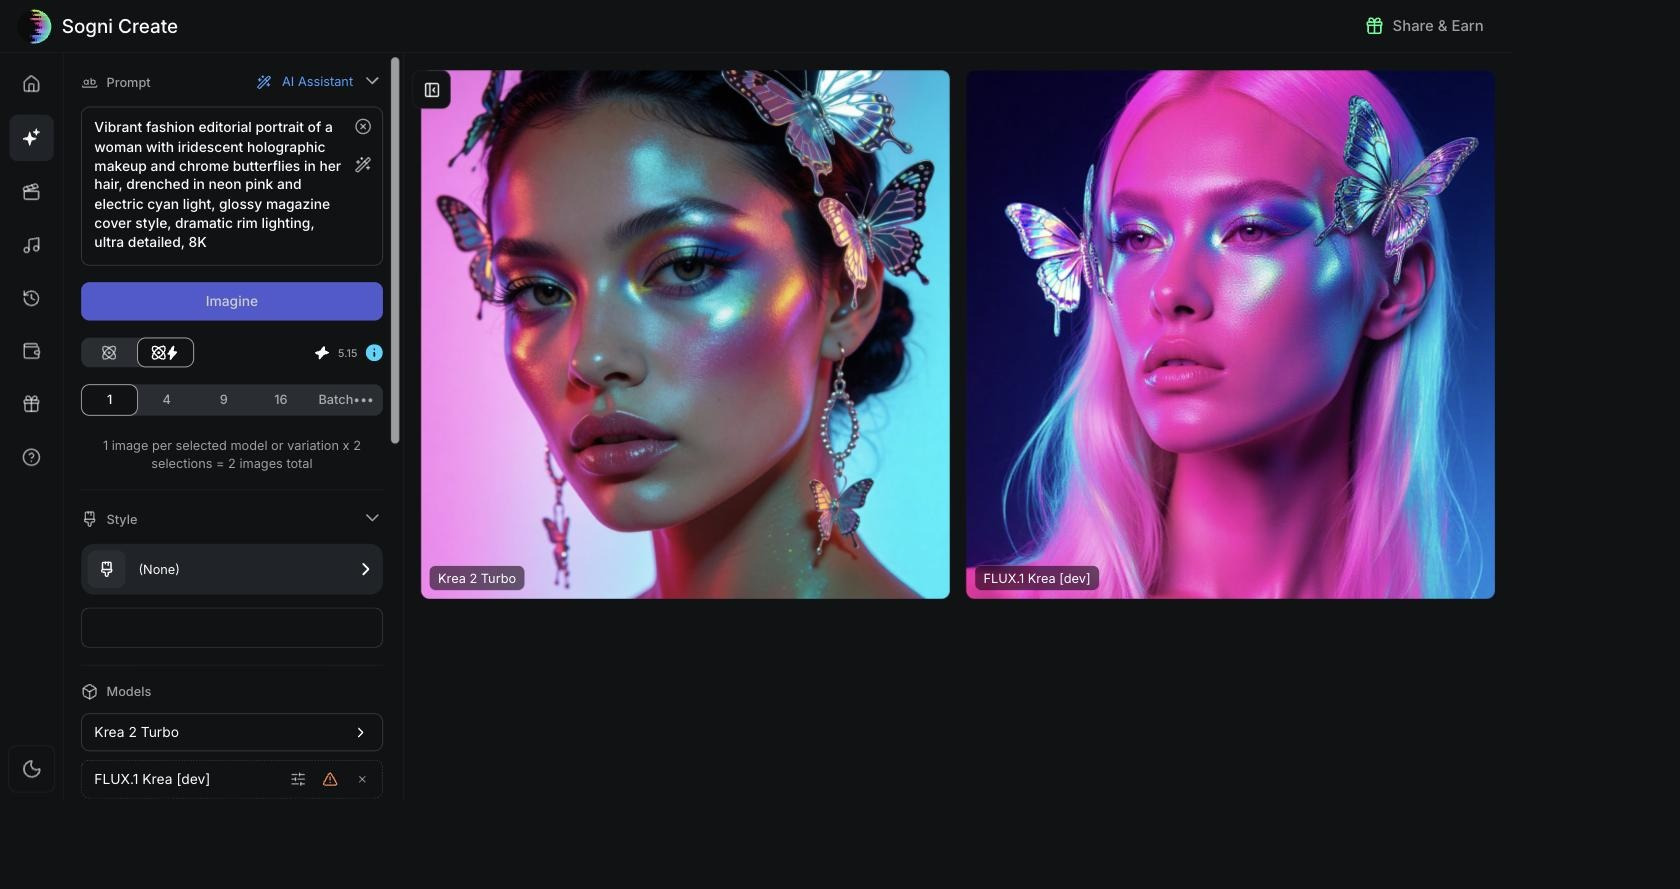
This is the feature that sets Sogni apart from most generators. Under the model field there is a + Compare another model / variation button. Add a second model (or a third, or a different version of the same model) and one click renders the same prompt with the same starting seed on all of them, side by side. No more generating separately and squinting between browser tabs.
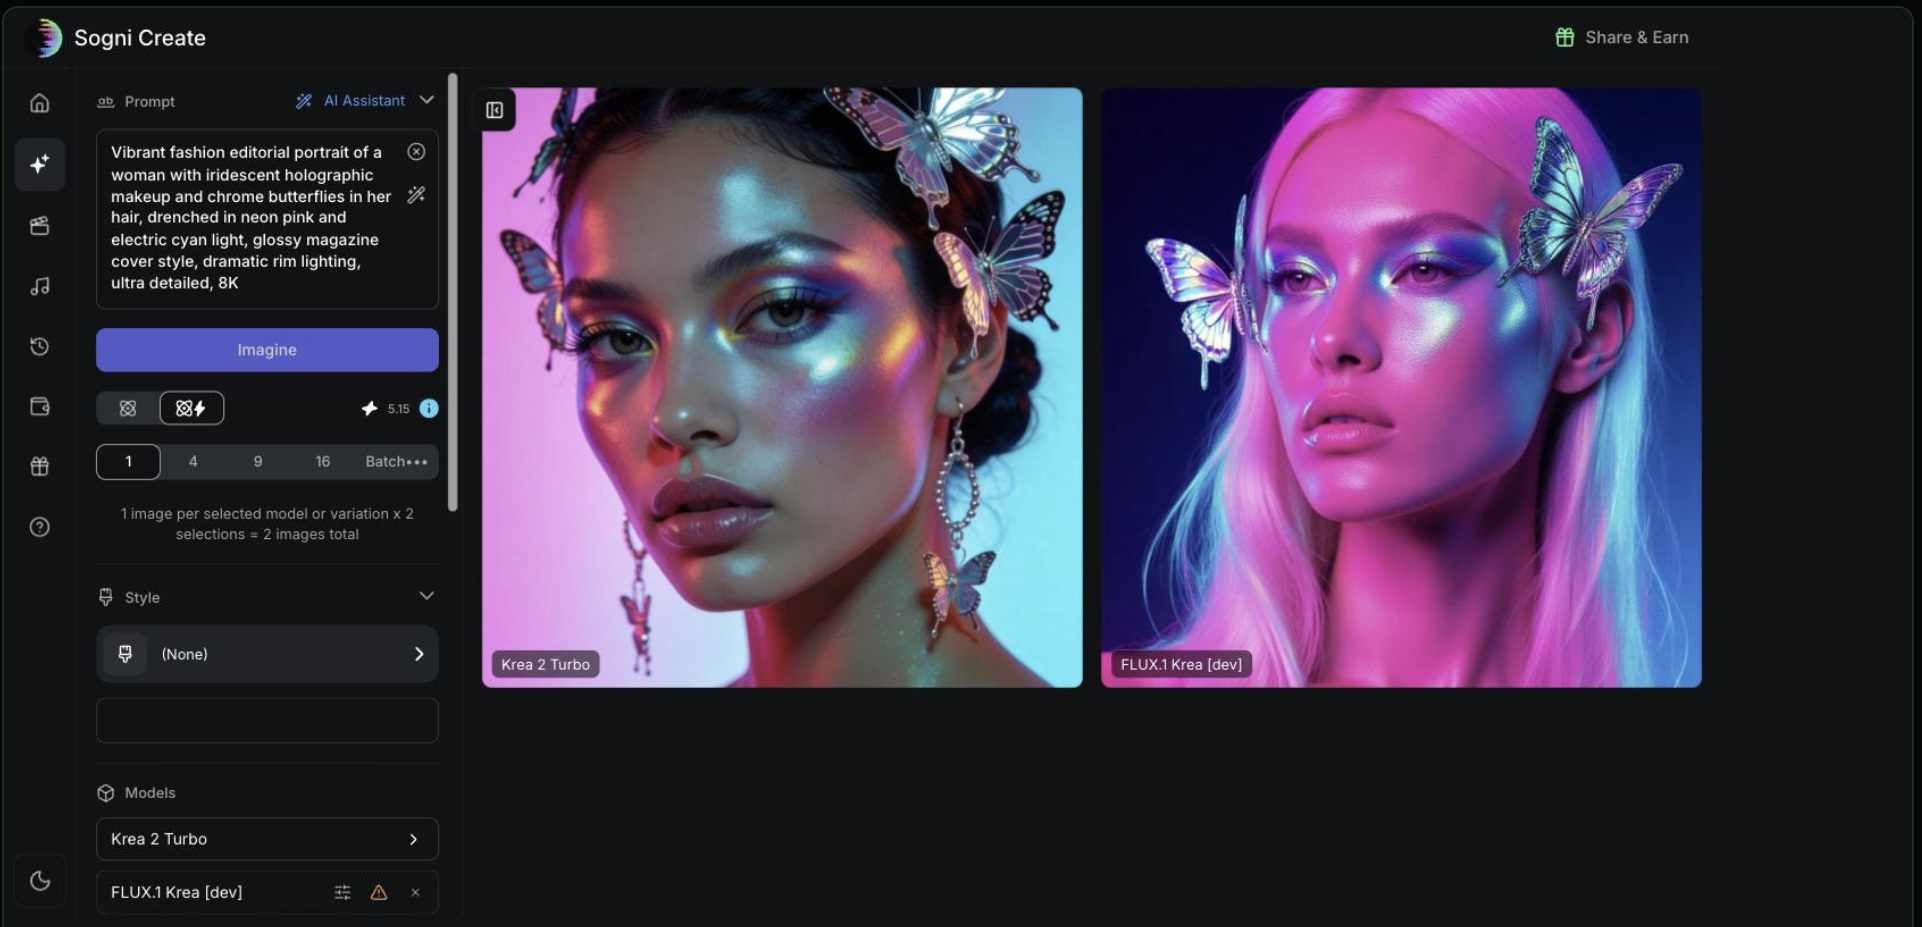
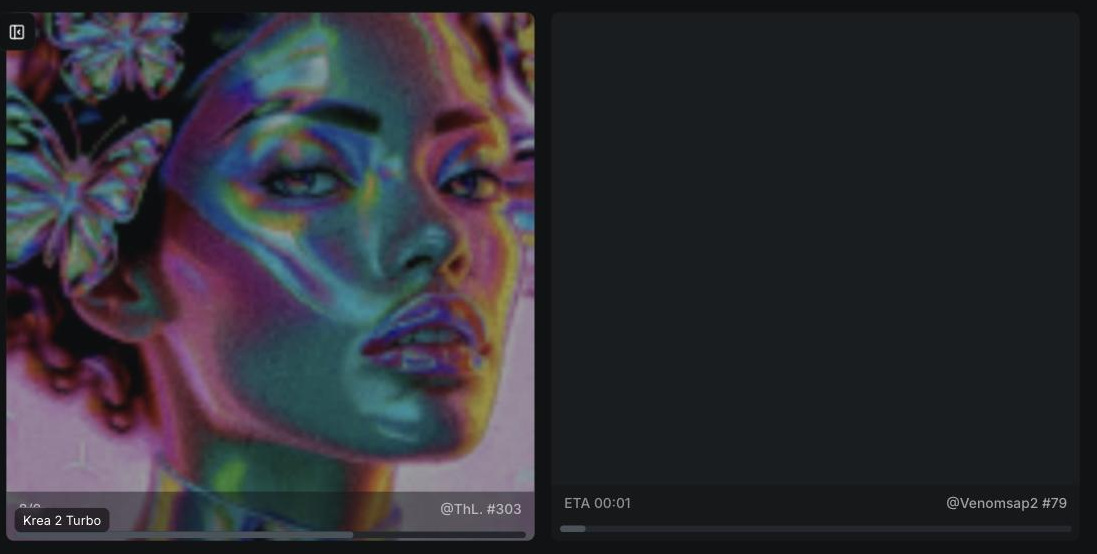
Here is the result: the identical prompt rendered by Krea 2 Turbo and FLUX.1 Krea [dev]. Each tile is labeled with the model that produced it, so the comparison is unambiguous.
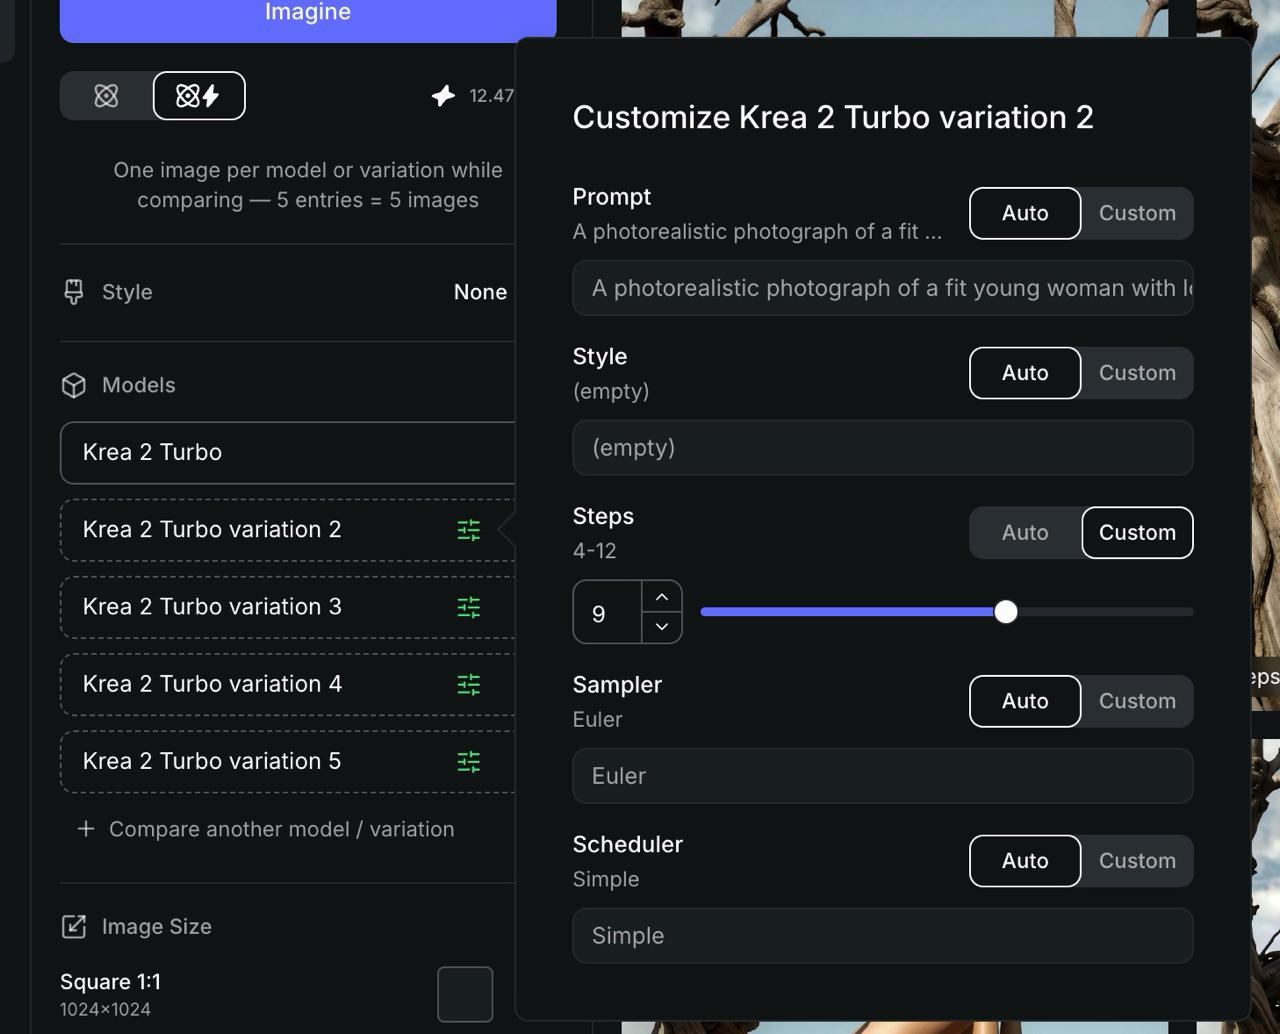
Give each model its own settings
Every compared model has a sliders icon next to its name that opens a Customize panel. There you can override the Prompt, Style, Steps, Sampler and Scheduler for that model alone, and depending on the model also Avoid (the negative prompt) and Guidance. Leave everything on Auto and each model uses its own recommended values, which is almost always what you want. The gray text under each label tells you the range that model actually accepts, and it varies a lot: one engine will list steps 1 to 40, another 20 to 50 with guidance 1 to 7. If any of those names are unfamiliar, step 11 explains what each one does.
11Size, seed, steps and the advanced settings
Below the model sit the precision controls. Scroll the panel to the bottom and you can see all of them at once.
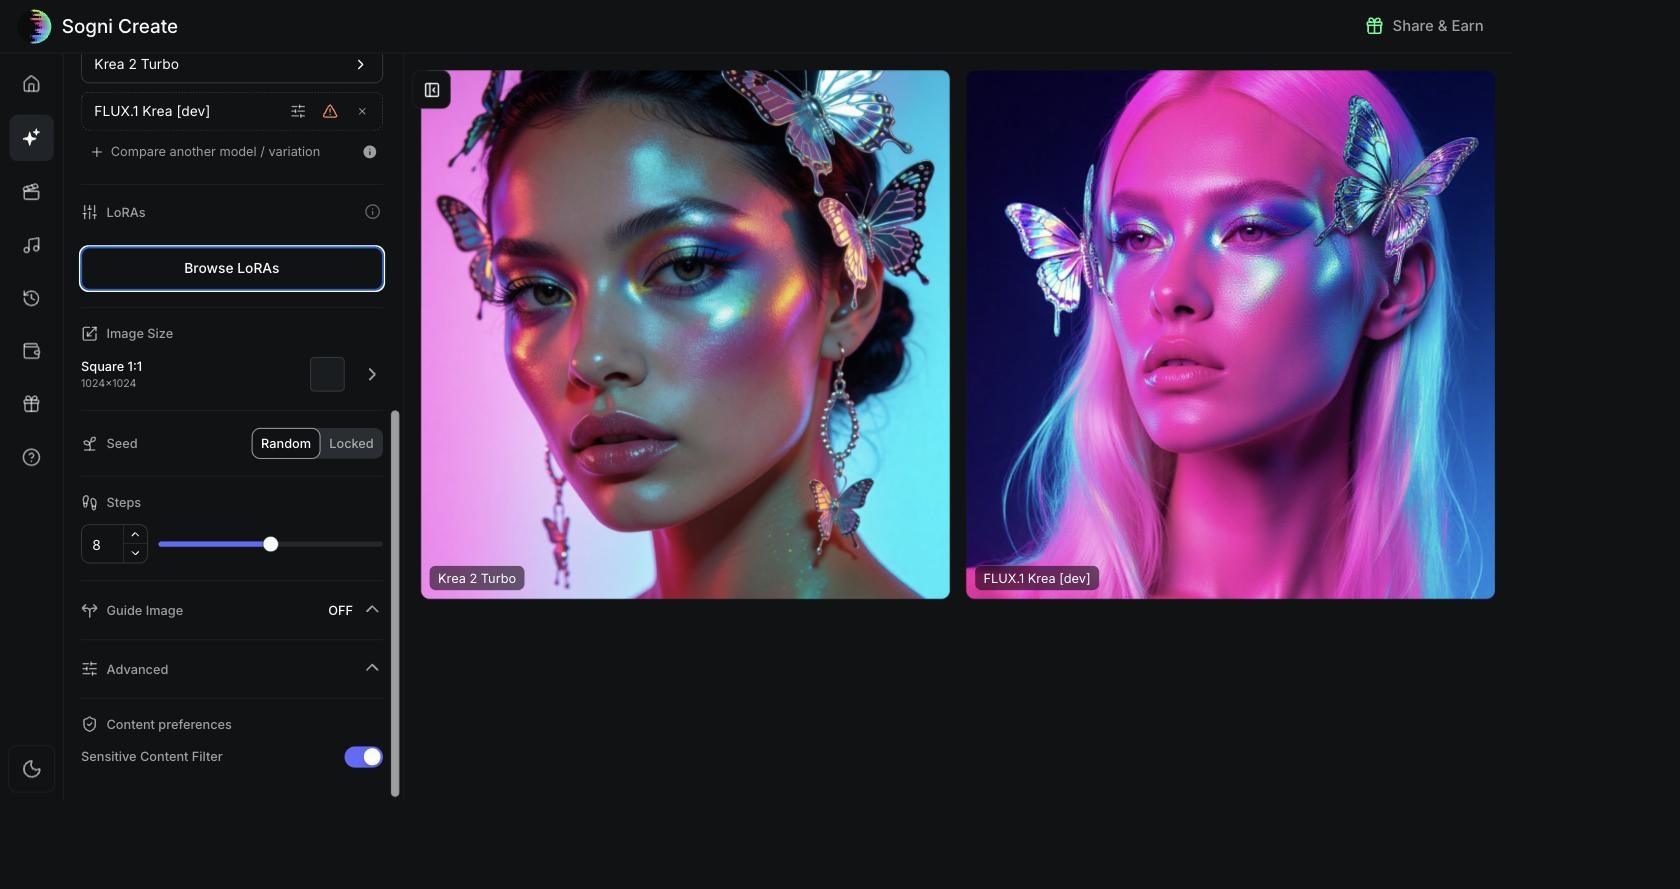
| Setting | What it does |
|---|---|
| LoRAs | Lightweight add-ons that teach the model a specific style, character or motif. "Browse LoRAs" opens the library, described just below. |
| Image Size | Aspect ratio and resolution. The default is Square 1:1 at 1024x1024; there is tall 9:16 for stories, wide 16:9 for covers, and more. |
| Seed | The randomness anchor. Random means every run is different. Locked makes results reproducible, which is what you want when testing small prompt changes on the "same" image. |
| Steps | Denoising iterations. Turbo models are built for low step counts, and 8 is the sweet spot for Krea 2 Turbo. More steps is not automatically better here. |
| Guide Image | Image-to-image mode. Add a reference and the generation follows its composition, with a PaintOver strength slider to control how much freedom the model has. Any result can become a guide image in one click (see step 13). |
| Content preferences | The Sensitive Content Filter, plus the setting that decides whether your work appears in the public "Made with Sogni" gallery. |
What the Advanced settings actually do
The Advanced section is the one place in the app where the labels assume you already know diffusion vocabulary. You can safely leave every one of these on its default, but here is what each is for, since these are also the settings you can override per model when comparing (step 10).
| Setting | Plain-language explanation |
|---|---|
| Guidance also called CFG | How strictly the model must obey your prompt. Low values give it creative freedom and more natural images; high values force literal compliance and, pushed too far, produce burned colors and stiff compositions. Each model lists its own sane range, often somewhere between 1 and 7. |
| Avoid negative prompt | What you do not want to see. Words here are actively pushed away from the result, which is the standard way to suppress recurring problems such as extra fingers, watermarks or text. |
| Sampler | The algorithm that turns noise into an image, step by step. Euler is the fast, predictable default. The DPM++ family tends to resolve fine detail better at higher step counts, and the ancestral and SDE variants inject extra randomness, so they give more varied results run to run. Changing the sampler changes the look even with an identical prompt and seed. |
| Scheduler | How the denoising work is spread across those steps, in other words whether the model does the heavy lifting early or late. Simple and Normal are safe defaults; SGM Uniform and Beta shift where the detail lands and pair well with low step counts. |
| VAE Selection | The decoder that converts the model's internal representation into actual pixels. It mostly affects color and fine texture. Leave it on the model's own VAE unless you have a specific reason. |
| Preview Count | How many intermediate previews you see while the image renders. Purely cosmetic, it does not change the result. |
| Format | JPG for smaller files, PNG when you need lossless quality or transparency. |
The LoRA library
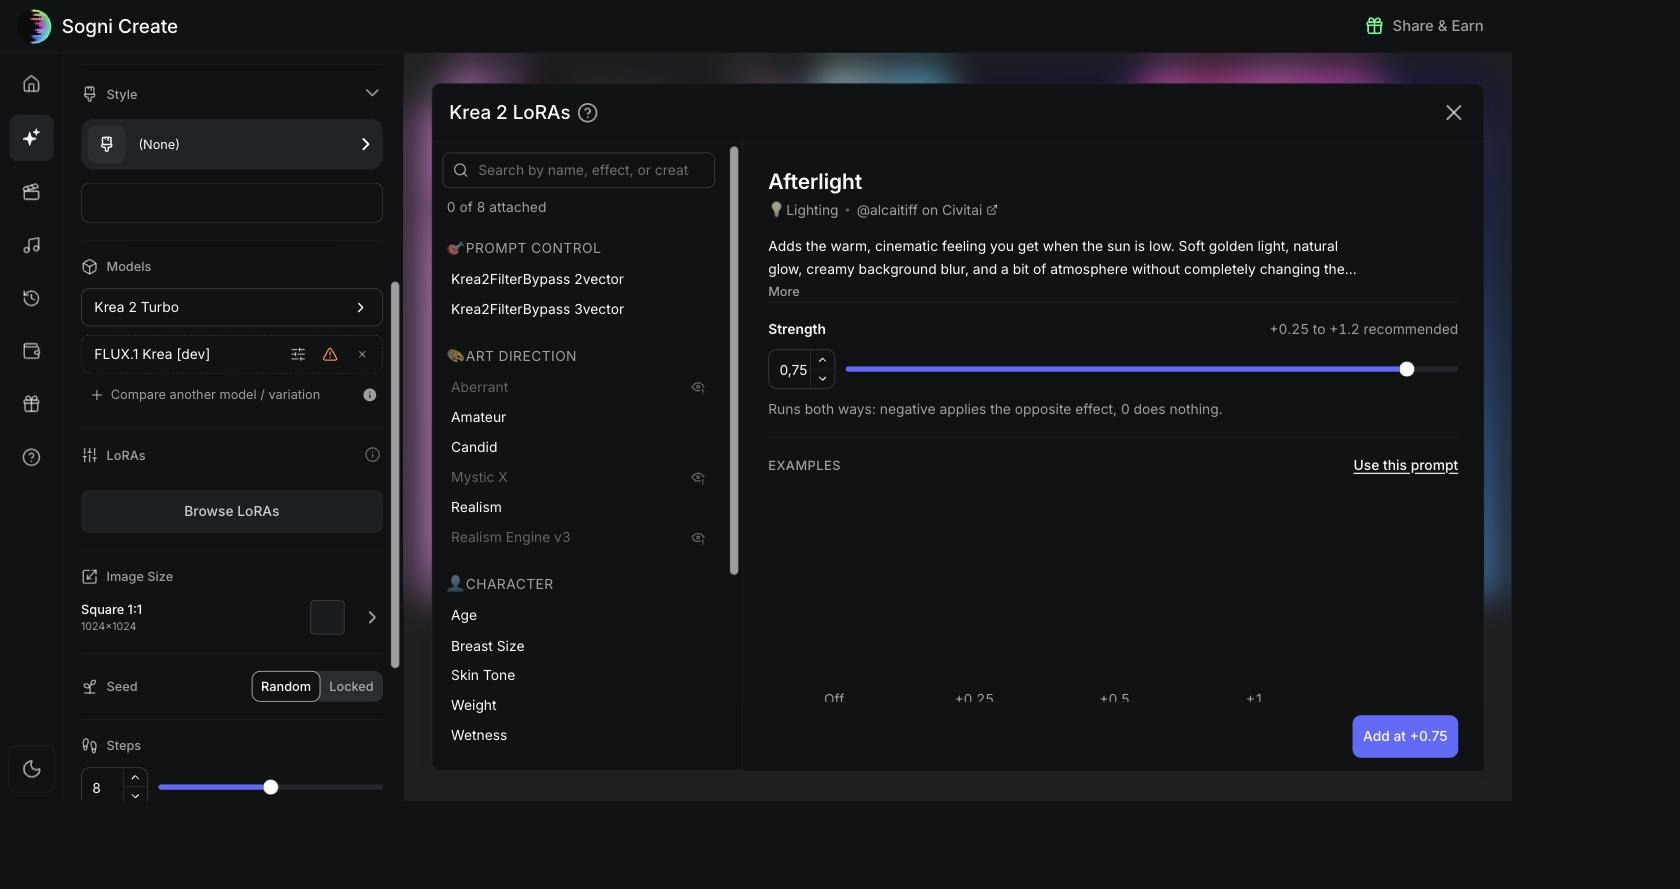
Click Browse LoRAs and a library opens that is worth exploring on its own. LoRAs are grouped by what they do: Prompt Control, Art Direction (Aberrant, Amateur, Candid, Mystic X, Realism, Realism Engine) and Character (Age, Breast Size, Skin Tone, Weight, Wetness), with more categories further down. Each one shows who made it, a plain-language description of the effect and a link to its Civitai page.
The important control is Strength. Every LoRA comes with a recommended range, for example +0.25 to +1.2, and the slider runs both ways: a negative value applies the opposite effect and zero does nothing. So a "Realism" LoRA at minus strength pushes the image away from realism. You can attach several at once, the counter at the top of the list tracks how many are active, and the Use this prompt link next to the examples loads the prompt that produced the sample images.
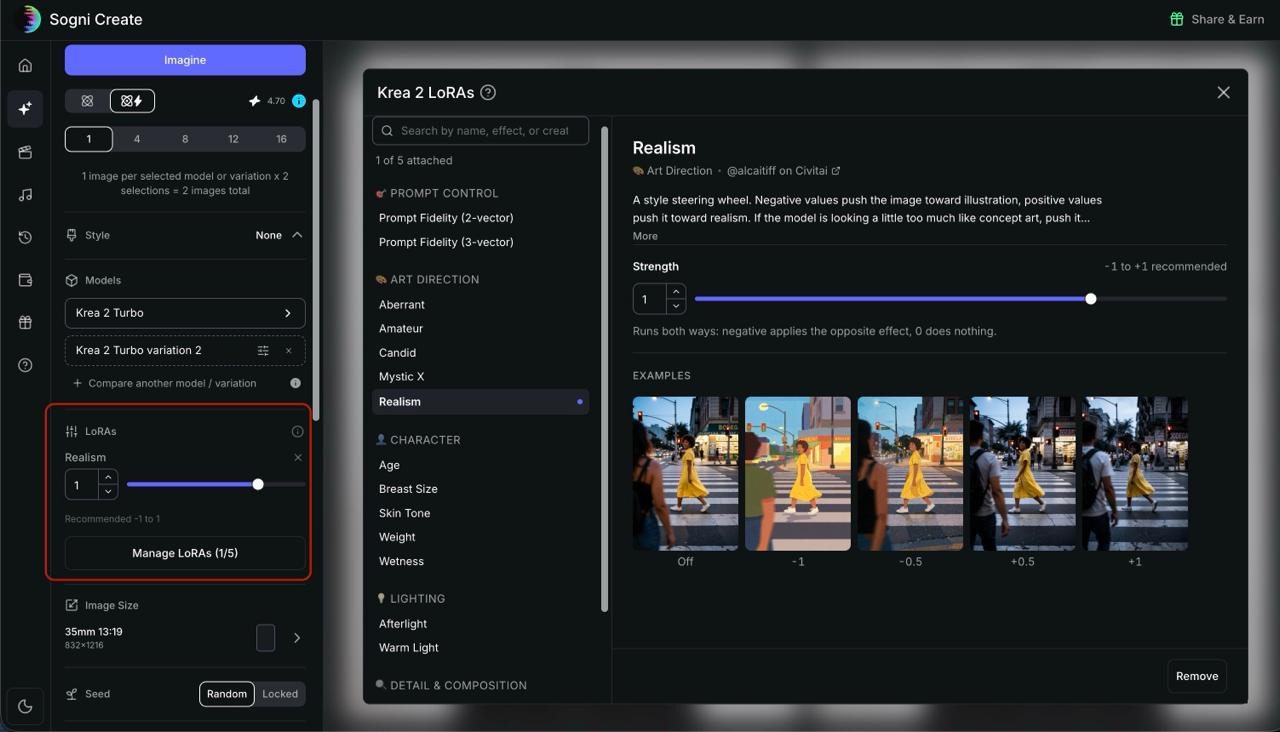
You do not have to guess what a given strength will look like, because the Examples row shows the same scene rendered across the whole slider. Below, the Realism LoRA is displayed at Off, then at -1, -0.5, +0.5 and +1, and you can watch the shot travel from flat illustration at the negative end to a fully photographic frame at the positive end. That is what "a style steering wheel" means in practice.
Once a LoRA is attached it appears in the Create panel with its own strength slider and the recommended range printed underneath, so you can adjust it without reopening the library. The button below turns into Manage LoRAs with a counter such as 1/5, which tells you how many are active and how many the model will accept at once. Inside the library, the attached one is marked with a dot in the list and the button on the selected LoRA changes from Add to Remove.
12Hit Imagine
Click Imagine and the workspace fills with tiles, one per image in your batch. Each tile shows a live step counter, an ETA and the name of the Supernet worker rendering it. You can cancel at any point while it runs.
A few seconds later the batch is done. The neon prompt with the Magic Neon style on Krea 2 Turbo delivered four variants: one idea, four takes on composition and color.
13Working with a finished image
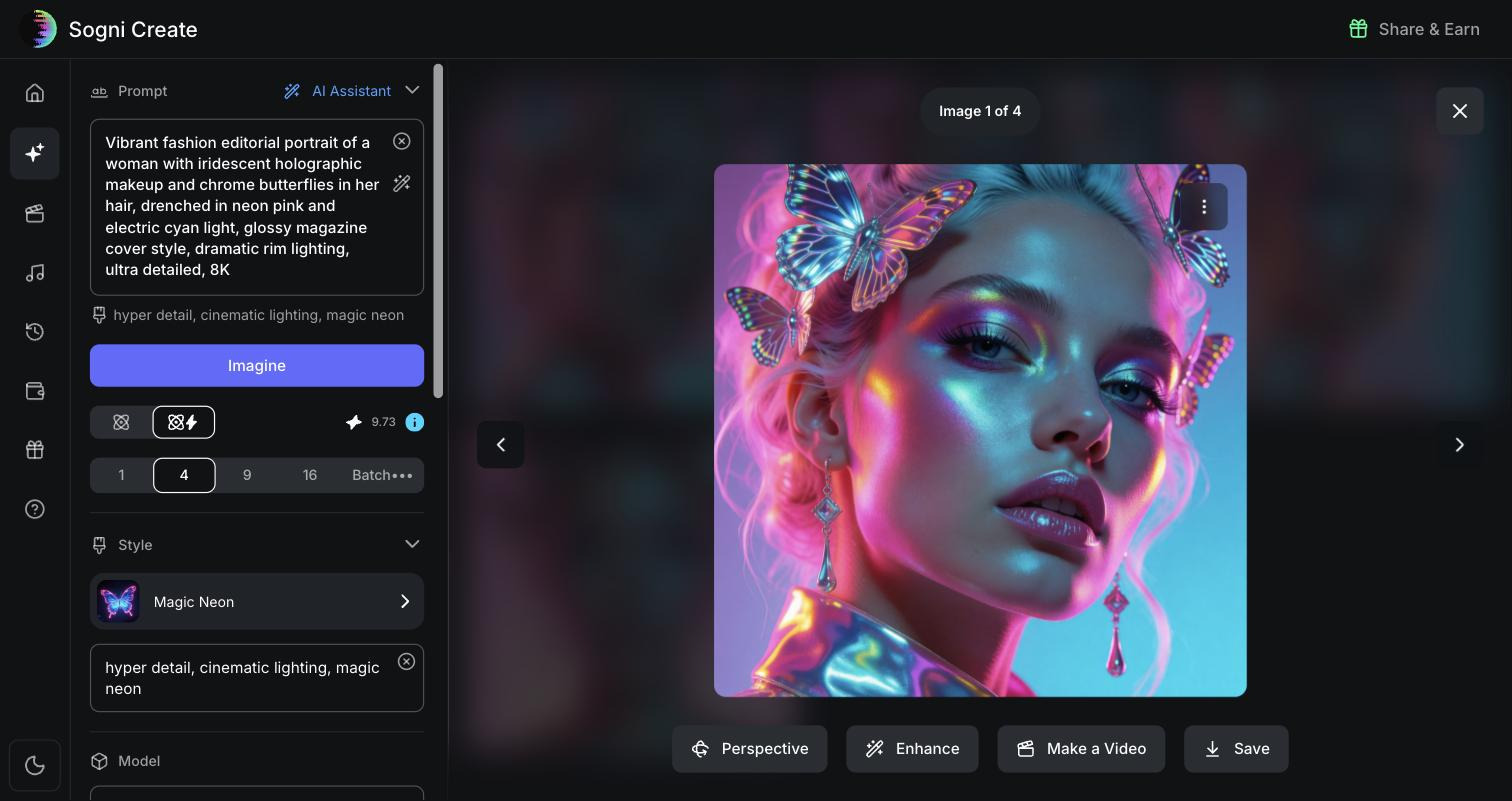
Click an image to open the full-screen viewer. The action bar covers the essentials: Perspective, Enhance, Make a Video and Save, and the side arrows flip through the batch.
The three-dot menu in the corner of the image holds the full toolkit. Every entry is a different way of continuing from the picture you just made.
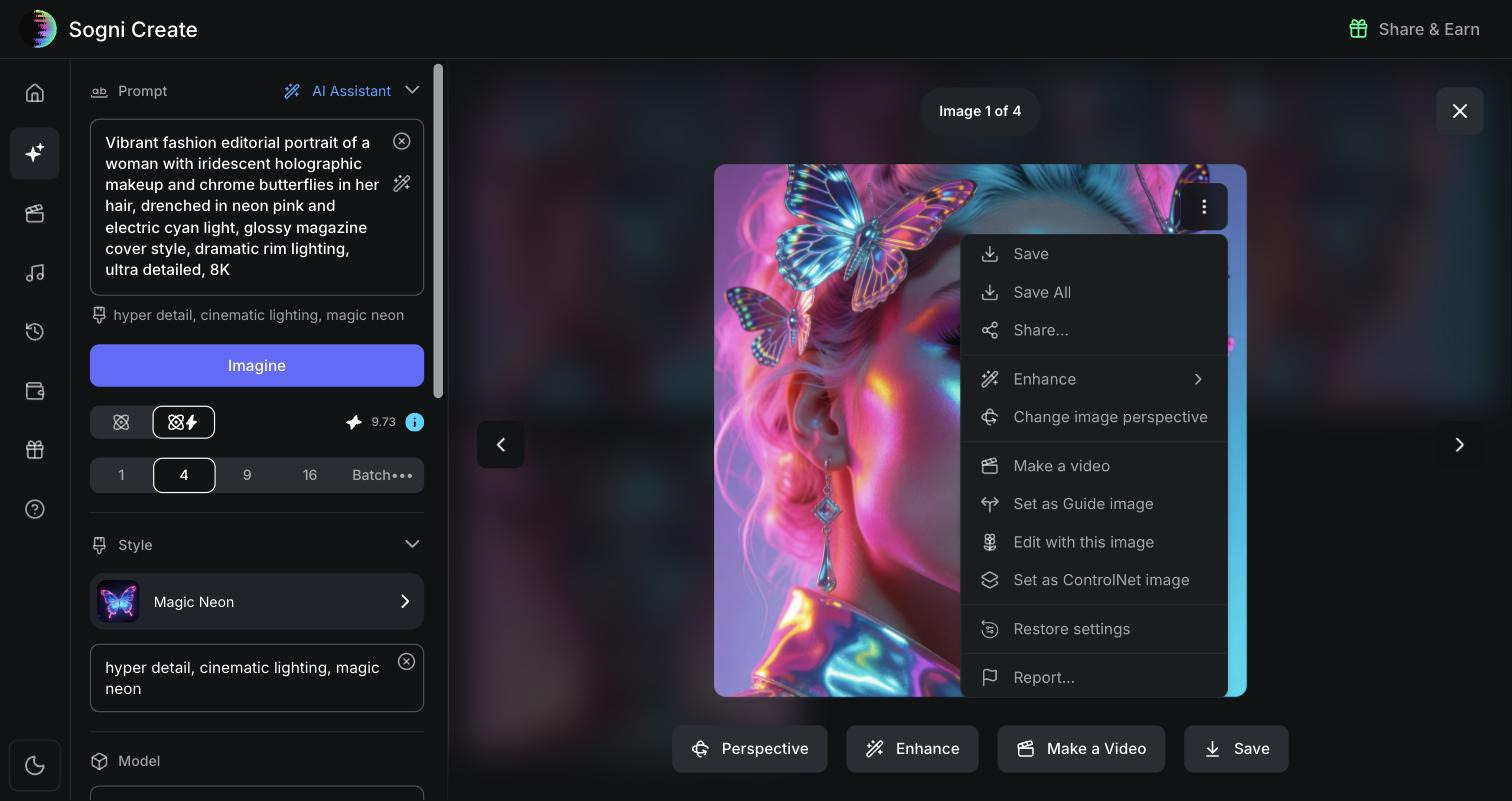
| Menu item | What it does |
|---|---|
| Save / Save All | Downloads this image, or the entire batch in one go, to your computer. Use this early: see the retention warning in step 16. |
| Share | Creates a shareable link to the result so you can post it or send it to someone without downloading first. |
| Enhance | Upscales and refines the image, adding resolution and detail. The submenu arrow lets you choose the enhancement level. |
| Change image perspective | Re-renders the same scene from a different camera angle while keeping the subject and style, which is the quickest way to get a second shot of the same character or product. |
| Make a video | Sends the image straight into Image to Video, so your still becomes an animated clip without leaving the flow. |
| Set as Guide image | Feeds the image back into the Create panel as the guide for your next generation, so new prompts inherit its composition. This is how you iterate on a look instead of starting over. |
| Edit with this image | Opens the image in Image Editing, where you can inpaint, extend or restyle it with a text instruction. |
| Set as ControlNet image | Uses the image as a structural control reference, so the next generation follows its pose, edges or layout much more strictly than a guide image does. |
| Restore settings | Reloads the exact prompt, style, model, seed and every setting that produced this image. Perfect when you find an old favorite and want to make more like it. |
| Report | Flags the result to the Sogni team if something has gone wrong with it. |
14Video: models and workflows
Sidebar > Video
The four video models
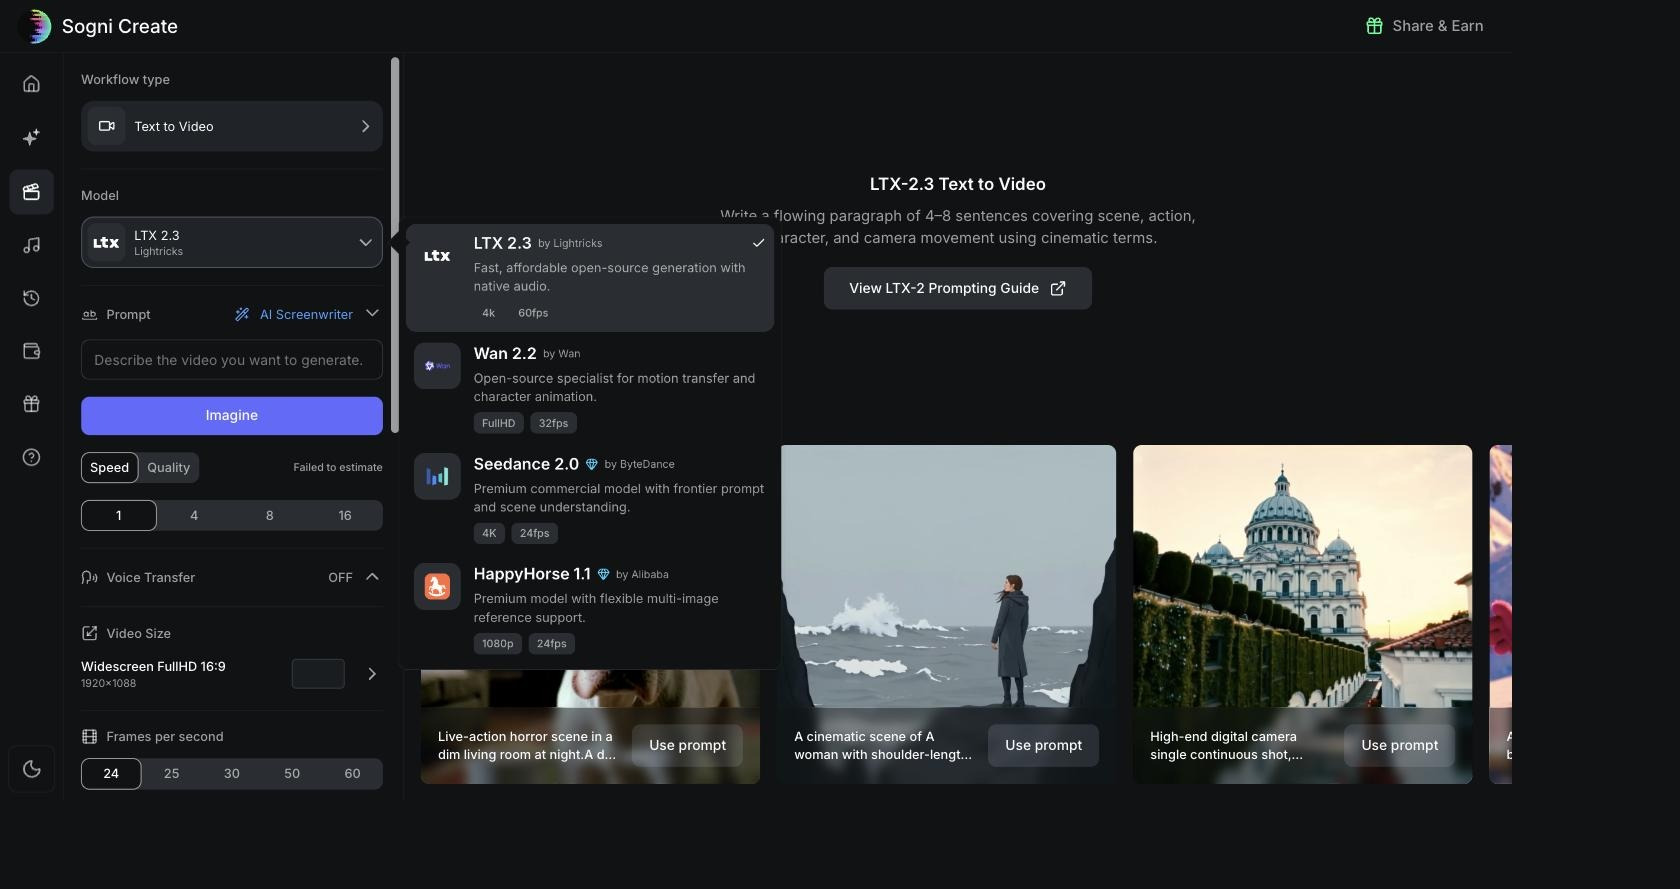
Open the Model selector in the Video section and you get four engines, each with a different strength.
| Model | Best at | Output |
|---|---|---|
| LTX 2.3 Supernet by Lightricks | The default and the best all-rounder: fast, affordable open-source generation with native audio, so your clip arrives with sound already on it. Covered by the Supernet. | up to 4K, 60fps |
| Wan 2.2 Supernet by Wan | The open-source specialist for motion transfer and character animation. Reach for it when a character needs to move convincingly. Covered by the Supernet. | FullHD, 32fps |
| Seedance 2.0 Premium by ByteDance | Premium commercial model with frontier prompt and scene understanding. The one to use when a complex, multi-beat scene has to be read correctly. | 4K, 24fps |
| HappyHorse 1.1 Premium by Alibaba | Premium model with flexible multi-image reference support, so you can feed it several references and keep a consistent character or product. | 1080p, 24fps |
The workflows
The Workflow type selector at the top of the panel switches between six ways of making a video. The three core ones are text to video, image to video and video to video, and the rest are specialized variants of the last.
| Workflow type | What it does |
|---|---|
| Text to Video | Write a prompt to turn your ideas into a video. |
| Image to Video | Animate a starting image into a video while preserving its look. |
| Sound to Video | Generate an audio-reactive video from a sound clip. |
| Reference to Video | Blend multiple reference images into a single video. |
| Motion Transfer | Transfer motion from a driving video to your character or image. |
| Replace Subject | Keep the original scene and swap the subject for your character. |
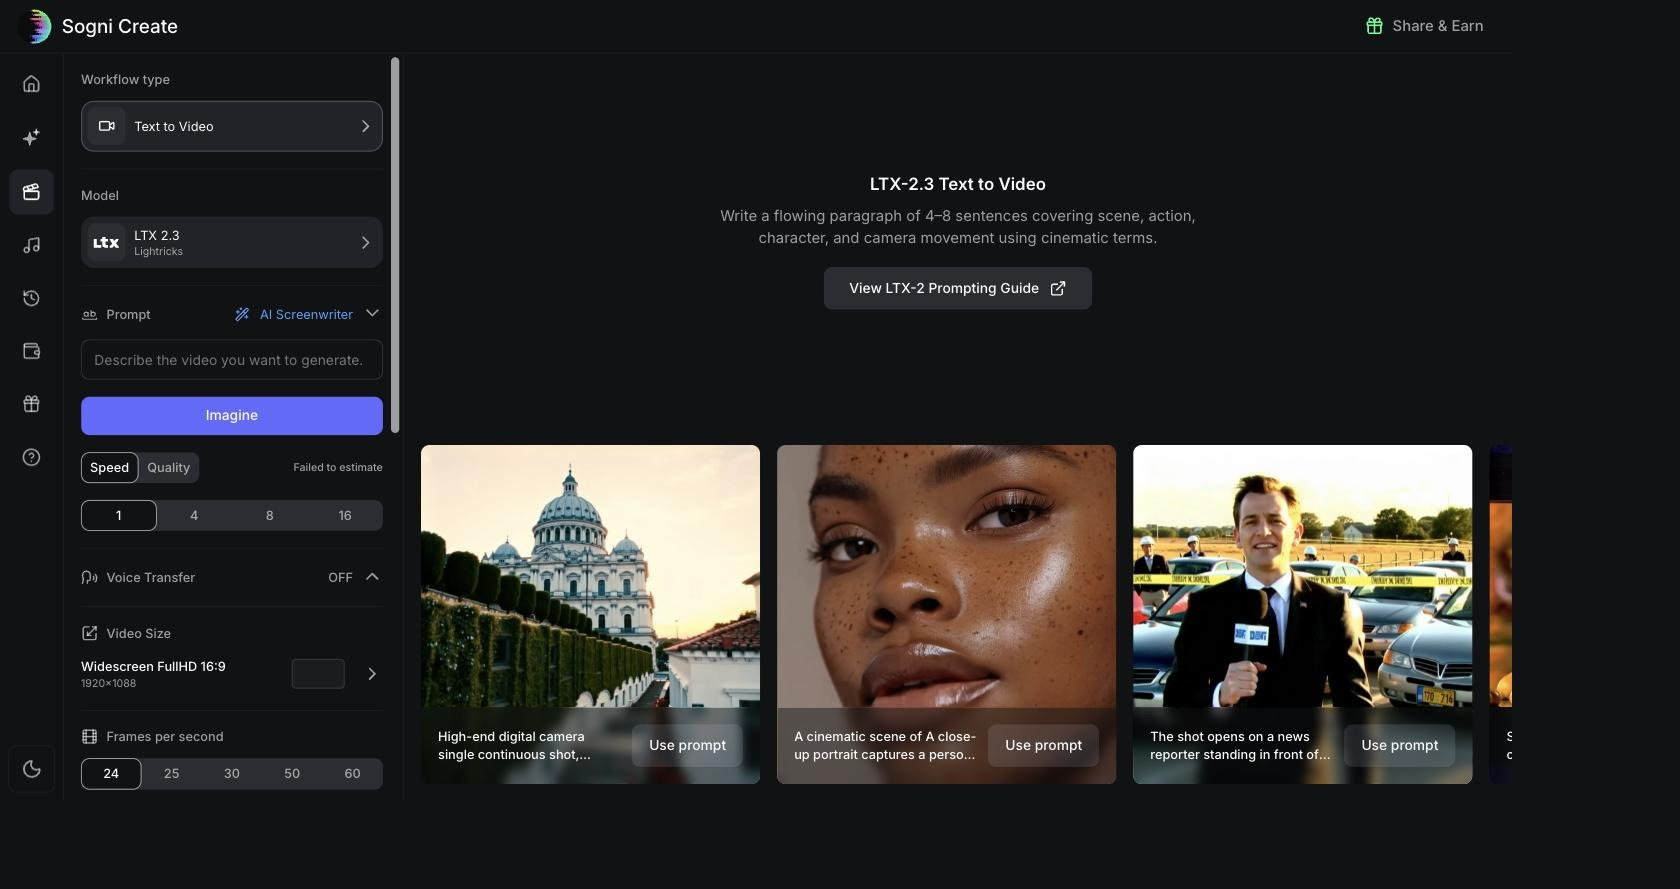
Text to Video (T2V). You start from nothing but words. Write a flowing paragraph of four to eight sentences covering scene, action, character and camera movement in cinematic terms, and the model builds the whole shot. This is the most creative and the least predictable of the three: you get total freedom over the world you describe, but no control over what the subject looks like. Use it for establishing shots, abstract or stylized content, and anything where no specific person or product has to appear. The AI Screenwriter toggle rewrites your rough idea in proper cinematic language, and the header links to the LTX-2 Prompting Guide.
Image to Video (I2V). You start from a still, and the model animates it while preserving its look and composition. This is the workhorse for brand and social content because the first frame is already exactly what you approved: generate the perfect image in Create, then animate it. Character, color and framing stay locked, and the prompt only describes the motion. If you want your video to look like a specific thing, start here rather than with text to video.
Video to Video (V2V). You start from an existing clip and change something about it while keeping its timing and movement. In Sogni this splits into purpose-built workflows: Motion Transfer takes the motion from a driving video and applies it to your character or image (a dance, a walk cycle, a gesture, performed by someone else); Replace Subject keeps the original scene, lighting and camera move and swaps only the subject for your character; Reference to Video blends several reference images into one video; and Sound to Video drives the visuals from an audio clip, which is what you want for music-reactive pieces.
The rest of the panel mirrors Create: a prompt box, a Speed / Quality toggle, batch size, the live Spark estimate, Voice Transfer (drop in an audio file to carry a voice into the clip), Video Size, Frames per second (24, 25, 30, 50 or 60), Duration, Steps, Guidance, Sampler, Seed and a Generate Audio switch for models that produce native sound.
15Music: the full studio
Sidebar > Music
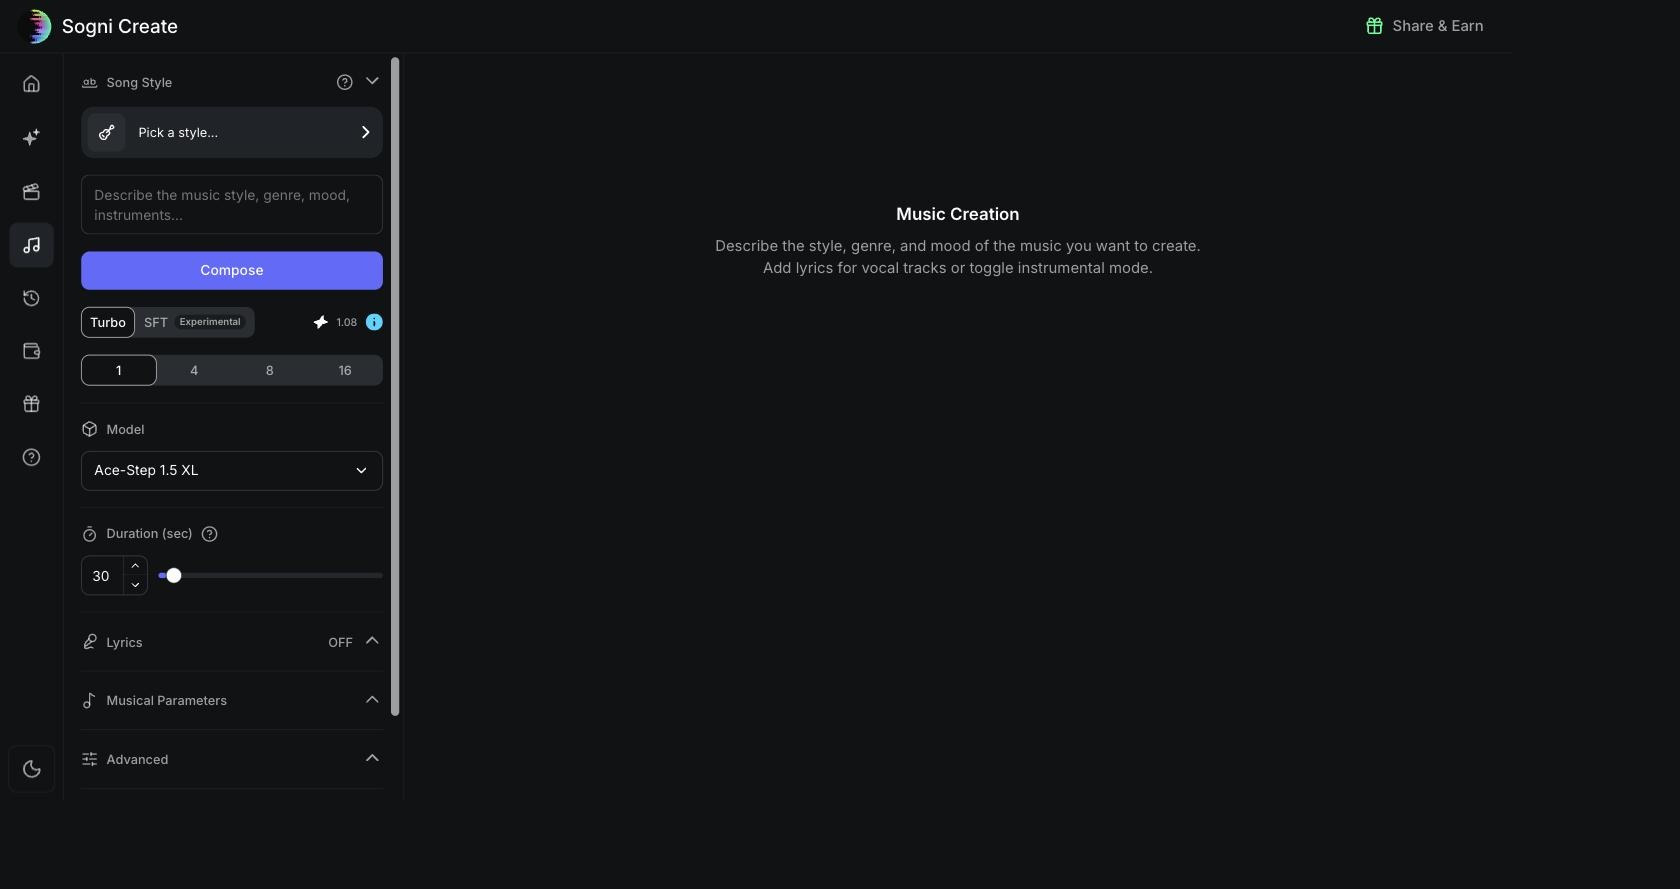
The music studio runs on Ace-Step 1.5 XL (with Ace-Step 1.5 also selectable) and it is a proper studio rather than a single prompt box. A full track costs on the order of one Spark, which makes experimenting essentially free.
Song Style presets
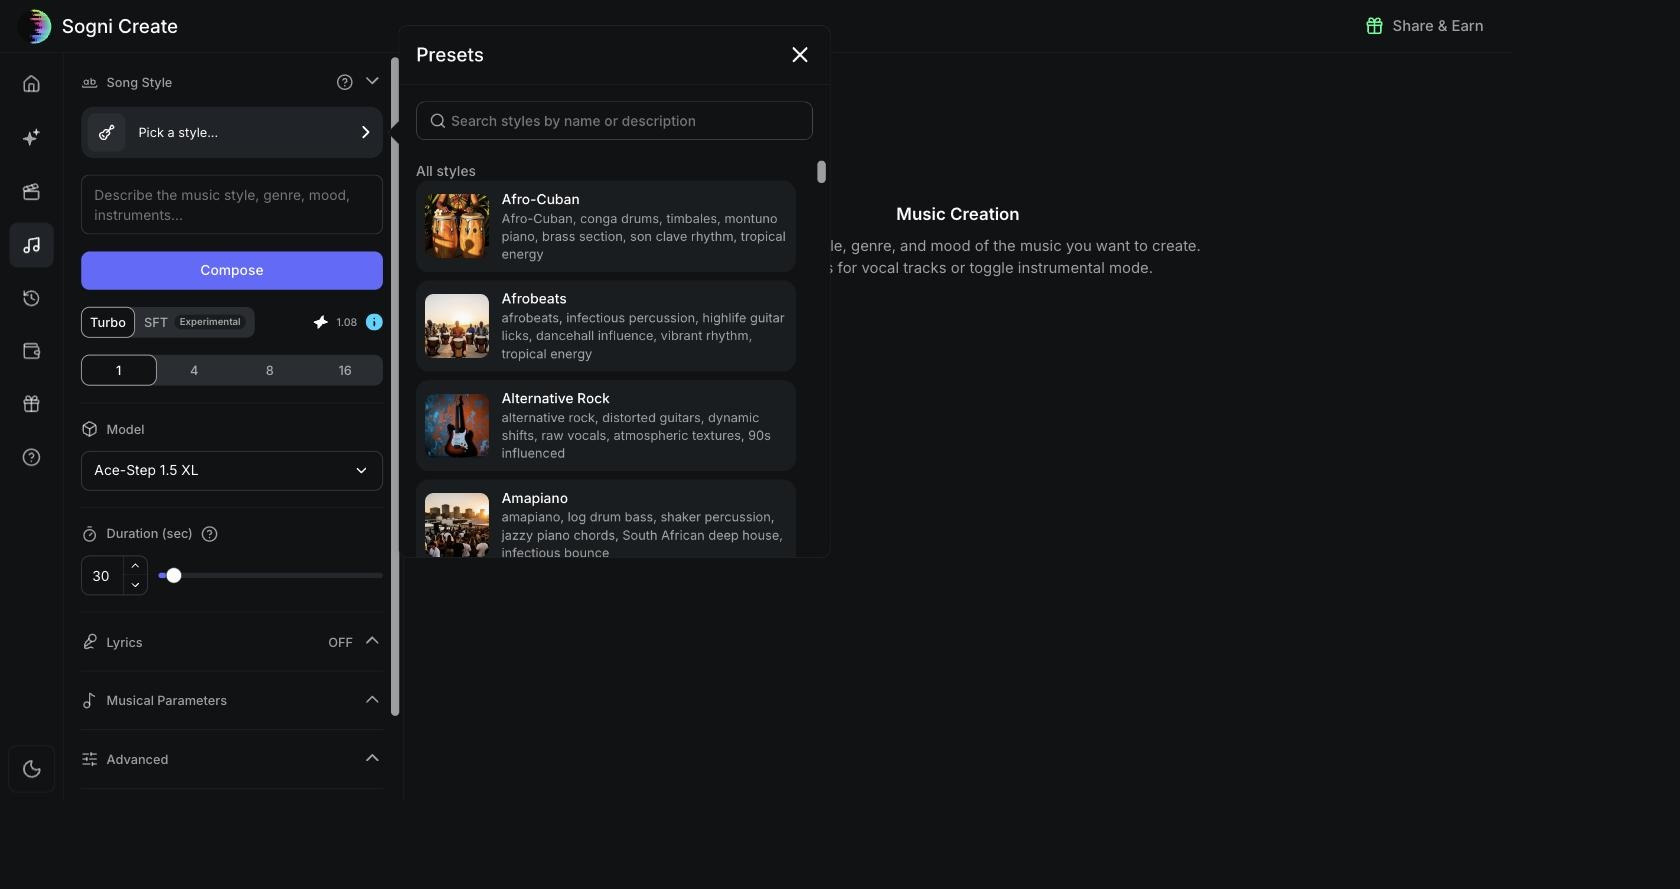
Rather than guessing at genre vocabulary, open Pick a style and browse the preset library. Each preset is a genre with its production recipe spelled out, for example Afro-Cuban ("conga drums, timbales, montuno piano, brass section, son clave rhythm, tropical energy"), Afrobeats, Alternative Rock, Amapiano, Ambient Electronic, Bedroom Pop, Cloud Rap or Dance Pop. Selecting one fills the description box with those keywords, which you can then edit freely.
What you can control
| Control | What it does |
|---|---|
| Turbo / SFT | Quality mode. Turbo is the fast default; SFT is an experimental fine-tuned mode for a different character of output. |
| Batch size | 1, 4, 8 or 16 tracks from the same brief, so you can pick the take you like instead of regenerating one at a time. |
| Duration | Track length in seconds, set with a slider or typed directly. |
| Lyrics | Switch on to write your own lyrics for a vocal track, or leave it off for an instrumental. There is a Language selector with more than fifty options, from English, Spanish and Polish through Japanese, Korean and Hindi to Latin and Sanskrit, so the vocal is sung in the language you intend. |
| Musical Parameters | Real musical direction rather than vibes: Tempo, Time Signature (2/4, 3/4, 4/4 or 6/8) and Key, with every major and minor key available if you need the track to sit alongside existing material. |
| Advanced | Creativity (how far the model strays from the brief), Steps, Shift, and the output Format: MP3, WAV or FLAC. Choose WAV or FLAC if the track is going into an edit. |
The result
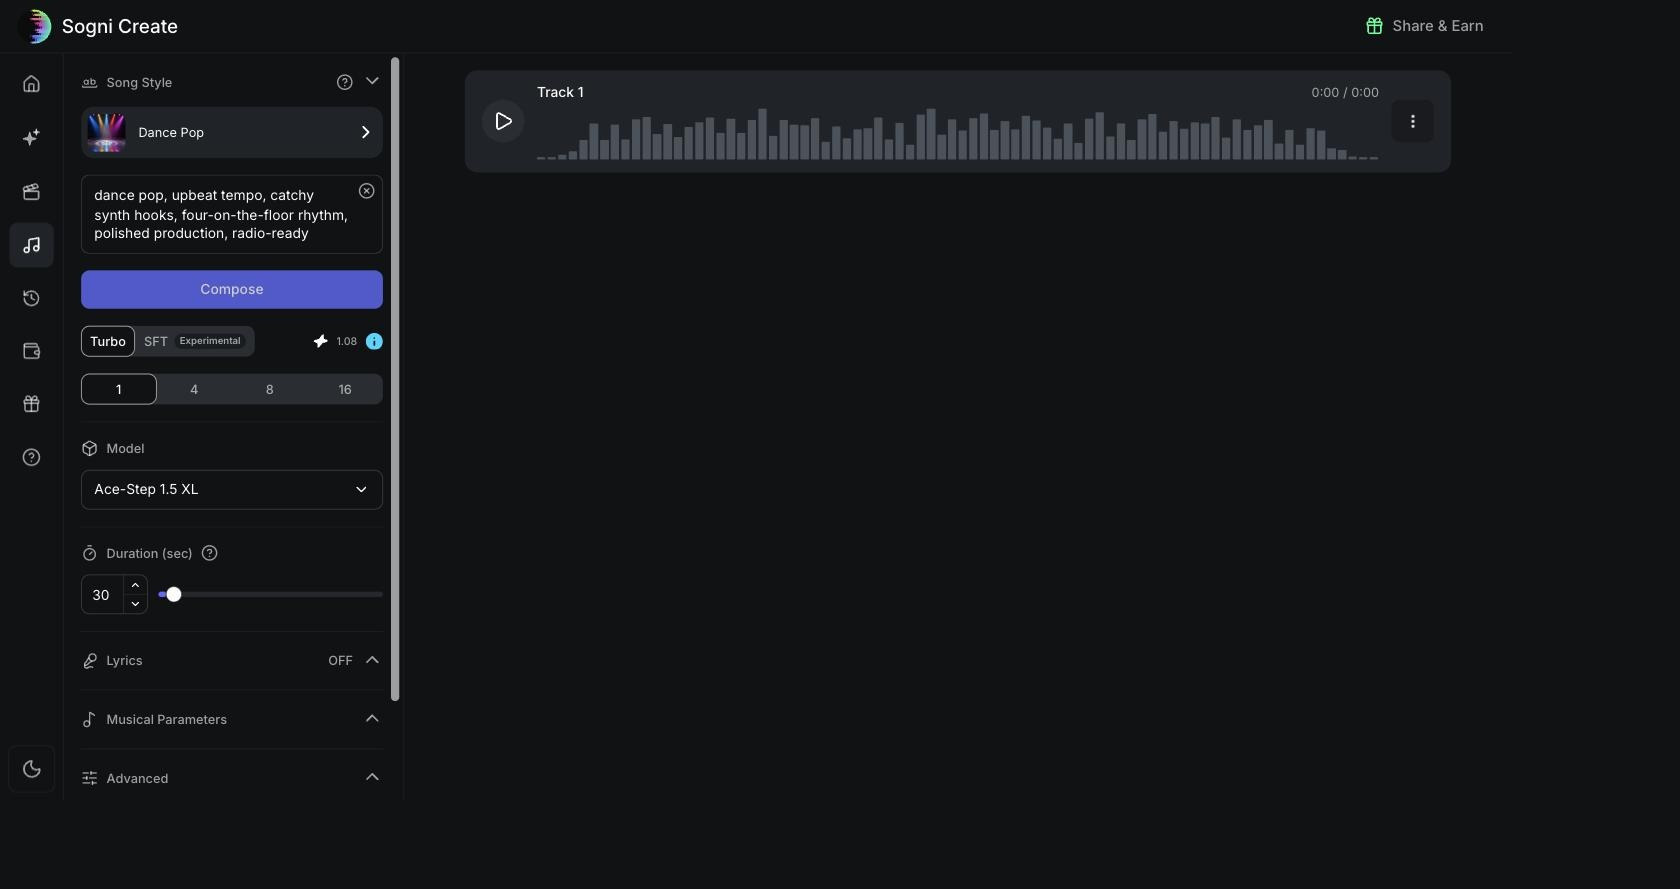
Press Compose and the track renders on the Supernet just like an image, with an ETA and the worker name on the tile. When it is done you get an inline player with a waveform, so you can listen immediately, scrub through the track and download it from the three-dot menu without leaving the page.
16Recent Projects
Sidebar > Recent Projects
Every generation, whether image, video or music, lands in Recent Projects, grouped by model and creation time. The info icon shows generation details and the trash icon removes a project.

17Spark, wallet and Sogni Unlimited
Sidebar > Wallet
Generations run on Spark Points, the platform's compute credits. The Wallet page shows your balance (settled, pending credits and pending debits), a SOGNI Token / Spark Points switch, an on-chain wallet on the Base and Etherlink networks for sending and receiving tokens, your full account history line by line, your creator Leaderboard ranking, and a Discord link. Buy Premium Spark tops up by card, and Premium Spark is what unlocks the Premium-badged models from step 9.
If you create a lot, Sogni Unlimited removes per-render costs entirely: unlimited fair-use generation across image, video, music and LLM, from $20 a month, with Unlimited Pro from $50 a month. Full tiers are on the pricing page.

18Rewards and Share & Earn
Sidebar > Rewards, or the "Share & Earn" button in the header
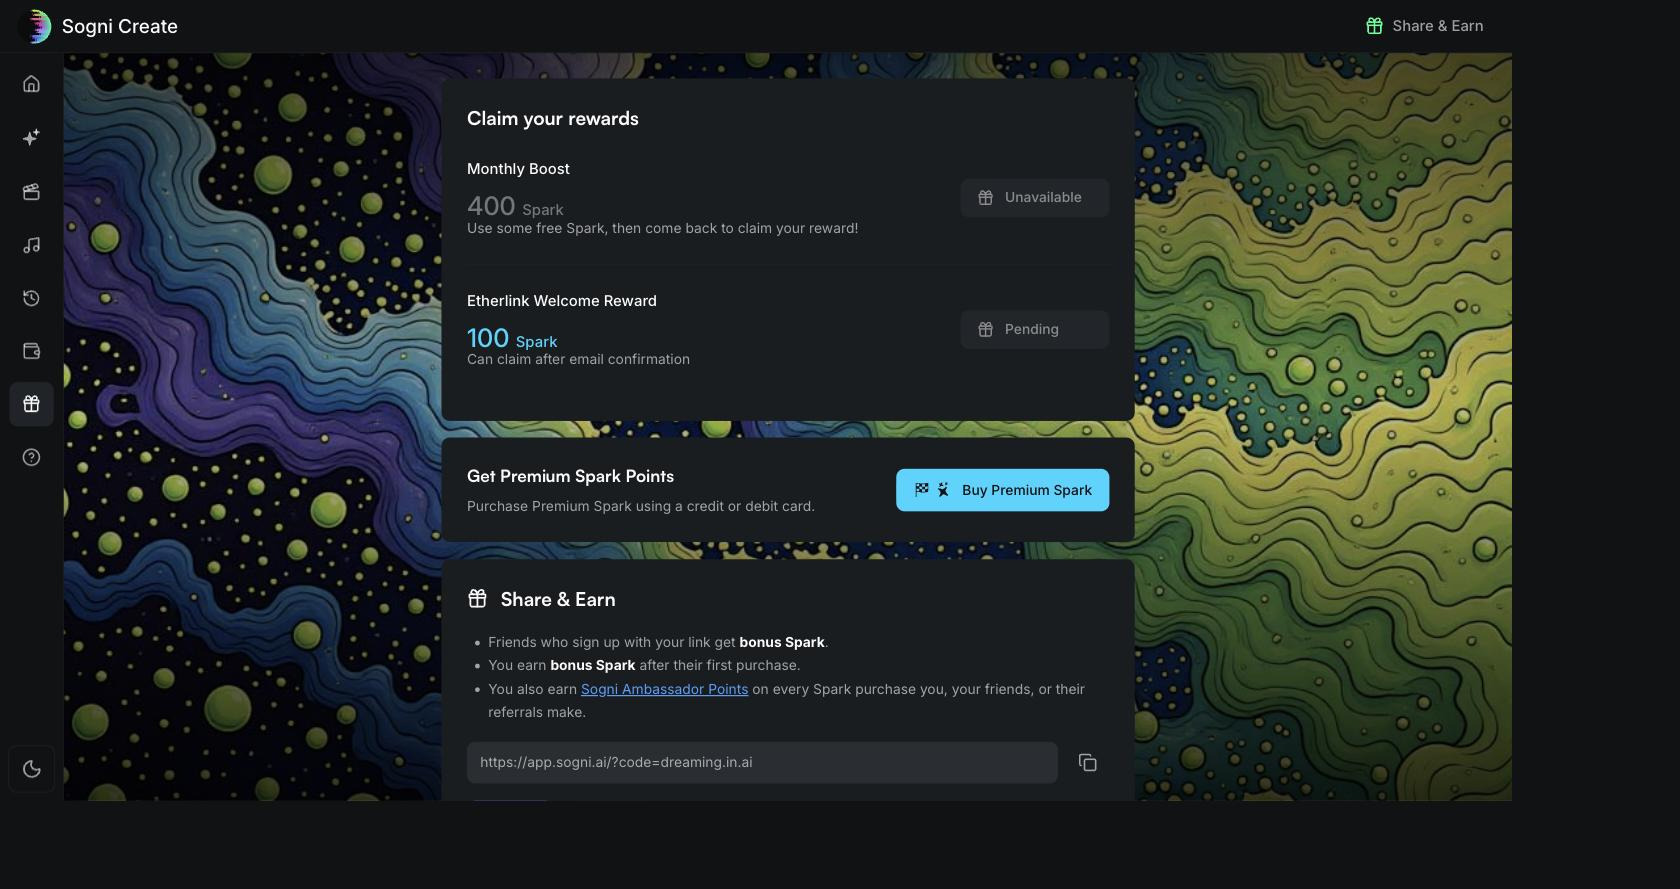
The Rewards page is free Spark. There is a Monthly Boost of 400 Spark (spend some free Spark first, then come back and claim it), a welcome reward of 100 Spark on Etherlink after you confirm your email, card top-ups through Buy Premium Spark, and the Share & Earn referral program. Friends who sign up with your link get bonus Spark, you earn bonus Spark after their first purchase, and you collect Sogni Ambassador Points on every Spark purchase made anywhere in your referral network. Your personal link and a ready-made post are both there to copy.
FAQ
Do I need to pay to start?
How do I know what a generation will cost?
What is the difference between the two processing icons?
Which models cost extra?
Text to video or image to video?
Why did my files disappear?
Which model should I start with?
What is the Supernet?
Open the app and run your first prompt.
Signing up is free and comes with Spark to spend. If you create a lot, Sogni Unlimited removes per-render costs entirely, with a 3-day free trial.


